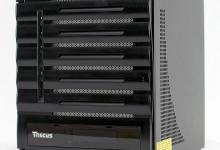
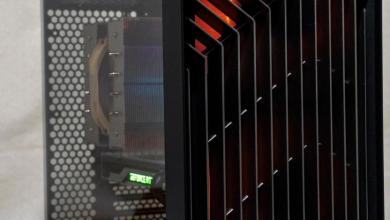
Xigmatek Gigas mATX Case
Internals…. getting into this case…. |
| Two words folks, “top down”.
It’s a layer cake. You have 4 fans that you will need to find ports on the motherboard, or you can tie 3 of them to the included fan controller. It’s a knob on a PCI bracket, that passes to a basic controller board. Plug power into the board, and then attach your chosen 3 fans to the cable breakout, and you have a basic “tunable” fan controller. But you need to think about those cables, and if they are going under your motherboard, or where the cables will go. You effectively take off the “roof” of the case and install your equipment in functional layers… bottom layer first. Bottom layer is the motherboard. If you have an aftermarket CPU cooler, you will want to do a test fit with it. Be sure to install the necessary screw in stand offs for the motherboard mounting. The have metal standoffs already in the bottom of the case for common hole locations on the motherboard. You then screw in the normal stand offs into these locations, which gives the board a bit of a lift (hence the cable routing from the previous step), as well as makes for a clean base under the case (as the initial standoffs are built into the lower case panel and not just screwed in, and the don’t protrude out the bottom!). Install the CPU cooler on the board, put the board in the case, then put the structural cross bar back in, drop in the drive bays you are using, and make sure that nothing is going to impede that rudimentary level of the install. Once you have that all worked out, and whatever cables you are going to put below the motherboard, screw it down. At this point you will attach your SATA cables and anything that you are wanting to have attached to the board. This case comes with a front USB3 port run from a USB3 motherboard connector cable. If your motherboard has a USB3 port pin out on the board, then you can attach this directly to the board, instead of the “pass thru” cable that I have seen from others, where it is a regular USB cable that plugs into the back USB3 jack on the motherboard back panel. Native, internal solution, assuming your motherboard supports it. Don’t forget about the front panel/power switch/LED lines.
After you have the bottom “layer” installed, I would recommend the power supply. Installing here will give you access to the motherboard before it has become obscured by the next step… the drive bays. It bolts in on the side at 90 degrees from what you normally orient the PSU at. This give it direct access to cool air from the outside of the case, as the intake will be located directly over the pre-drilled side panel, an excellent decision!
Next are the drive bays, the two separate 3.5″ drive bays and the one 5.25″. I put my initial drives into the bottom drive bay, below the 5.25″ bays. I felt it made for a cleaner cable install. Then installed the optical drive into the 5.25 bays, and laid it over the 3.5″ suspended drive bay. Put in the side retaining screw, but don’t cinch it down. There is a little lee way given to the 5.25 bay, and that allows you a slight bit of adjustment to find that perfect spot for your optical drive and the eject switch on the cover panel. Any remaining 3.5″ drives can go into the second tray bay, that resides almost over the CPU heatsink.
There will be a lot of thought and planning that you will need to have when building this case up, due to the orientation. What you end up with may not be show worthy from a cable management standpoint, but if you lay everything out and plan well, you can have a *ton* of stuff installed into this little case, and still have great airflow! |
