Thermaltake Element G Mid Tower Computer Case
Installation
My equipment list for this build reads as follows:
Intel P4 EE 3.46GHz
Asus ATX SLI motherboard
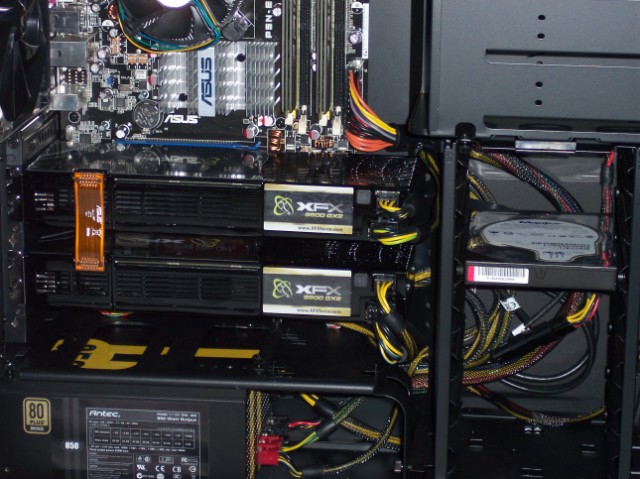
2 qty. Nvidia 9800GX2 SLI video cards running in Quad SLI
4GB of RAM
Maxtor PATA hard drive
Antec TruePower Quattro 800w
I did something on this build that I had never done… and I’m glad I did. Prior to installing of the stuff into the case, I took a test power supply unit and attached it to the molex that supplies all of the fans. I wanted to see how good these fans looked and how loud they were with NOTHING in the case. Well, I powered up the case, and the front fan did not work. So, I set to work pulling apart the case to reach that front controller board. To get to it, I had to unbolt the top exhaust fan, pop the inner tabs on the top plastics, and ease that top piece off…
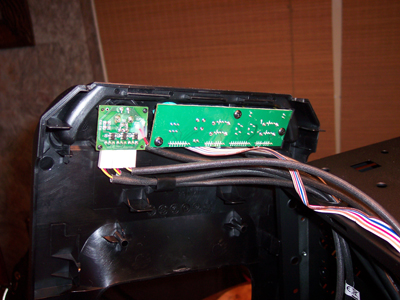
All 3 fans are attached to that little board on the left, and I simply removed and reattached the fans. Whammo! All 3 fans were working. I bring this up because I went out to NewEgg and looked at some of the other people that have bought this unit, and a couple of them had the same issue. A couple minutes of time and some careful, deliberate disassembly could likely save you a bunch of time waiting on a replacement. Granted, the fans should work out of the box… but if they don’t, you can do what I had to do, or you *may* be able to reach the connections with some needle nose pliers while the whole thing is still installed. It should just take a little movement to make the connection joint solid again.
Ok… so now that I know that the whole case is working as it is supposed to, I started installing my hardware, used the enclosed standoffs and matching *black* screws (thank you again for another non gleeming way to install the components!), installed everything but the video cards. I knew they were going to obscure a lrge portion of the motherboard, so I wanted all of my connections done *before* (yeah, cuz I’m smart like that) I covered them up with the video cards! I took about 45 minutes planning and working on my PSU cabling and all of the rest of my connections. I know there is more wrangling that can be done, but for 45 minutes of work, this looked damn good! Clean airflow, minimal obstructions.
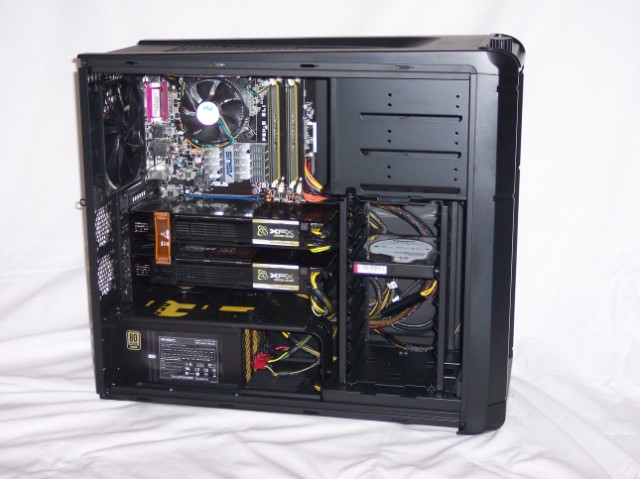
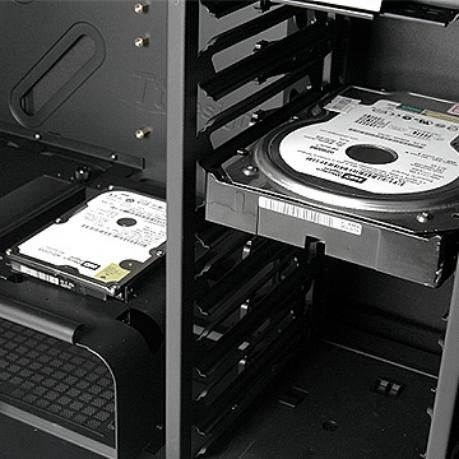
Hard drive installation was dreamy and easy.
All in all… I have no complaints, except for the initial front fan not working, but that was easily remedied.
