Thecus N2560 Network Attached Storage Review
Software
Intelligent NAS SOFTWARE
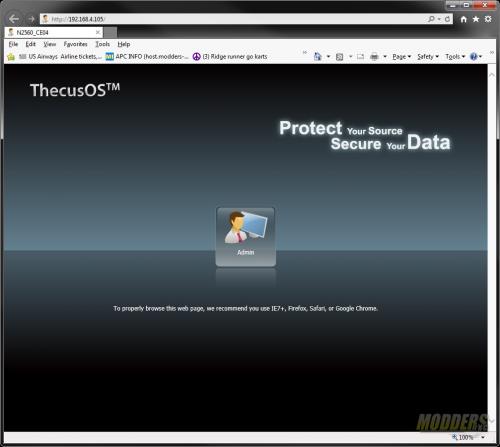
After the initial configuration with the Intelligent NAS software, the desktop can be accessed by going to the ip address of the NAS in the browser.
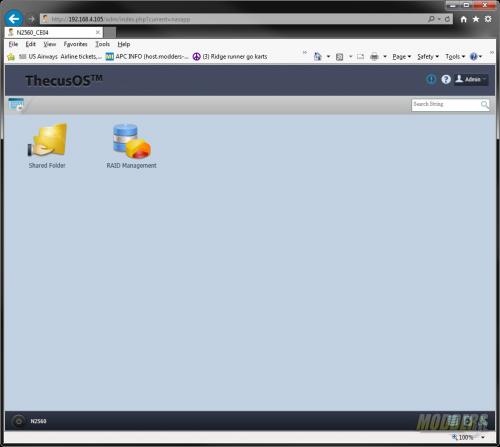
Here is the desktop of the Thecus N2560. When a user first logs into the NAS the desktop contains the shared folder and RAID management icons. More can be added by right clicking on the icon in the control panel that needs to be added and then choose add shortcut.
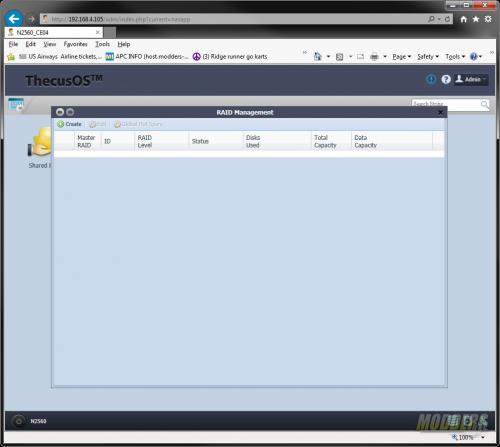
The 1st thing that needs to happen in order to get the Thecus N2560 serving up data is an array needs to be created. To do this Launch the RAID Management application from the desktop. Once the management application launches, click the create button in the upper left corner.
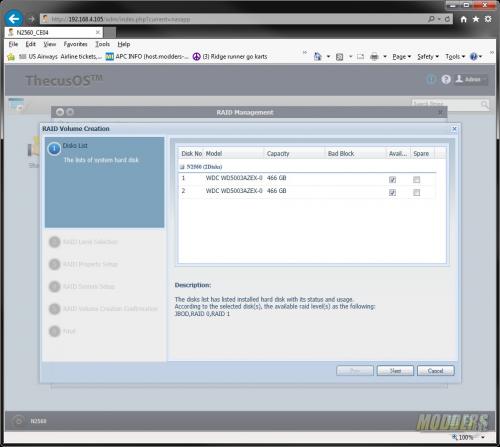
The 1st set of options when creating the array is to select which drives are going to be used. Each drive can be set as available or spare. In this case I choose to use both drives to create the array.
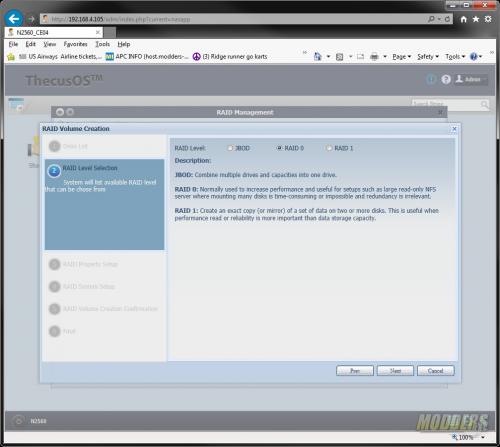
Next, you will need to decide what type of array will be created. The three options are JBOD, RAID 0, and RAID 1.
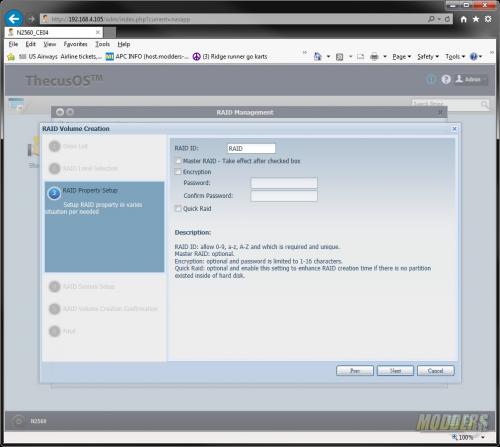
The next step in creating the array is to choose the name of the array. The name will be referenced in all applications dealing with creating and sharing folders and files on the Thecus N2650. Encryption can be applied to the array at this step as well. Quick Raid enables the user to be able to read and write to the array quicker. The hard drives must not have any partitions. When creating the array this drastically cuts down on the creation time.
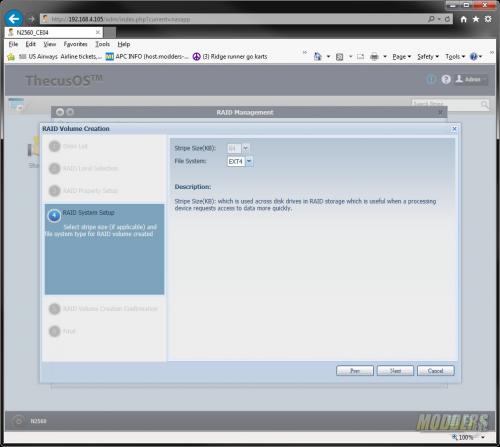
Next up is the stripe size. With RAID 0, different stripe sizes can be selected. Stripe size directly effects RAID performance but bigger is not always better. The default is 64 KB and during our testing that was the size that was used to create the RAID 0 array. There are many different schools of thought on stripe size and various arguments on which size to use. Typically I will use a stripe size between 64 and 128 KB. Since ThecusOS is based of Linux, the only options for file system is EXT4.
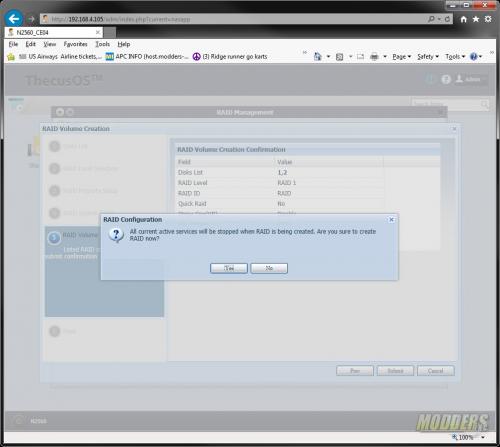
The confirmation screen will show all of the options selected during the last few steps. After clicking submit a dialogue box will pop up and ask if you want to continue. During the RAID creation all services to the Thecus N2560 will be stopped.
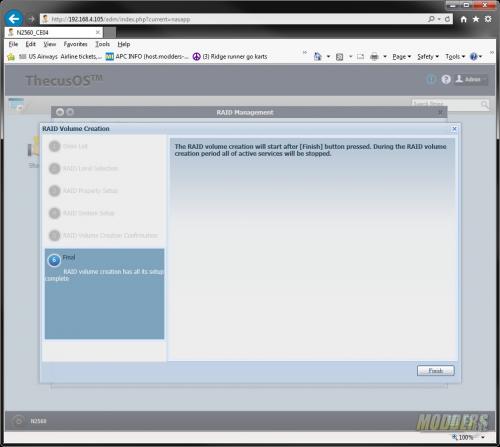
One more confirmation page. Clicking finish here will start the array creation.
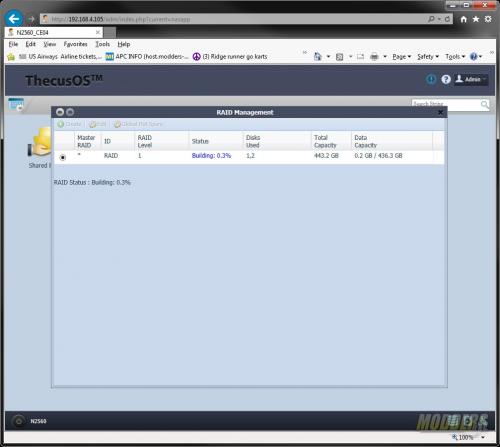
Some RAID arrays take longer to create than others. The status of the RAID array can be checked by launching the RAID management application from the desktop. Once the array has been completed, the ‘State” will go from “Building %” to “Healthy”
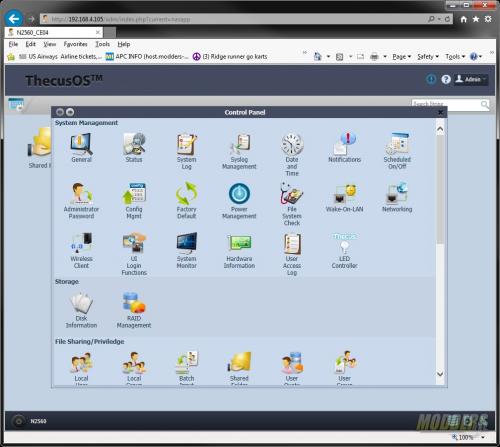
The control panel of the Thecus N2560 contains all the applications that are needed to get the device up and running.
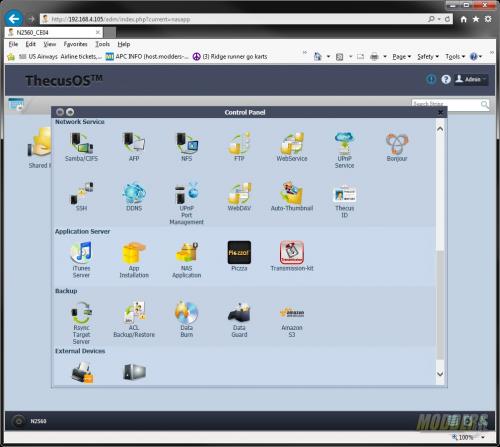
Scrolling down through the applications you can see there are quite a few configuration items as well as some extra applications.
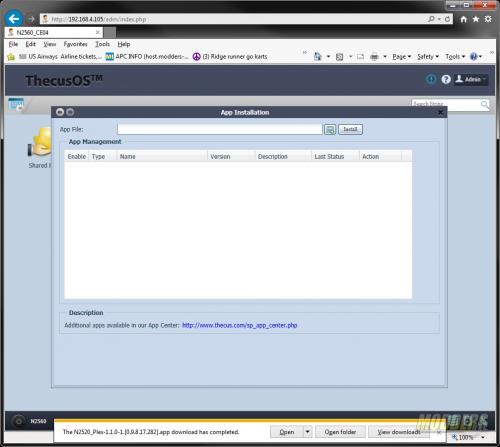
Speaking of applications, there are two ways to install applications. The first option is to choose the App Installation icon. This allows the user to download and install applications created by community members from Thecus’ website.
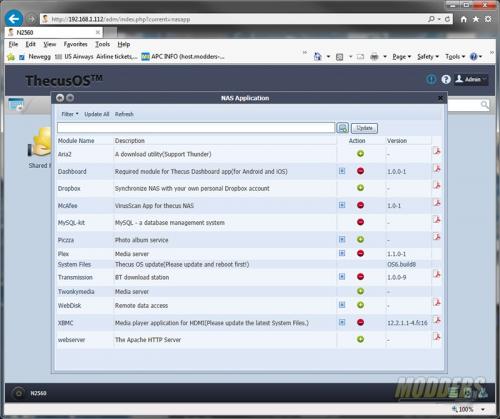
The second way to get applications installed on the Thecus N2560 is to use the NAS Applications tool. This application allows users to install a set of preconfigured applications either created by Thecus or 3rd parties that have worked closely with Thecus. These applications are designed to work properly with the ThecusOS.
In order to use the Thecus N2560 as a media center, XBMC needed to be installed. While XBMC is not as polished as some of the other media centers, it is very usable and functioned just fine in our testing. To control XBMC, a mouse and keyboard can be plugged in or XBMC can be controlled from a smart phone or tablet. I was able to use the VisionTek Mini Wing Keyboard that I reviewed HERE. After installation of XBMC a reboot is needed.

Would it be possible to test more video formats/sizes using xbmc via the hdmi port, as this NAS will supposedly replace your stand alone media player.