Synology DiskStation DS1515+ Network Attached Storage Review
DSM Storage Manage
In order to be able to do anything other than look at the user interface with the NAS, a volume or disk group needs to be created. This will take the drives installed in the NAS and configure them based on your input. After the volume is created you will then be able to create shared folders and put data on the NAS.
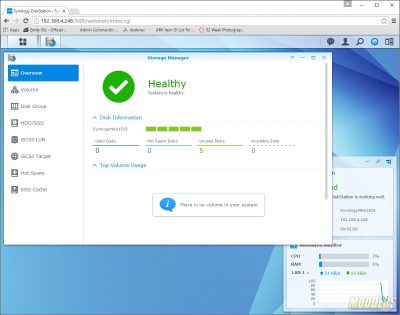
Storage Manager is accessed in the same way as the control panel. The overview menu gives you quick information on how many drives are in use, set as spares, and are available for expansion as well as gives the volume usage.
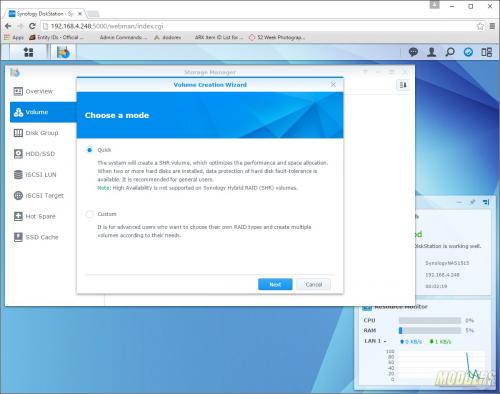
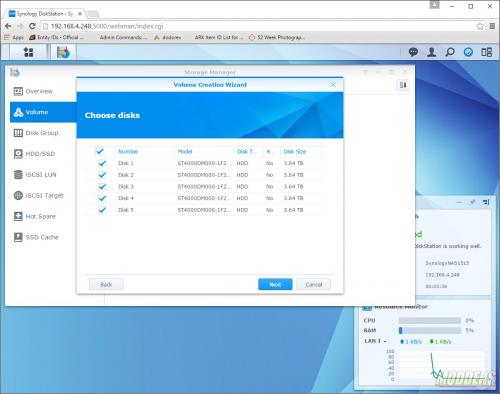
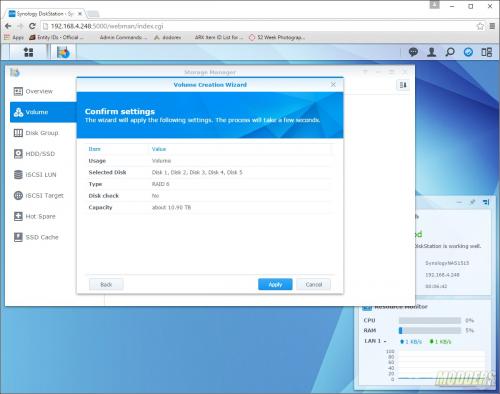
A volume is created in the volume menu. There are two options: quick and custom. In either mode, the next step is to select which drives you want available in the volume.
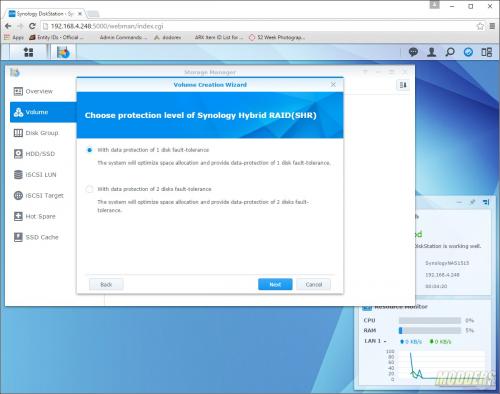
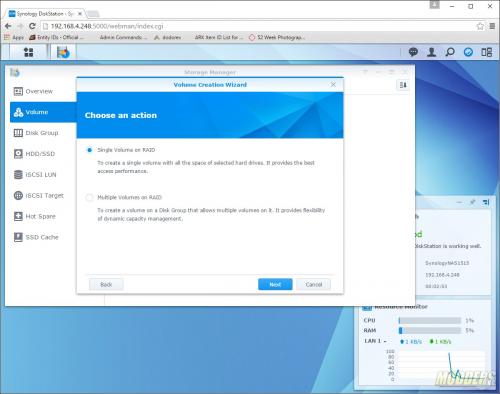
In Quick mode, you’ll be asked if you want the fault tolerance of one disk or two. If you choose custom mode, you’ll have the option to choose a singe volume on RAID or multiple volumes on RAID. With the custom volume, the next step is to choose which RAID array you’d like to create. Available RAID options (depending on the number of disks selected) are: RAID 0, RAID 1, RAID 10, RAID 5, RAID 6.
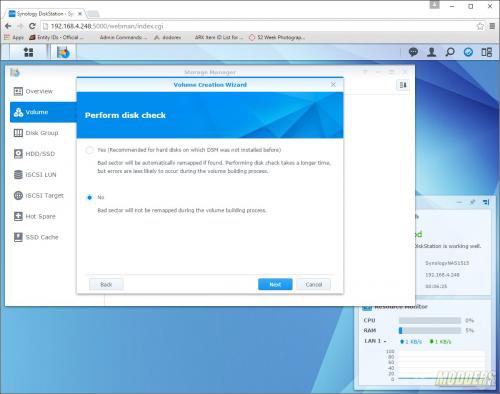
After you’ve chosen the type of RAID array you’d like, the next page will ask to perform a bad sector check. I would say for the sake of data integrity, perform the check. Yes it will take time, but the extra time you take to make sure the drives are good now could save you a major headache later on. Finally, the last page will confirm your settings. Just click on the finish button and the DS1515+ will start creating your array.
