Seagate NAS Pro DP-6 Network Attached Storage Review
Management Web Interface
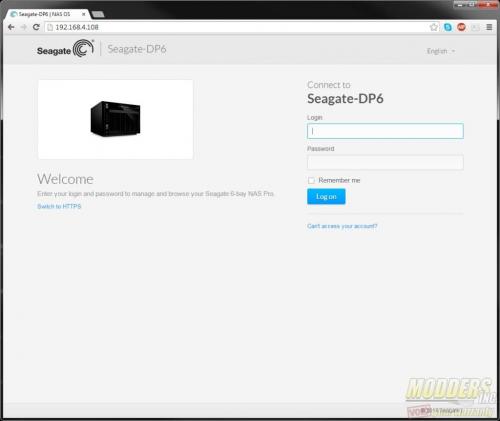 Once the Seagate NAS Pro DP-6 is connected and powered up, you’ll need to log into the web interface to manage it. In your browser, simply go to the IP address of the device. In this example, it is http://192.168.4.108. Then log in with the default username and password.
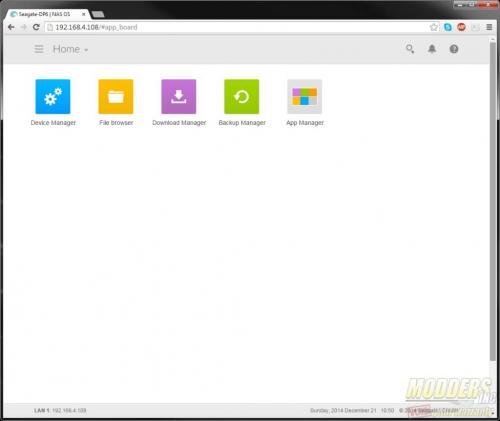 The next page presents a few of the management options. For the initial set up, device manager will be selected.
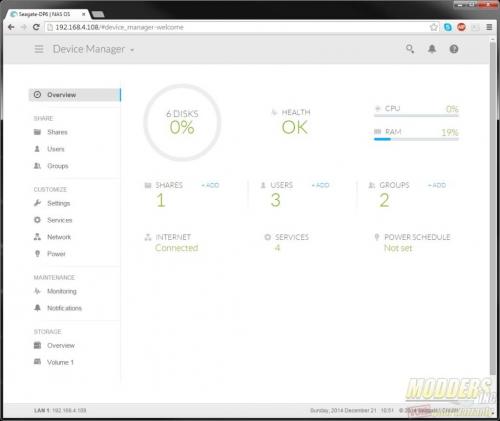 The 1st page that comes up in device manager is the overview. In a quick glance the user can get critical information on the health of the NAS, how much memory and CPU is being used as well as how many users are connected.
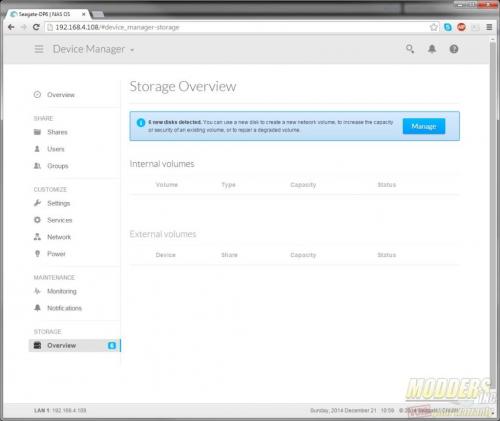 In order to create a storage space, a volume needs to be created on a RAID Array. To do this, go to the storage array overview menu and click on the manage link.
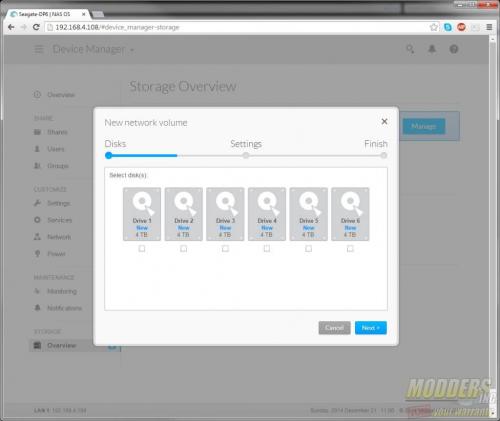 The first part of creating a RAID array is selecting how many disks should be included. Click on the disks to be added then click on next.
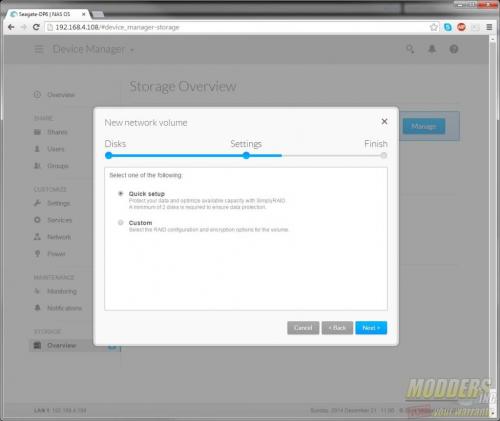 Seagate offers two options when creating a RAID Array. The quick setup option doesn’t allow any changes to be made and automatically selects the RAID level for you. In our examples, we chose custom.
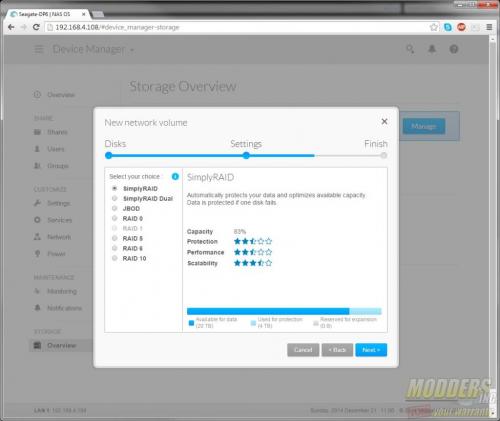 The Seagate NAS Pro DP-6 offers a lot in terms of RAID levels. The 1st two options are Seagate’s SimplyRAID options. Based on the data presented, SimplyRAID is RAID 5 and SimplyRAID dual is RAID 6. Other options include, JOBD (Just a bunch of disks), RAID 0, RAID 1, RAID 5, RAID 6 and RAID 10. RAID Levels depend on the number of disks chosen. For example, RAID 5 requires a minimum of 3 disks, if you choose only two disks on the previous screen, RAID 5 will not be available.
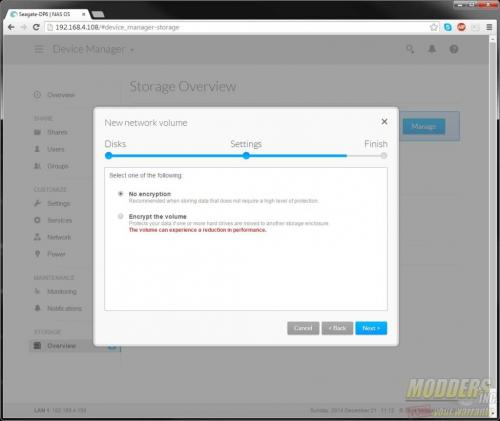 After the RAID level has been selected, an option will appear asking if the volume should be encrypted. Encrypted volumes offer better security at the cost of performance.
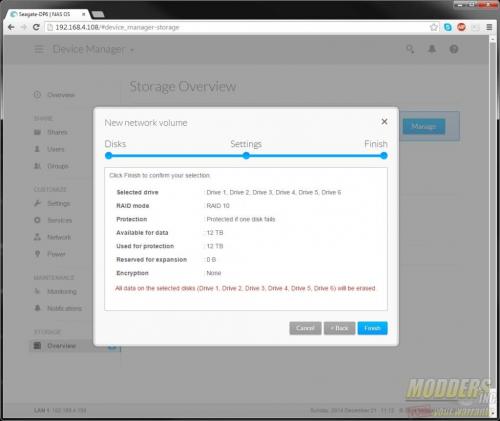 The next page shows the confirmation of all the settings selected over the last few screens. If everything is correct. click next.
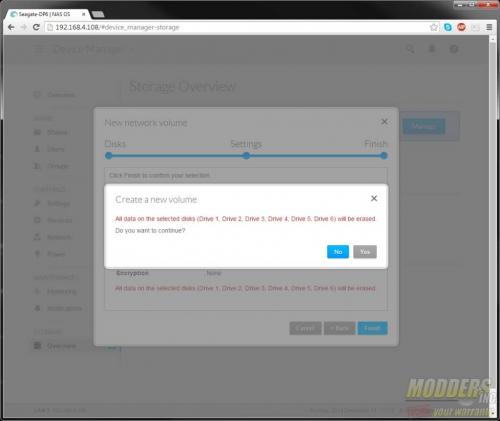 Finally, another confirmation page will verify that you want to complete the action and explains that all data on the disks will be lost. Click on YES to complete the volume creation.
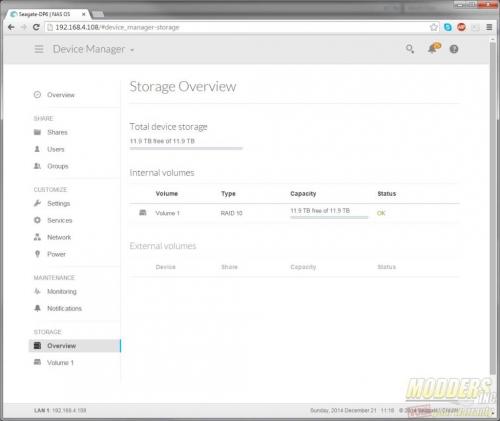 After the volume is created, you can take a look at the health and specifics of the volume on the overview page. Depending on the type of RAID used, it can take a very long time for the array to fully synchronize. During the RAID 5 volume creation it took 22 hours to fully synchronize across 4 drives.
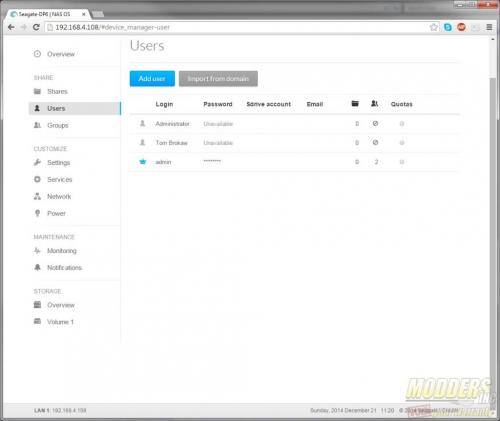 The next step is to create users unless you are going make the data available to everyone on your network. If you are an an active directory domain, you can import your users in from one of your domain controllers.
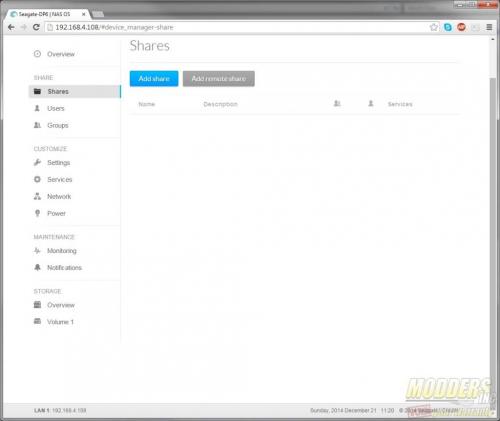
Now that the volume and the users have been created, it is time to create the shares. Shares allow users to map share names to a network drive. Simply browse to the name of the Seagate device on the network in Windows Explorer and click on the folder. Right clicking gives the option to map as a network drive.
This is an extremely basic sharing technique. Following these steps should get shares on the network and the users can start using them. The Seagate NAS OS allows the administrators a very granular level of control for accessing shares based on user accounts.

Hi Tom, I have this unit and was wondering if in your opinion the so-dimm memory module could be upgraded to a larger size? Also do you know if the stock memory is ECC?
I have this NAS, and use it for shared video editing storage with 2 editing systems. I wanted to make it work a bit faster, so I bonded the two Ethernet plugs into one “load balancing” 2Gb/s connection.
I got a Netgear GSS116E – ProSAFE 16-port Gigabit Click Switch specifically because it was able to do port aggregation.
The whole experience turned into a massive pain. I plugged the NAS into two of the switch’s ports and configured the switch to link those two ports together. It wouldn’t work. Eventually, I just tried moving the cables over to NON-aggregated ports on the switch, and the NAS popped right up on the network. I don’t know if the NAS and the GSS116e don’t have compatible port aggregation or what, but it just didn’t work. I do know that the GSS116e only does “static LAGs,” not LACP. According to the NAS’ monitoring info, it is putting out over 200MB/s (>1.6Gbps) with two plain old, unlinked gigabit ethernet ports.
So before you spend the money on a new network switch, try it out with what you have, just linking the ports in the NAS and plugging them into a dumb gig-e switch. That’s the only way I could get this to work.