Raijintek Pallas Low-Profile CPU Cooler Review
Installation of the Raijintek Pallas
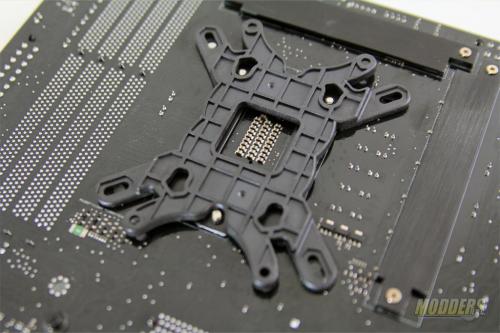
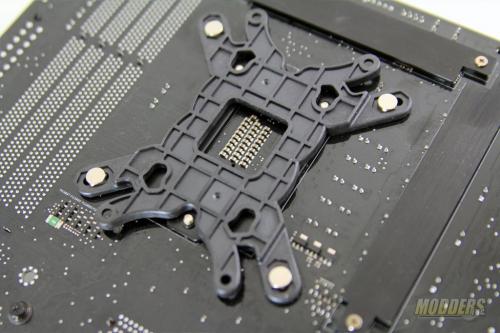
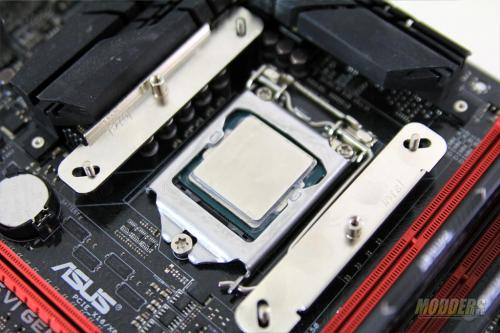
With the exception of LGA2011 motherboards, all installation requires the use of the included backplate. This is a two-sided backplate with one side insulated for AMD use and the other side is for Intel mainboards, not that insulation is a big concern since it is made of plastic. Pass the four knurled threaded screws through the backplate and the board then secure the top motherboard surface side with the four plastic spacers. Unlike other heatsinks, the spacers are threaded so the backplate stays even when the motherboard is already mounted on the motherboard vertically.
For LGA2011 motherboards, install the LGA2011 stand-offs on the integrated locking mechanism instead of putting together the backplate-spacer nut assembly.
Before placing the mounting bars, decide on the heatsink orientation. While Intel users can mount it on all four directions, AMD users can only mount the Raijintek Pallas with the heatpipe curve facing either the rear I/O side or the DIMM slot side of the motherboard. Secure the mounting bars with the four metal nuts.
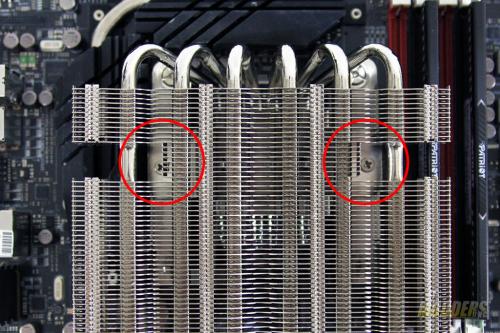
Place the two M3 screws through the crossbar before placing the crossbar on the plate of the Pallas heatsink. Doing it the other way around is more difficult because of the limited space and the small screws that you have to contend with. Make sure to match the crossbar bumps on the two holes on the top of the base before securing completely. Thankfully, Raijintek opened up the heatsink array area on top of the M3 screws so that a screw driver can be used unlike most C-type coolers which use 90-degree angled wrenches to lock in place. Do not forget to remove the contact surface cover and apply thermal compound before securing the Pallas heatsink on the mounting assembly.
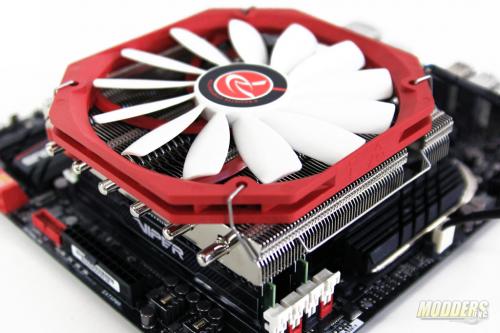
The last step involves fan installation which is fairly straightforward with the use of a pair of fan clips. Note that the fan measures 140x150mm and is not a square so if you find that installing the fan clips is a bit too difficult then you need to rotate that fan so you have a 150mm fan side matching the 150mm width of the Pallas heatsink. Not that installing the fan with the 140mm with is impossible or completely incorrect, but it will take some muscle to force the wire in place otherwise. Do not forget to plug in the 4-pin PWM fan on the motherboard header when assembly is completed.
Compatibility and Clearance Issues
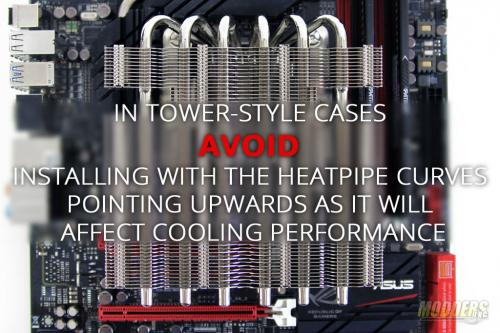
As a rule, whenever installing C-type coolers, please make sure to observe the following:
Why is does this happen? This has to do with the type of heatpipe used and unfortunately, outside of cracking the heatpipe open, there is no way of knowing what type of heatpipe is used. Most heatpipe types can be affected by orientation.
Wait, what’s a heatpipe? Other than a fan, most coolers are made up of the radiator (those flat things you see forming an array on a heatsink, mostly aluminum or aluminum coated with a finish), the heat pipes (the tubes you see running across the heatsink, commonly made of copper or copper coated with a finish), and the base (which is often aluminum soldered on the heatpipe) which can be the actual contact surface with the CPU surface or holding the heatpipes together at the bottom).
You still haven’t explained how orientation affects the temperatures! The heatpipes are physically hollow and contains liquid coolant which moves across, evaporating and condensing in a cycle when in use. In a heatsink, it moves heat away from the contact surface and distributes it to the radiator fins and the fan pushes the heat off the heatsink then the cycle repeats. Inside the self-contained tube also is a wick pattern on the wall lining surface which compliments the type of coolant used.
There are four common heat pipe wick types used: groove, powder, mesh and composite (fine fiber or something else). These types are for the most part self-explanatory as the groove type has axial grooves, the powder type looks like powder and the mesh looks like a weave pattern. The powder type however is not loose (which makes sense since there will be liquid flowing through it) and compacted in a type of metallurgical process called “Sintering”. As you might have guessed, the process is complicated and adds additional cost. Groove type is the easiest to make and therefore costs less while the powder type is complicated and costs are high. In the middle is the mesh type, commonly used in consumer heatsinks. The fourth “fine fiber” type is basically a composite double-wall type with copper fiber against the wall and a loose mesh coil on top of it. There are also other composites with groove types and sintered powder.
You still haven’t explained how orientation affects temperatures! Now that you know the different heatpipe types, all you need to know is that the Sintered powder heatpipe is not affected by gravity while groove and mesh types are. Groove is actually affected the most while screen mesh type has an average conductivity, thermal resistance, and gravity resistance compared to the rest, hence it is used most often.
Wait, if you don’t open the heatsink, how do you know which heatpipe type is used? You do not need to open a heatsink to figure it out. You just need to look at the price because the manufacturing cost of sintered powder or composite type will drive the price much higher than the competition, plus if manufacturers did use it on their heatsink, you WILL hear about it as it will be plastered on all the promotional information and they will make sure that every reviewer who reviews their heatsink knows that they used a more expensive process. That is just PR 101 and how marketing works. If the manufacturer tells you on their website not to mount it with the heatpipe curves facing up, then bet on the fact that it is either groove or mesh type.
If you want to know more about heatpipes and heatpipe technology, Google Books has a wide selection and this is where I learned (FOR FREE!): http://books.google.ca/books/about/Heat_Pipes.html?id=baEwKpm3dQkC
HEY! this section of the review should be about clearance issues!
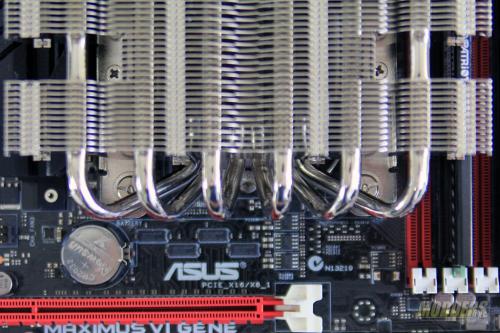
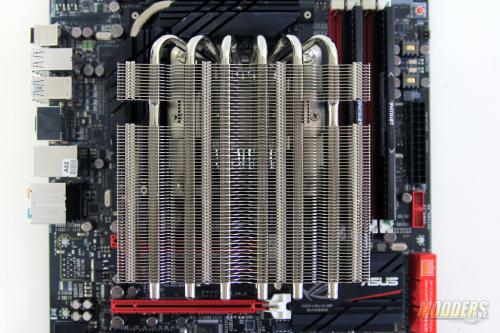
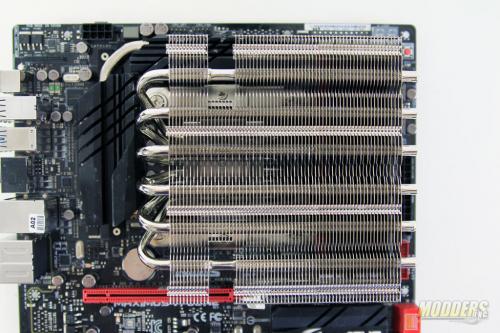
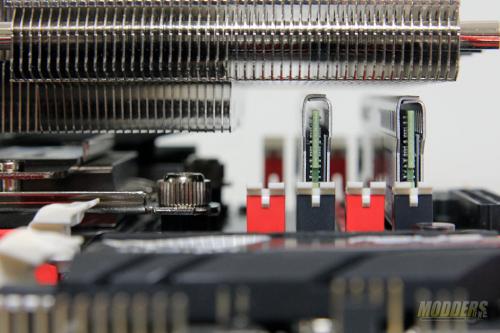
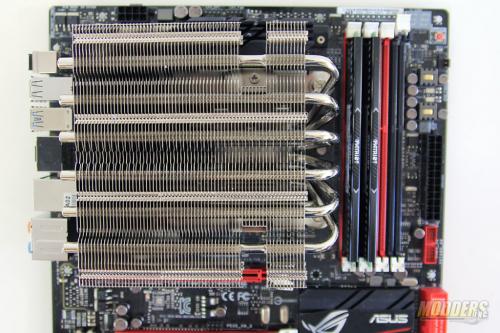
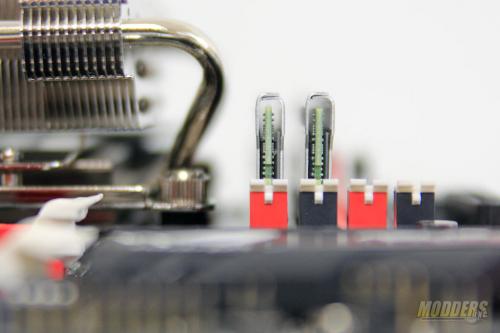
Now that we have sorted the tower-style case orientation out, we can look at the various clearance issues that arise from mounting the Raijintek Pallas in all four directions. If you are installing it with the motherboard lying flat, obviously it does not matter which of the four directions is used and selection must be made depending on which component is going to be used.
Since the Raijintek Pallas does not extend upward into a tower, it distributes its heatpipes and radiator across a greater area on the motherboard and thus RAM and expansion slot modules are affected. First, let’s designate a letter for the four different mounting options so it is easier to explain the rest. Imagine all of these options as mounted inside a tower-style case. Mounting option “A” has the heatpipe curve facing south, mounting option “B” has the heatpipe curve facing NORTH, option “C” has the heatpipe curve facing WEST and option “D” has the heatpipe curve facing EAST. This mounting option reference will be used on all C-type cooler reviews that you see here at Modders-Inc from here on out.
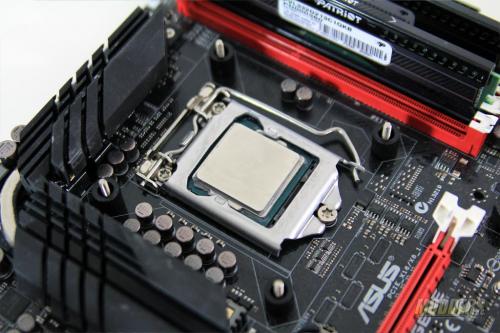
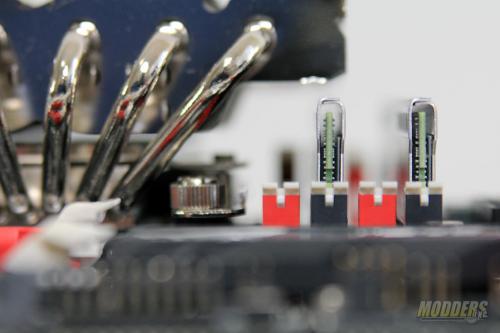
Also, let us simplify the motherboard CPU-DIMM slot spacing into two categories: normal and +1.5mm. Most new motherboards, especially enthusiast class models offer an additional1. 5mm gap or greater between the CPU area and the first DIMM slot to alleviate heatsink and RAM compatibility woes. For example, MSI Z87 LGA1150 motherboards have a distance of 27mm between the socket and the 1st DIMM slot while this gap is 28.5mm on an ASUS Z87 Maximus VI motherboard. The affected DIMM slots will be referred to by number from 1 to 4 with the closest to the CPU having the lowest number and it means only standard or low profile memory modules can be installed on those slots. The differences are even greater when it comes to mini-ITX motherboards as there is no standard for the layout, but the space between the CPU socket and the first DIMM slot can be even tighter than the standard by as much as 2mm (25mm distance between CPU socket and 1st DIMM slot).
As for expansion slots, the top-most expansion slot is often a PCI-E x1 slot with the exception of four-way SLI/CFX mainboards and micro-ATX boards (such as the test motherboard used in this review) which have a PCI-E x16 slot instead used for graphics cards. The affected expansion slots will be referred to as slot 1, 2 or 3, starting from the top. If slot 1 is affected, this means that micro-ATX, mini-ITX and 4-way SLI/CFX motherboards cannot use the top-most expansion slot for video cards.
Option A:
- Heatsink tip goes past top of motherboard edge
- DIMM slots affected on normal : 1, 2, 3
- DIMM slots affected on+1.5mm: 1, 2
- Expansion slots affected: NONE
Option B:
- DIMM slots affected on normal: 1, 2, 3
- DIMM slots affected on+1.5mm: 1, 2
- Expansion slots affected: 1, 2, and 3
- Worst mounting option as it obscures expansion slots and is not optimal for tower-style cases
Option C:
- DIMM slots affected on normal: 1, 2, 3 and 4
- DIMM slots affected on+1.5mm: 1, 2, 3 and 4
- Expansion slots affected: 1
Option D:
- DIMM slots affected on normal: NONE
- DIMM slots affected on +1.5mm: NONE
- Expansion slots affected: 1
- Possible clearance issues with installing 4/8-pin power supply cable (depending on motherboard design)
- Possible clearance issue with front-panel audio header (depending on motherboard design)
- Possible clearance issue on rear exhaust fan on some mid-tower cases, especially those without a recessed rear fan mount such as Corsair or Thermaltake cases.

5/2/2014 – Article edited for correction. On the clearance section, it was supposed to say +1.5mm instead of +5mm.