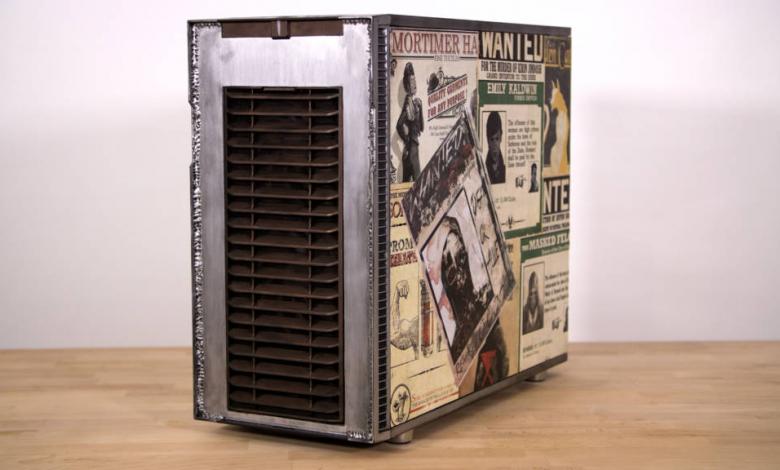
“What have I gotten myself into…”
That phrase kept ringing through my head. With every Dremel cut, every clear coat, every bloody knuckle… Don’t get me wrong, I’ve drilled holes into my cases before. I’ve performed some (pretty regrettable) rattle-can paint jobs. But this was likely beyond my skill level.
As a member of the Modders-Inc family, it should be an expectation that you come with at least some modding experience. And while I have nearly two decades of PC building experience, I had never performed a full-scale, themed PC build before.
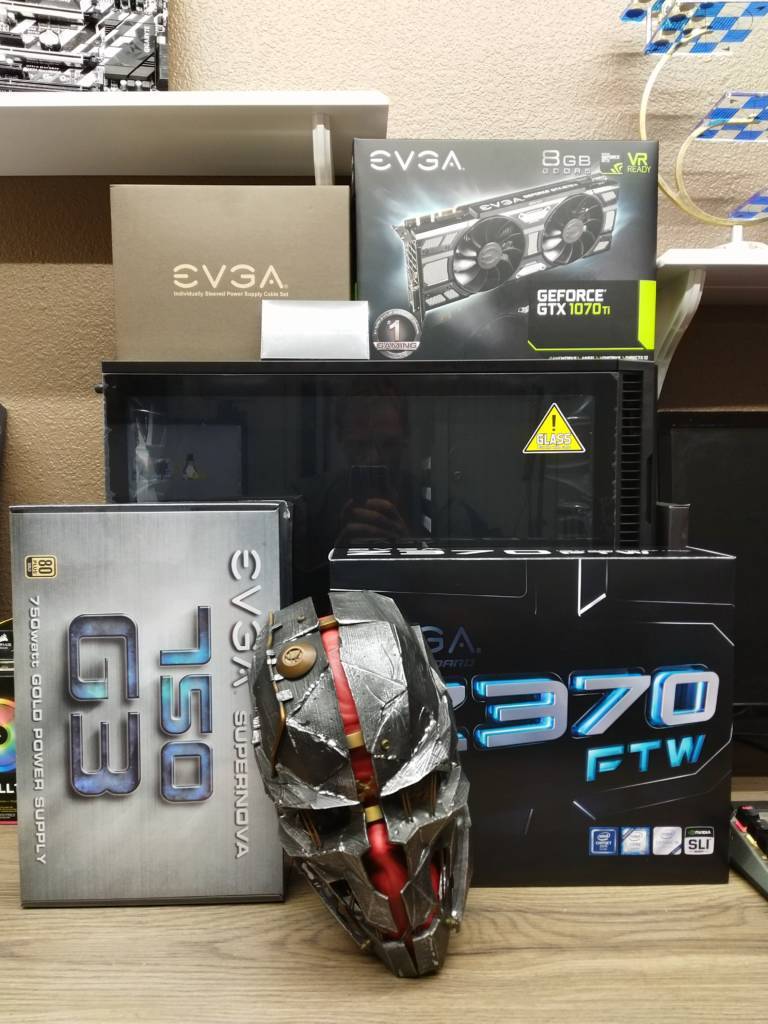
Before I get into the details, this would not have been possible without the sponsors of this Staff vs Staff competition. An enormous THANK YOU to Fractal Design, EVGA, Kingston, Swiftech, and iFixit for providing the hardware, and trusting me to not screw it up!
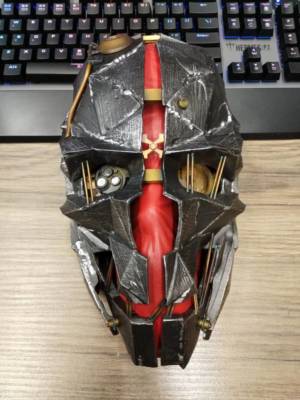
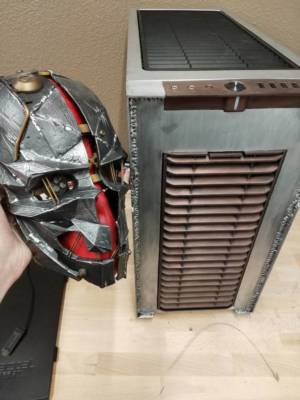
As the theme this year was Bethesda/id, I was immediately drawn to Dishonored. The props and environments in the game are absolutely beautiful and truly unique. I did two things to draw inspiration at the beginning of the project. First, I played Dishonored for around 10 hours (not a difficult task), and I picked up a Corvo mask from one of the Dishonored 2 Collector’s Edition sets. Starting with a physical, licensed prop from the game provided design queues and a color palette to work with. The hard part would be taking the image in my head and putting it into steel, aluminum and silicon.
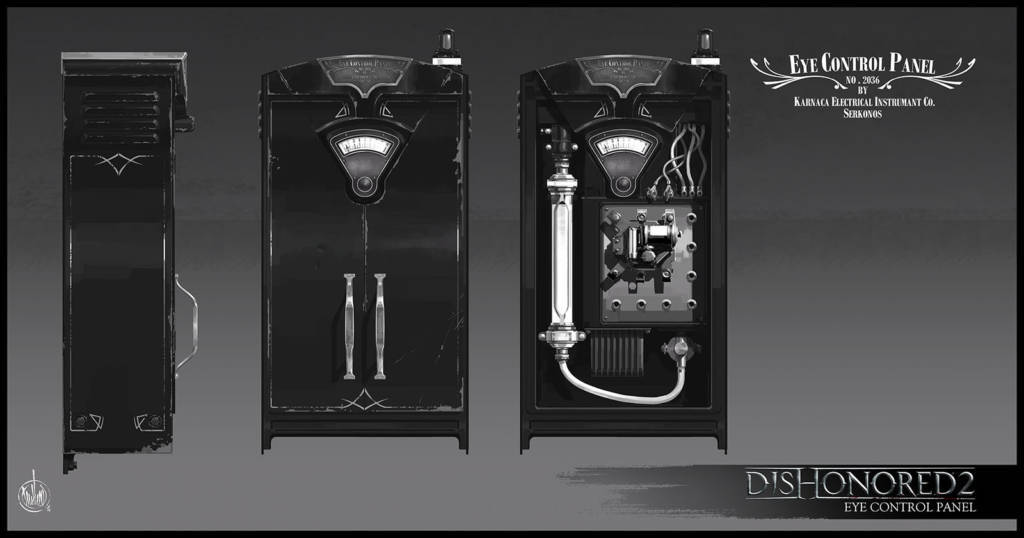
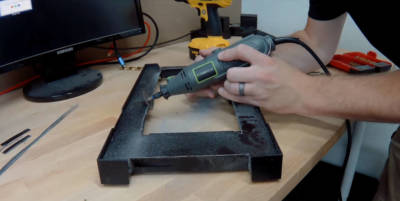
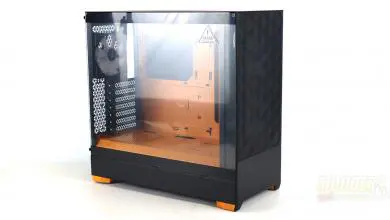
Working off of the mask, as well as concept art from the game, I determined very early on I wanted to create a PC that looks like it belongs in the game world. Lucky for me, there is no shortage of material in Dishonored. The basic premise of the mod is a PC powered by whale oil, the main power source in the game. The hard drive tray in the Fractal Design Define R6 would become my canvas for this, and it was easy to see a lot of cutting in my future.
Cutting into the internals would come later in the process though. I wanted to get the detail set on the outside of the case first. It’s easy to call the world of Dishonored ‘steampunk’ inspired, but to me there’s more to it than that. While there are plenty of gauges, steam, and elegant costumes, there’s also a dingy, worn, and crudely-built element as well. The world is a disparity of styles, with the haves living in luxury homes drinking Cidre de Gristol… the other 99% live in a hastily put together city. I wanted to capture the darker, grungier side of things. The case needed to be a steel box, but worn-down and crudely assembled. Simple. Basic. Utilitarian. Nothing present that doesn’t need to be.
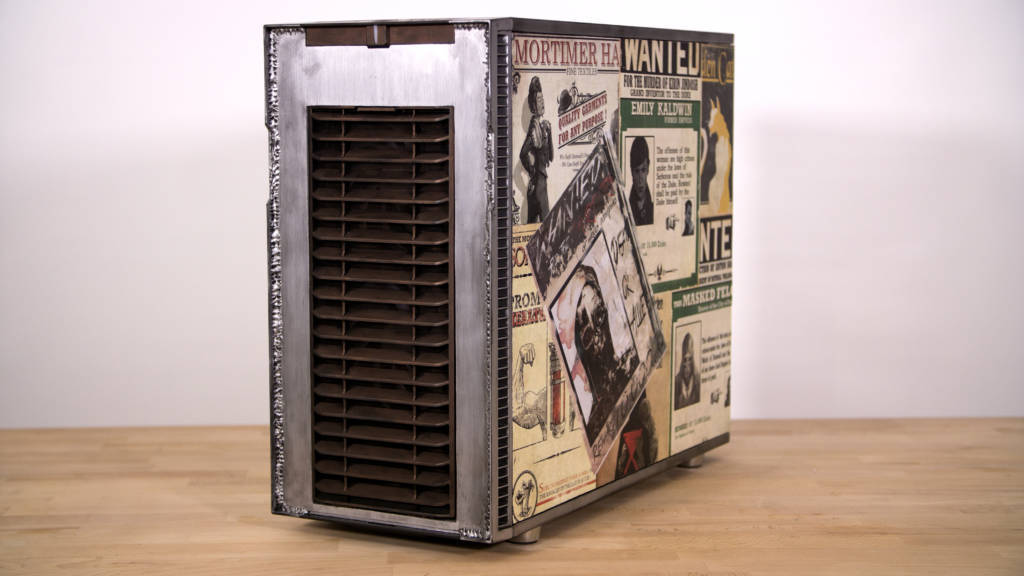
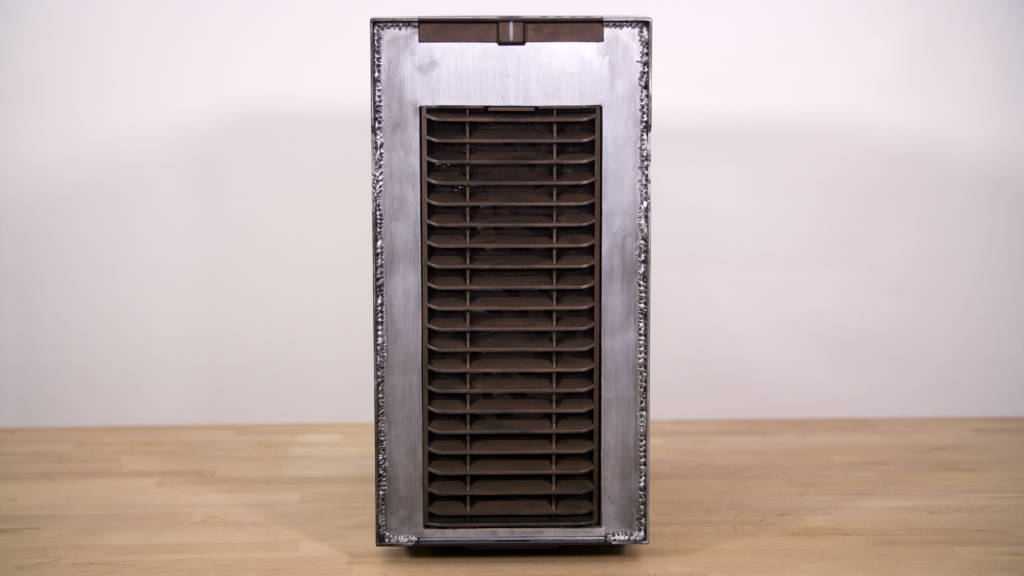
Making a worn-steel finish is actually a simple process. I used Rub ‘n Buff for all of the color in this mod. It’s a wax material that just rubs with a soft cloth on and gives a very metallic finish. I applied a very even coat of silver to the majority of the outside of the case, and then took it back down by both removing color from the edges of the case, and using a black acrylic paint wash to add grime in the corners. This gives off an amazing aged look to the case, as if it’s spent the last 10 years outside and neglected. An antique copper Rub ‘n Buff finish was used for all of the vents and accent pieces to bring the theme together.
The front door was my biggest struggle in the entire process. A door that opens only to a vent wouldn’t make sense in the world, so it obviously had to go. The hinges removed easily enough with just a couple screws each, but what to do about the numerous issues left behind? The holes for the hinges, and 5.25″ drive slot, and the massive gap between the front vent and the front of the case all had to be taken care of. As luck would have it, the door had a brushed aluminum panel glued to it, and was already the perfect size to cover all of those issues.
As bad luck would have it, that glue was INSANELY strong. In all, it took 60 minutes of heat-gunning, prying, lifting, swearing and hand-cutting to separate the door from it’s beauty panel. But in the end, it was absolutely worth the effort. The glue seems to be pressure activated, so applying the aluminum to the front case panel was easy as could be. A little bit of super glue was added on the couple of spots that didn’t want to seat quite right.
Cutting the aluminum panel to perfectly fit the front of the case was non-trivial as well. The Dremel work wasn’t too bad, making quick work of the rough shape. It was the filing, the sanding, and all of the finish work that took much longer than expected. In the end, the result was nearly perfect, all except for a 1/4″ seam along the outside edge of the aluminum, and that was going to need some kind of finish work. I went through a dozen ways to hide that transition, from square doweling, to paint… but it turns out my procrastination helped immensely here.
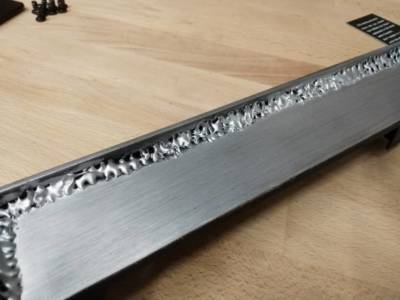
While in a late-night YouTube binge, I stumbled across a Tested.com video in which Adam Savage is recreating the world’s first high-altitude flight suit. The suit is a modified deep-sea diving rig, and the helmet is this crudely assembled steel contraption with some of the dirtiest welds I’ve ever seen. Adam being Adam comes up with a very creative solution on recreating those welds using nothing but hot glue, Rub ‘n Buff and black acrylic paint… exactly the color and finish I’m applying to my case mod. And that dirty weld pattern absolutely fit the style of the universe… it was just meant to be.
The entire process took less than 40 minutes, and gives the front of the case exactly the look I was going for. It’s a fantastic blend of rough materials, sub-par assembly, utilitarian design, and years of neglect that Dishonored is known for.
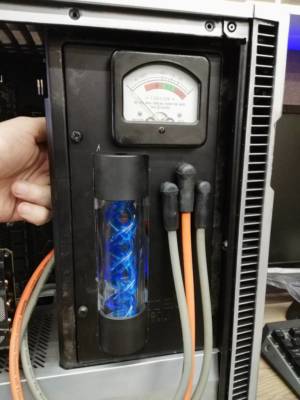
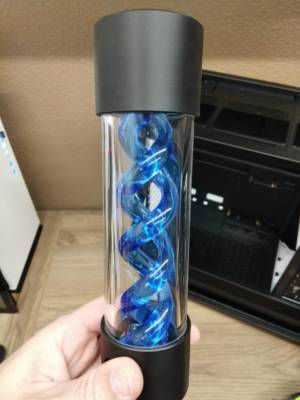
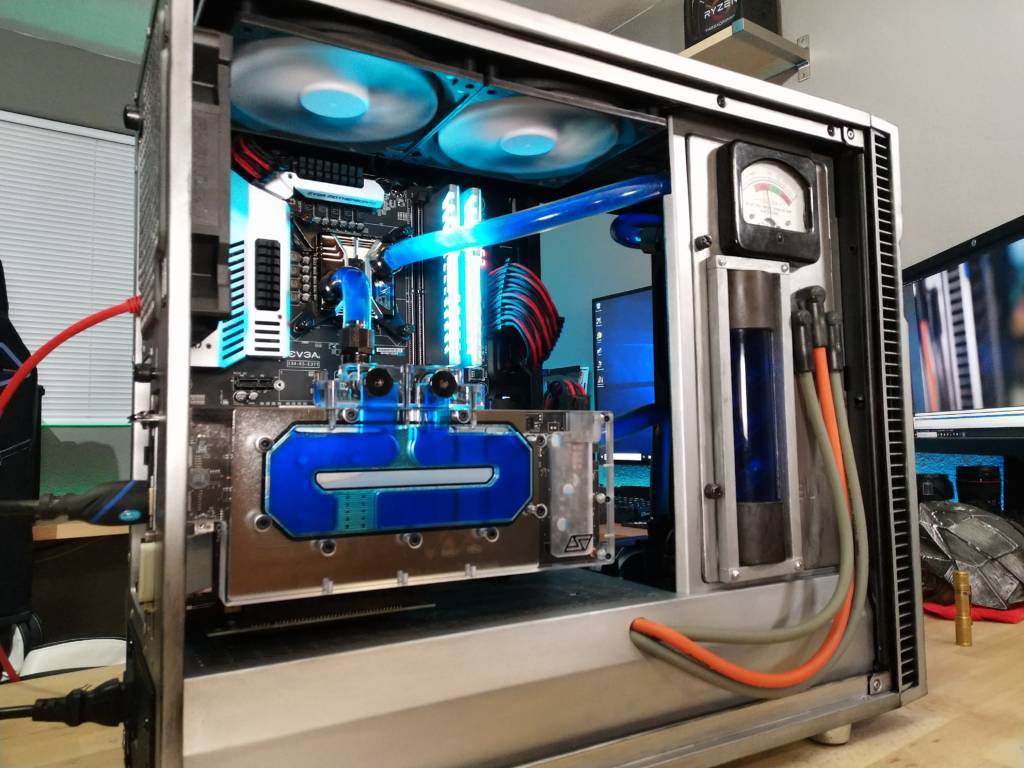
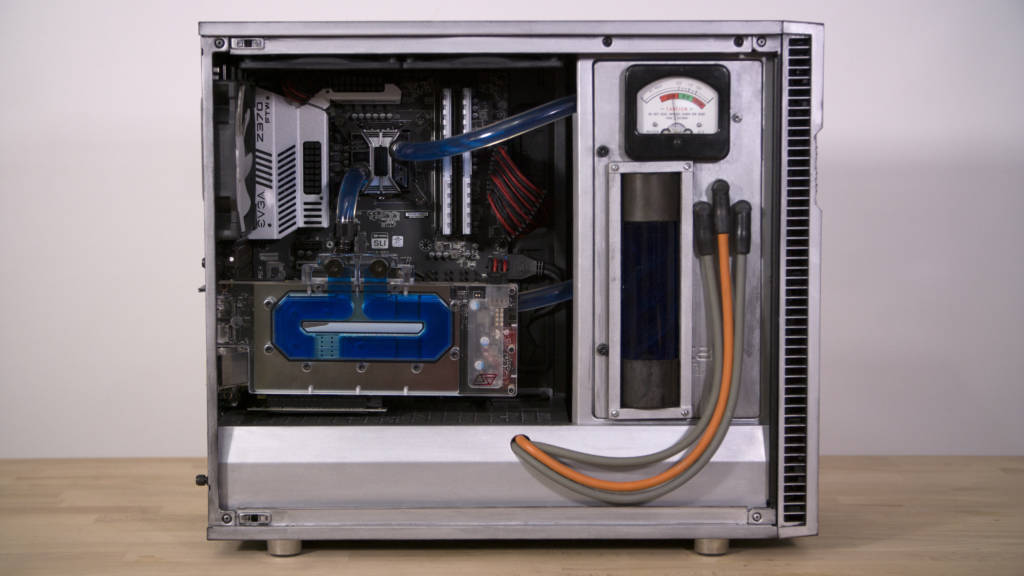
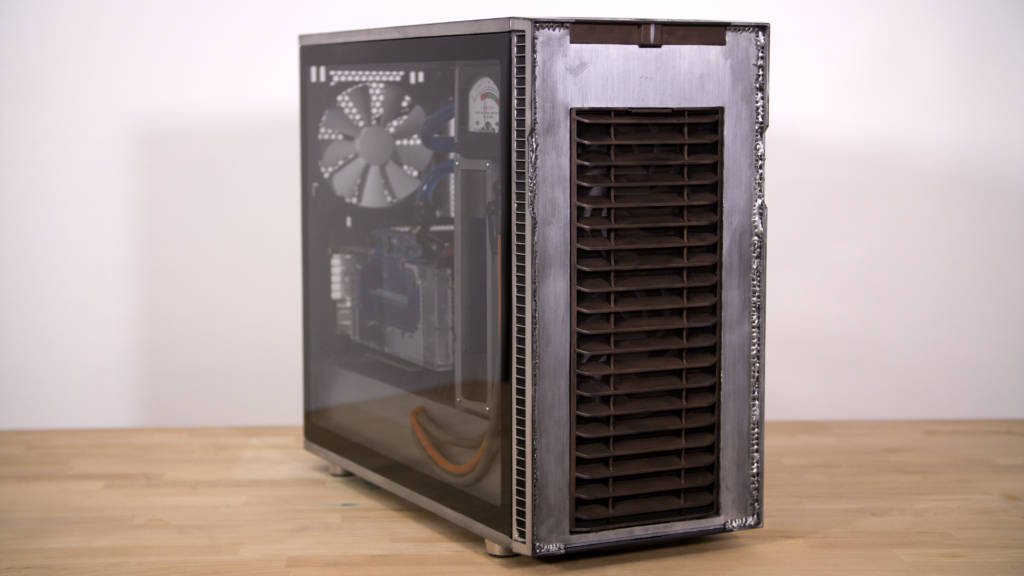
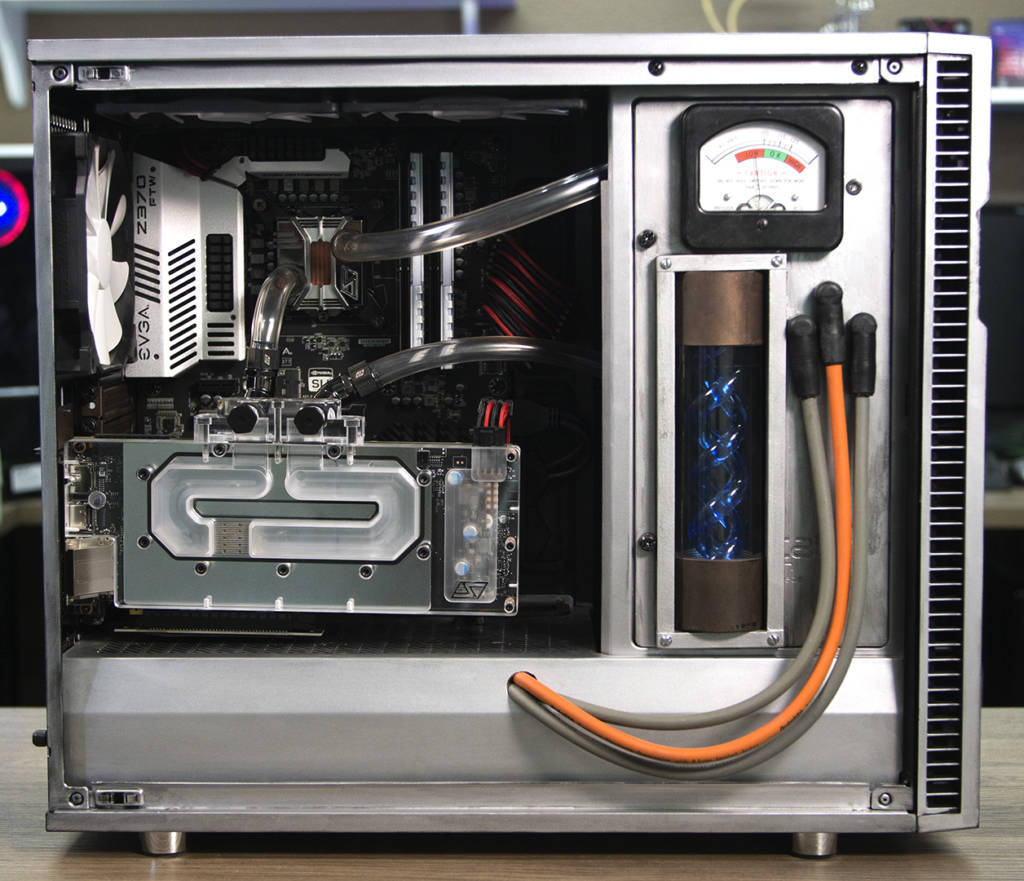
Whale Oil Tank Reservoir was just a matter of more cutting and more filing. I wanted to have the Res to have a modular and removable look to it, similar to the oil canisters in the game. I accomplished this with a bit of square doweling framing in the reservoir, allowing it to sit forward from the panel almost a full inch. Attaching the res to the case is likely the most ‘jank’ thing here, as there was no way to use the mounting hardware that came with it. I screwed in all of the fittings to the reservoir, put it into the case, and then zip-tied it in place using the four screws that pass through the frame. It’s not pretty from the backside, but it certainly gets the job done. And besides, what are zip ties if not just a more refined version of duct tape???
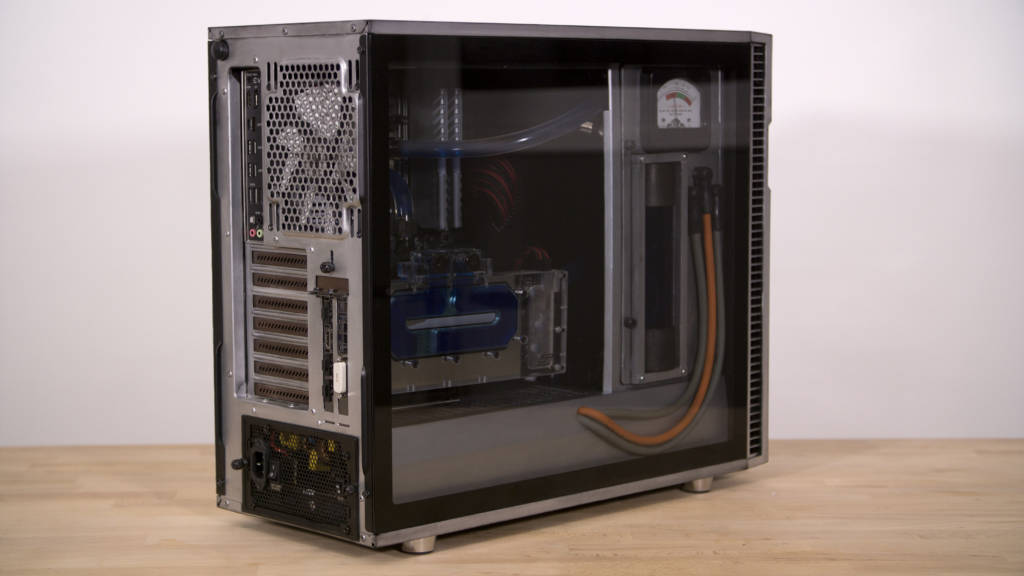
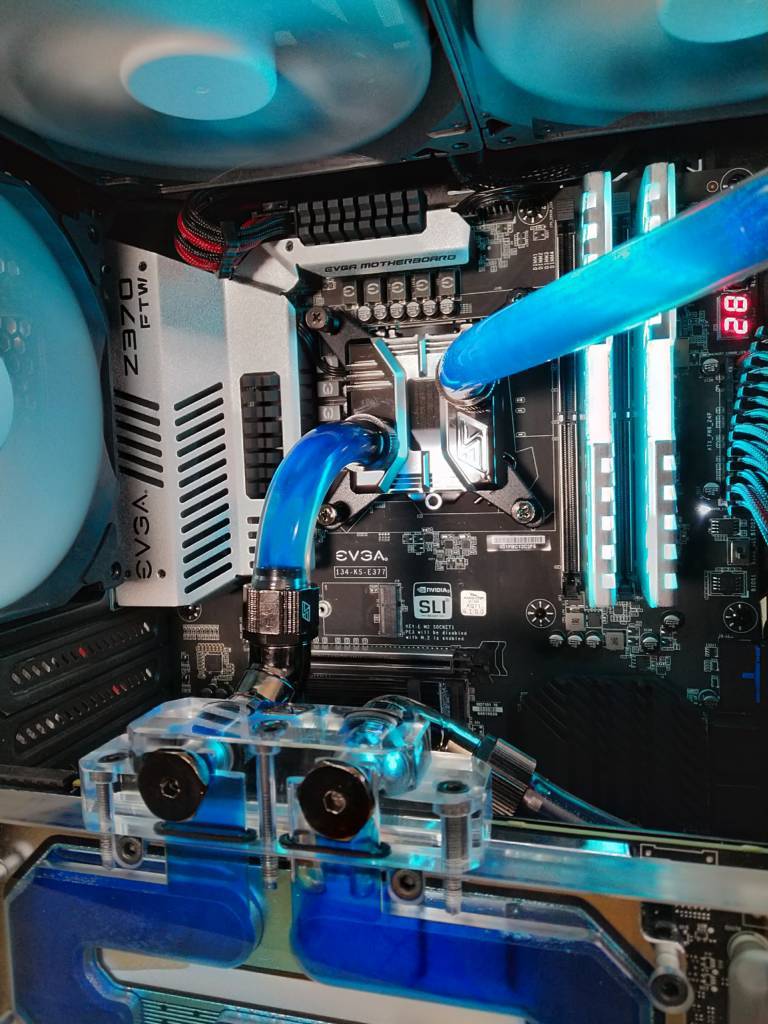
The component and watercooling installation went along without a hitch. The tubing runs, while a little complex for soft tubing, ened up with a very simple look in the main chamber. The vertically mounted EVGA 1070 Ti and Swiftech Komodo full cover block highlight the lower-half of the motherboard tray, while the Swiftech Apogee SKF CPU block and EVGA Z370 FTW motherboard take care of the upper section. As Dishonored is a fairly dark game, both tonality and visually, I wanted to avoid going crazy with lighting. A set of RGB memory heatspreaders on the Kingston ValueRAM is the only illumination present, giving the impression of the Whale Oil being used to power the PC, rather than our standard 120V AC. Overall, the internal aesthetics are exacly what I was aiming for, and I couldn’t be happier with the result.
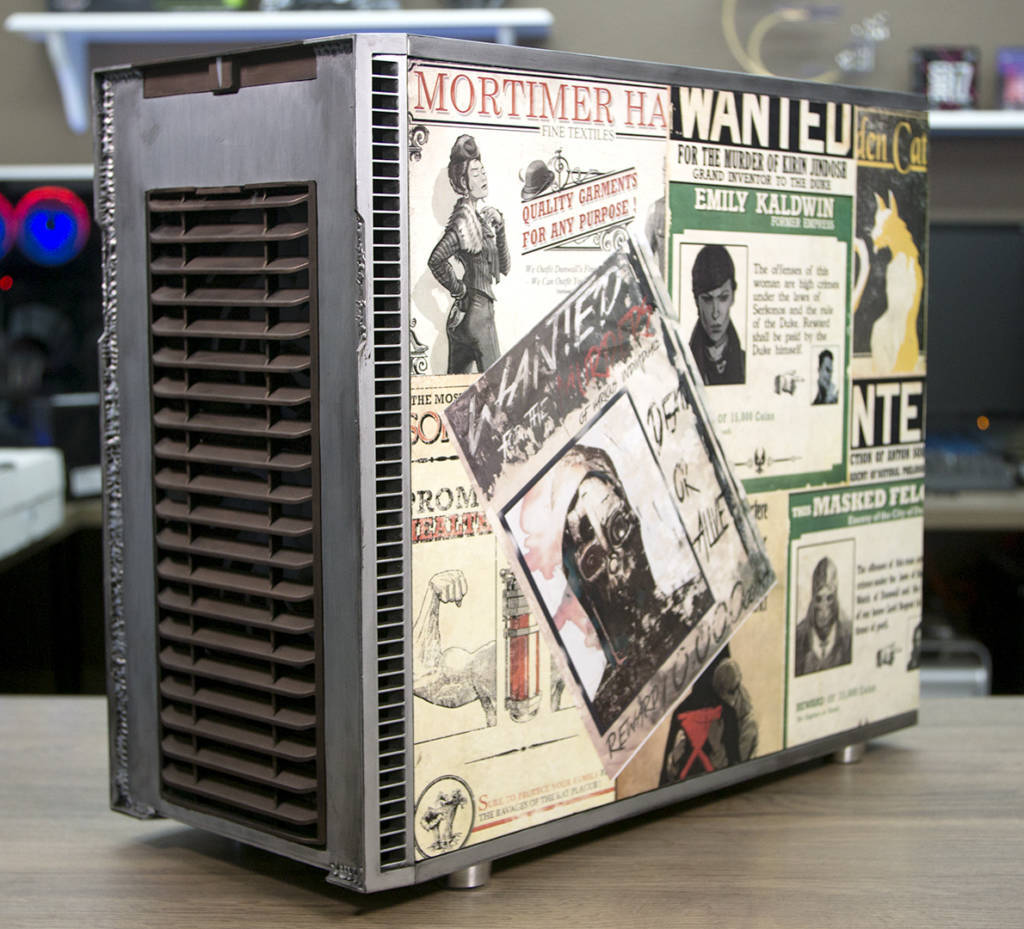
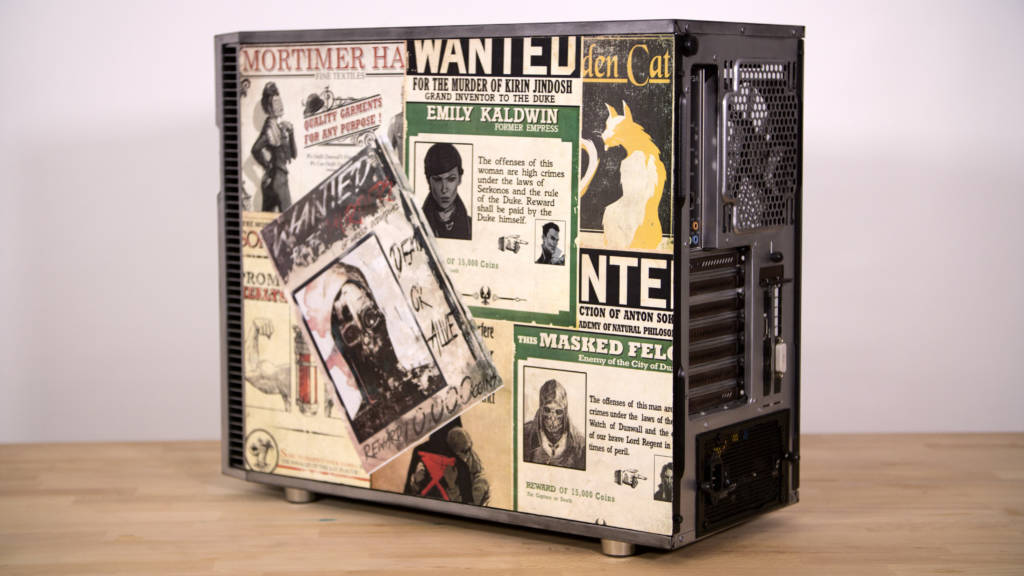
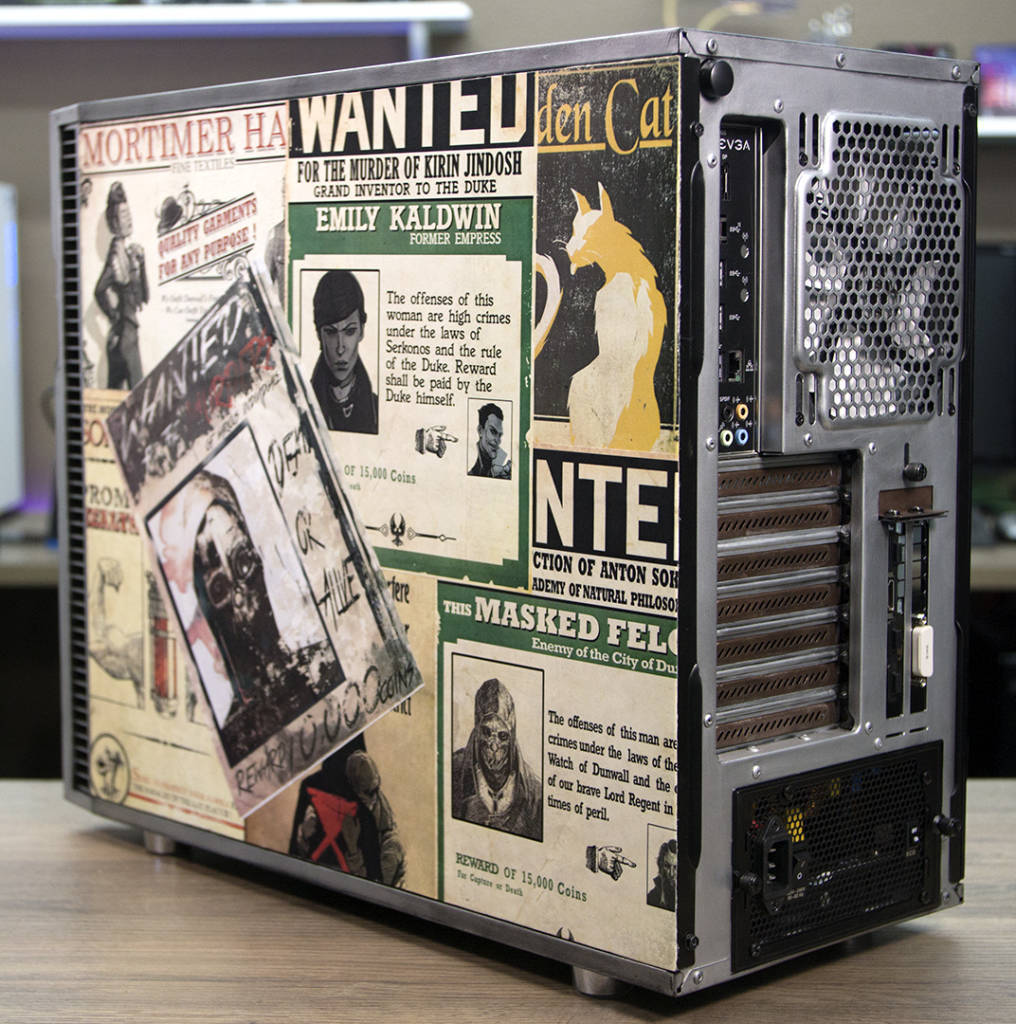
But there’s one last thing needed to pull the theme together. In my mind, the PC is some kind of power relay… an electrical box sitting out on some street corner. Traveling to any major city, you’re bound to see posters, advertisements, current events and more plastered to the side of every utility box and light pole you pass by. What better way to sell a theme than to put up advertisements and wanted posters from in the game. The back panel is a decoupage of those posters, and gives a bit of historical progression through the game. The base layer has advertisements for Mortimer Hats, The Golden Cat, Sokolov’s Elixir… with the posters for the masked felon, Emily and the like plastered on top. A decoupage glue was used both beneath and on top of the laser-printed posters, set out to dry, and then finished with a matte clear coat and sanded smooth. The result is a very durable finish that still looks like paper.
All told, the complete mod required about 40 hours of work beginning to end. Outside of the hardware used, the mod cost only ~$80, including purchasing waaay more Rub ‘n Buff than I really needed (the silver was done with 1/2 of a 1oz tube!). I am over the moon with the results, and would only change a few things if I were to do this build again. None of which would affect the visual results, rather it would just make it easier to work on. Obviously I would like to fabricate a more permanent mounting solution for the reservoir, as well as plum in a better fill and drain system (bleeding this loop is an absolute pain). I also had planned on including two 280mm Swiftech Radiators, but misread the requirements in the Define R6. With the hard drive mount in the forward position, only a 360mm Rad would fit, and even then, my memory heatspreaders are too tall and would interfere. Cooling at stock speeds on the i7-8700k and 1070 Ti are both great, but with only a single Rad, it leaves very little room for overclocking.
Overall, this is a beautiful mod that I’m happy to call my own. My build also goes to show you don’t need a massive budget or special tools and hardware to make a case mod. The entire mod was done with a $20 rotary tool, hot glue gun, microfiber cloth, paint, hand files and sheets of sand paper.
Thank you again to the hardware sponsors who made this competition possible! Fractal Design, EVGA, Kingston, Swiftech, and iFixit, you guys rock! The final specs of the build are as follows:
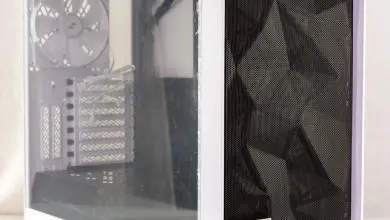
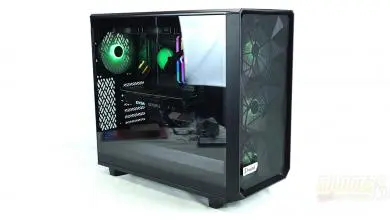
| Case | Fractal Design Define R6 TG |
| CPU | Intel Core i7-8700k |
| Motherboard | EVGA Z370 FTW |
| Graphics Card | EVGA GTX 1070 Ti SC Gaming 8GB |
| Memory | 2x8GB Kingston ValueRAM DDR4 2400 |
| Storage | Kingston 480GB m.2 SATA |
| Power Supply | EVGA SuperNOVA 750W G3 with EVGA sleeved cables |
| CPU Cooling | Swiftech Apogee SKF |
| GPU Cooling | Swiftech Komodo 1080 |
| Pump | Swiftech Maelstrom D5 |
And finally… here are those beauty shots of the final build. Enjoy!
