NZXT Zero 2 Crafted Series Computer case
Installation
Installation in this case was a moot issue. All of the case standoffs screwed in properly, the screws to hold the motherboard all threaded properly. The power supply went in like a champ, and the cables routed well.
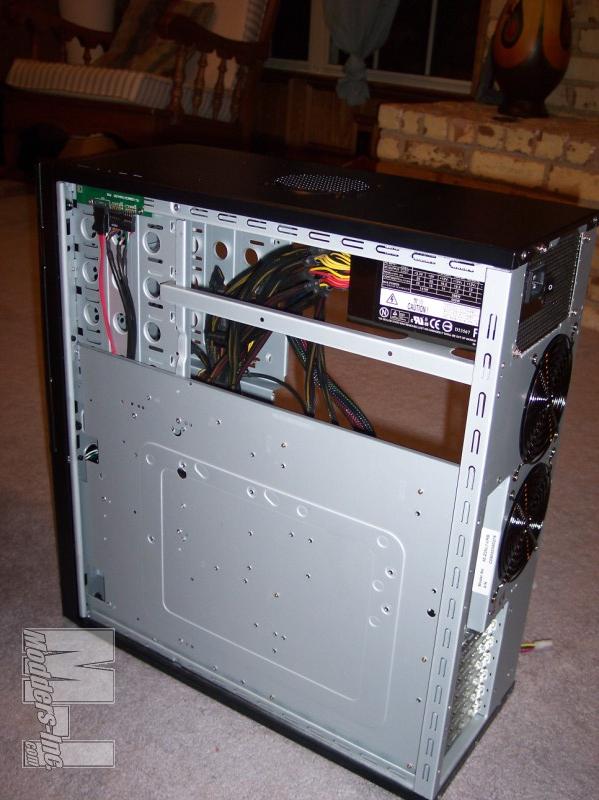
One of the things that I found while building the case was a neat little cable “well” down the back of the 5.25″ drive bays that led to not only the cable cave at the mid level, but that there was a cable access hole at the top of the 3.5″ hard drive bay area that was accessible from the same “cave” area! What this tells me is that, if you wanted to turn your hard drives around and put the cabling in the rear, you could feed it through that well. Although…. it will take some bit of modification if you plan on using the 3.5″ clip on sliders. The slide rails will fit the drive both ways (forward and backward), but the *drive* will only fit in with the cable ports facing out. If you try to put the hard drive in with the ports inward, it throws off the placement of the hard drive on the slide rails, and puts too much hard drive hanging out… making it impossible to push the drive all the way in. It’s a shame really that manufacturers have not heard this call. I’ve said it before, and I’ll say it again, it I want to be able to mount my drives backwards in order to hide the cabling, give me that option by putting an extra set of holes on the slide rails. I’ll pop the rivet posts out of the rails and move them to the proper holes…just give the *option* please? You made the case from an enthusiast perspective, and whether you meant to or not, you put a cable routing well into the back of the drive bay area. As it stands, the only way I can use it is with a boatload of loooooong SATA cables and a custom power wire harness. You gave me the option of putting the cabling back there and routing via that channel, but enthusiasts always want a little more.
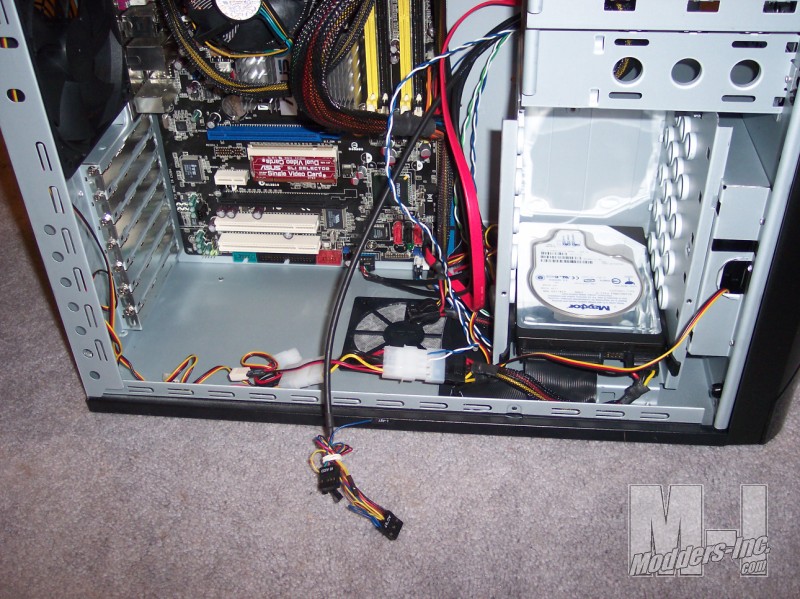
Also, the cables for the top panel ports are a good length, but they need to be longer. On my motherboard installation, my audio and USB ports are all the way at the bottom of the motherboard. I was able to route the USB cable down (it is on a port near the corner edge) but the audio cable was too short to reach the port on my board which was at the bottom left of the case. No way, no how was this cable going to reach.
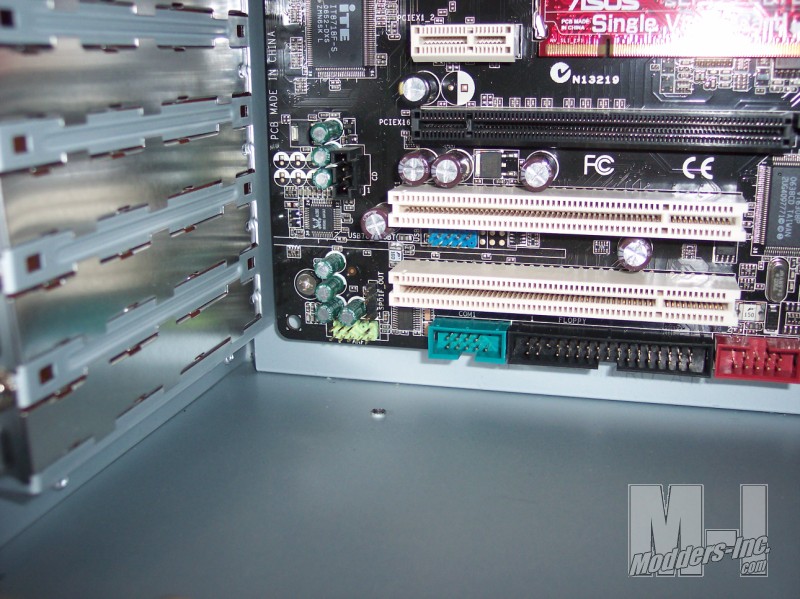
The USB cable would likely to have to go as well if I did not have a port receptacle so close to the right edge as I did, as the cables would likely hinder a video card installation. So, for a full sized case, depending upon the location of your on board USB and Audio headers, the cables used may not be long enough to connect. I can tell you almost assuredly (seeing as most audio and USB ports are put along the bottom of the motherboard) that there is certainly not enough length in the cables to be integrated into any enthusiast level cable management. You simply need more cable length. My daddy used to tell me, “I’d rather have it and not need it… then need it and not have it.” and that applies in spades right here. The way it stands, the only cable that I could say would assuredly stay connected would be the SATA/eSATA cable. It had enough length, and (from my experience) the SATA ports are always several inches up from the bottom of the board, very rarely have I seen any SATA ports at the very bottom of the board.
For a case this large to be without water cooling ports is a travesty, especially given the growing popularity. The dual 120mm fans on the rear are SCREAMING to be matched with a 240mm radiator. But no mounting and no holes might make people look elsewhere. Kinda scratching my head on this one.
Also, if you are going to make the motherboard tray a permanent fixture in the case, please cut out a large space section out of the tray below the CPU so that people can add in the new back plates that their cooling solution requires. It’s a simple thing really, and does not affect structural rigidity at all, but makes the end user’s tweaking so much easier when swapping cooling solutions on the CPU. Thank you! (Editors Note: I second that request as it was the first thing I did to my Silverstone FT01)
