NZXT Tempest
A Closer Look |
|
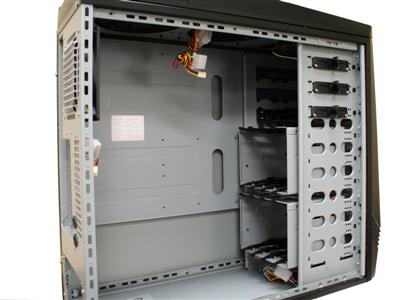
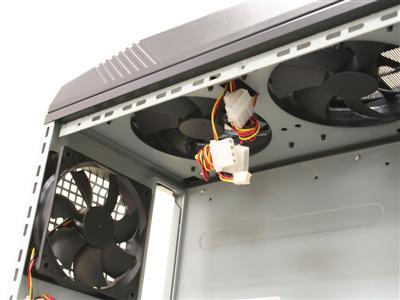
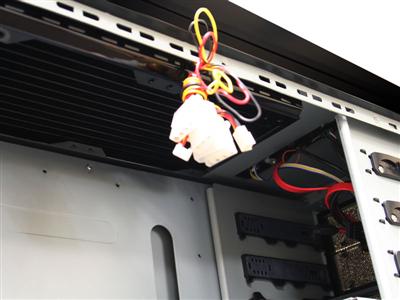
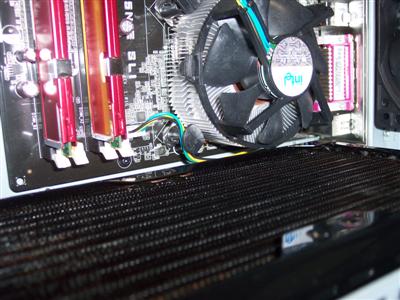
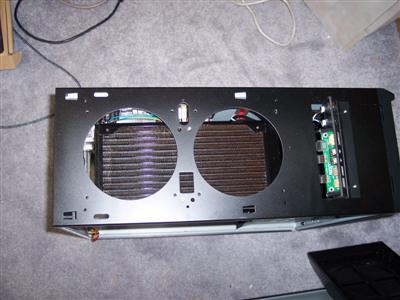
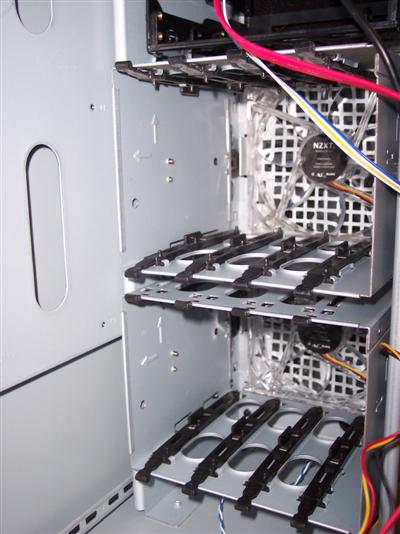
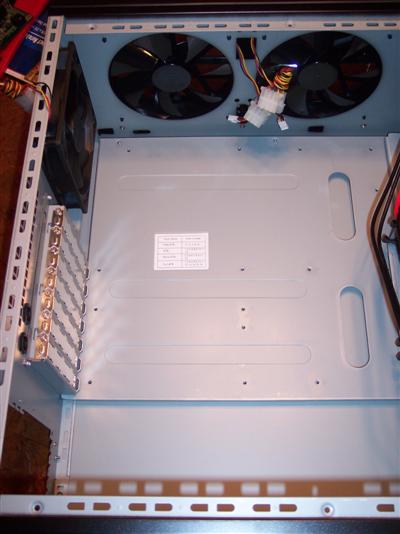
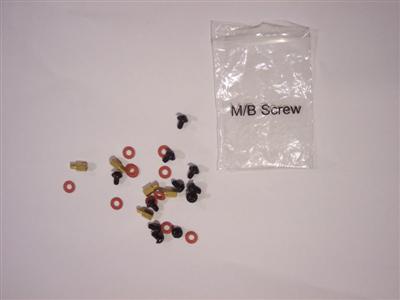
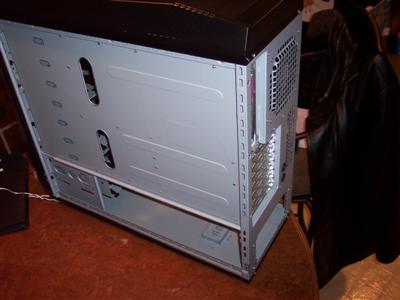
Anyone who knows me knows that I will gripe incessantly about “unfinished cases”, and by this I mean cases with edges that are not rolled or filed. If I work in a case, and I come out with bloody knuckles or missing chunks of flesh because of a cheese grater that was not advertised, I tend to get a bit bent. So my first test, to any case that I am considering, is running my bare, hair backed hand and forearms all through the case. I pick up the case by the edges, by the internal frame (like we all sometimes would do if we were building a machine with the sides off and needed to move it quickly). I run my hands into the drive bays, and any exposed cable holes get their edges tested. Back port holes for the motherboard, the section by the power supply… the back of the motherboard chassis where cables may be routed….I pretty much risk life and limb to bring you these reviews… I hope you appreciate them! ;) Guess what? In a nutshell… no blood! :) How is that for a simple response! This was one of the few cases I have ever found that were not blood bringers, and that is very exciting for me! Moving the detailed eye to the top fans, they are 140mm units. All black, no lights (12v/ .1A/ 1.2W). These act as exhaust units sucking that hot, convected air from the top of the inside of the case via two professionally cut holes that are the perfect diameter for the 140mm fan blades. Folks… I took a small 12v power supply that I had for a USB hard drive adapter. This removed all the background fan noise from the equation, as I was not using a PSU with a fan… just a power brick with a 4 pin molex hanging off of it. I chained all 5 fans together, and this thing was whisper quiet! In the past, most fans that come with a case are there (in my opinion) to act as place holders. NZXT saw fit to appoint this case with low noise fans… pretty impressive! Now, they are low RPM fans, to help account for the low noise, 900-1000 RPM if I remember correctly. But still… a case that I can install a system in to and it will not mimic a civil defense siren is pretty impressive!! If you are looking for a case that you can use for water, which I will be looking to do, I decided to see how the hardware would fit. To accommodate a rad mount installation, there are 4 holes in the middle between the 140mm fans, and those are used to mount a 240mm (2x120mm radiator) to the underside of the case top. This theoretically puts your rad underneath the 140mm fans for the exhaust. The underside of the roof of this case does not allow for many different kinds of radiators as options. Effectively, if the rad is thicker than 30mm, it will not likely work without significant equipment juggling or modification, as it will suspend from the top of the case too far down, and impede the CPU cooling mechanism. In my particular configuration that I used to test this machine, it was the CPU heatsink mounting that caused problems. Unless this was a low profile CPU heat sink, or a heatsink unit that had flush mount mounting hardware. In my case, anything that extended down past the 30mm threshold would have an argument with the CPU mounting area. As long as you stick to the narrow types of 240mm rads, you will be good. Check those dimensions! Please take special note of this picture. This is where your rad will fall regarding fan coverage. If you are planning any significant heat generation, you may want to look into relocating the rad to the rear. But if you plan on keeping it fairly stock, this cooling may suffice. But I must add kudos points to NZXT for putting in a spot for users to put their rad internally… keeping it protected and stealthily mounted! Props to you for thinking like this, as it almost always leads to better iterations of the idea! :) Internally, there is also space for 8 hard drives using tool-less sliders. Very… *insanely*…. easy to use. Effectively one 120mm fan per drive cage. Reverse mounting the drives and routing the cables down the back of the cage on the fan side might prove to be a bit much. Stepping up to the 5.25″ bay area, there are sliders inside the bay area that work in conjunction with a completely removable locking mechanism that pops off the side. The part that pops off consists of two small “screws” that would fit in to the standard locations of screw holes on a CD device, or other standard drilled item. Once the “screws” are in place, they line up with a series of holes on the case, and the plastic attaches to the side of the bay area, and with a twist and lock, your drive is mounted. Very securely I might add! Easy to remove too should you find yourself performing maintenance. I like this solution for a couple of reasons, easy to remove and re-attach securely, means that I can easily pull the parts (if I wanted to paint or powder coat the frame) and not have to really worry myself about possibly breaking a drive retention clip, or something else. This also leaves the side holes in pretty much the same shape as a regular case, and could be easily substituted with screws should the retention brackets be distracting. Effectively it gives you a tool-less retention mechanism, without removing the ability to use screws if you want to. The motherboard tray is a basic item, but they managed to make this clear, with a small black text on white background mapping of the holes. Most all of us have built enough machines to know where the standoffs will go, but to a novice, this makes it darn near fool proof. It used to always chap me when the case manufacturer would stamp the “letter code” instructions in to the metal. Always had to get the light “jussssst right” to read the darn things! This alleviates that headache. Also of note, while I am here…. the mounting hardware comes with screw in standoffs, screws, washers, etc… but yet another little detail that impressed me…. black screws. Put those on the motherboard while securing the holes, and the metallic sheen of chrome silver is almost completely removed/negated. Yet another slick detail. The back of the motherboard tray allows for cable routing via the two big oval holes cut out near the bay area. Also, with the back panel put on, there is a small 1-2mm gap between the panel and the bottom roll of the back/bottom of the tray area. This means that smaller, lighter weight gauge wire would be able to be easily routed behind the motherboard and possibly directly fed to the bottom port section of the mounted item. Thinking things like the reset switch, power button, HD LED, Power LED, speaker…. etc, those items come on thin gauge cabling, and that would easily route there. But the inclusion of the holes *greatly* assist in the routing/hiding of cable clutter. Having the PSU on the bottom presents a bit of an issue with spare, unused cabling. If you are not the type to trim your leads, the NZXT offers space below the bottom set of drive bays to slide your spare cable clutter under there! They have left several gaps and spots of space in strategic locations to allow for creative cable routing solutions. I love the thinking! |
