NZXT Phantom 630 High Performance Modular Ultra Tower
Interior Impressions part 2:
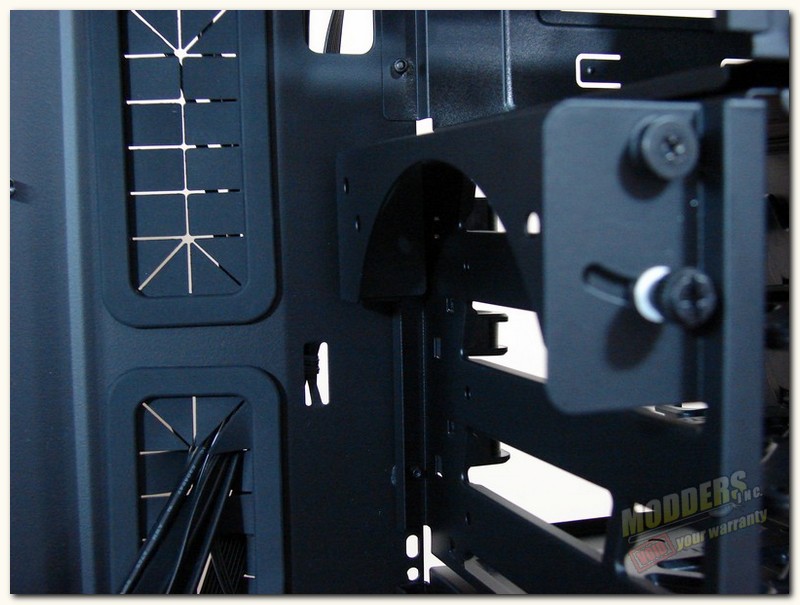
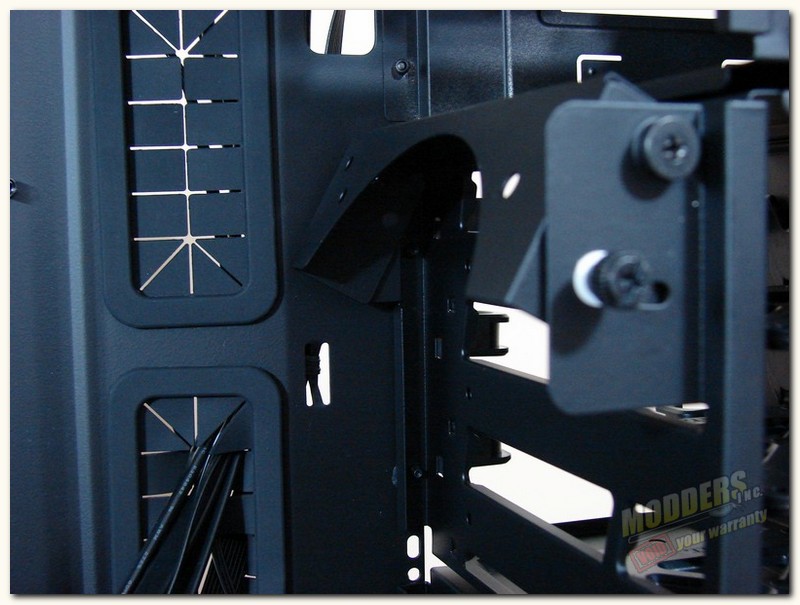
No we are not quite through with the hdd/ssd cage innovations on the NZXT Phantom 630. NZXT has also added an adjustable fan mount that swings upward to direct air flow where you want it. The first picture shows the mount in the traditional flat position, where a 120/140mm fan can be mounted. The second picture shows that the mount can be rotated upward about 35° to change air flow direction. Cool right! No worries, it can also be removed if need be.
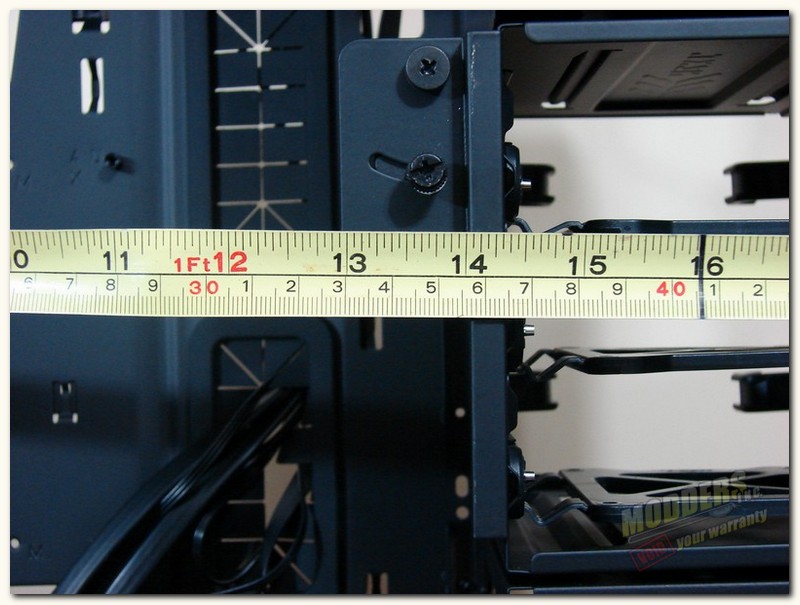
With the swing hdd/ssd fan mount attached to the drive cages, you have well over 12.5″ of space for a massive video card, remove it and you have dang near 14″ of clear space. Now, remove the cages completely and you have more room that you could possibly need, unless your installing some sort of huge liquid cooling reservoirs etc for a truly custom build.
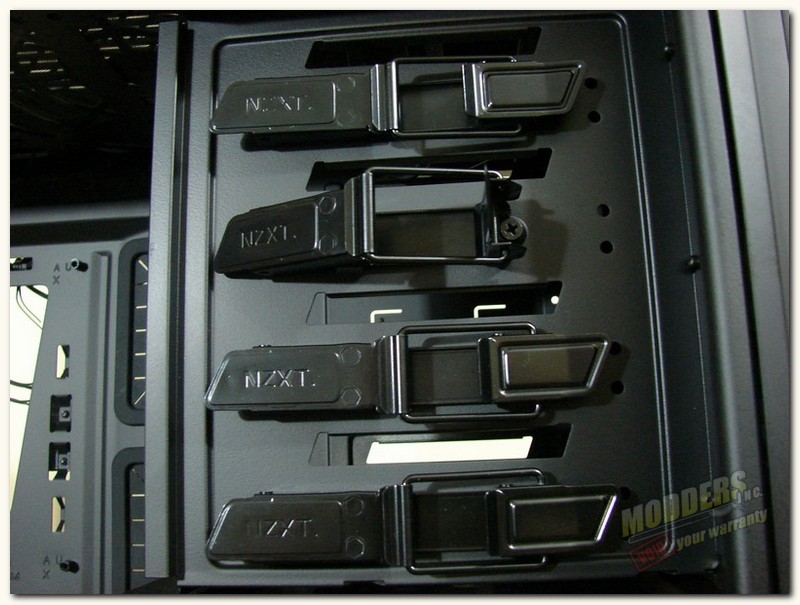
One thing that I found very impressive (among many) with the NZXT Phantom 630, was it’s use of a heavy duty metal tool-less optical drive locking system. This is truly the best drive locking system I have seem to date. Unlock the metal buckle type lock and slide in your drive, then simply re-lock the metal buckle and they are in there to stay.
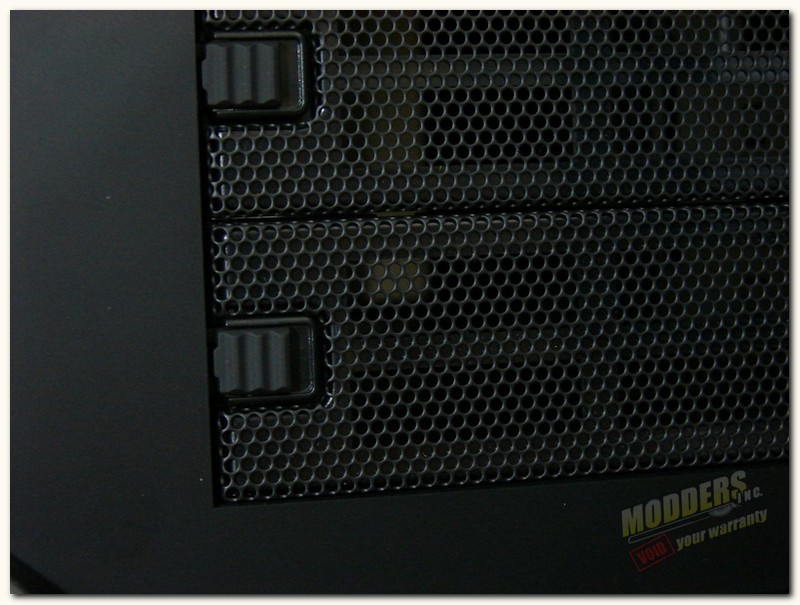
Now you may be wondering how to get into the drive bay covers at this point, so let me show you how. See, the little 3 hash grip on bay cover in the right pic? Just slide that to the right and pull outward and the bay cover will come loose. Now, personally I had to hook my thumb nail behind the slide, as I found it difficult for my big fingers to slide the lock over since it was almost flush with the bay cover, but none the less it works like it should. Now, it is important to note that there are no filters behind the bay covers, so you may want to keep that in mind if you do not fill all four optical bays.
Moving to the top inside of the case, we can see the top mounted 200mm white exhaust fan, we can also see room for one more 200mm fan there also. Note, that ou may choose to remove the 200mm fan and place up to two 120/140mm fans in the mounting areas provided. the 140mm fans can be adjusted by sliding them backwards or forwards. I really like the fan sliding slots.
Now, if we look at the top of the case without the top panel installed, we can see the installed 200mm fan has a dust/debris filter on it already, and that there is also another filter included for the same reason in the empty forward fan space. this will help keep dust and debris from falling down into the chassis.
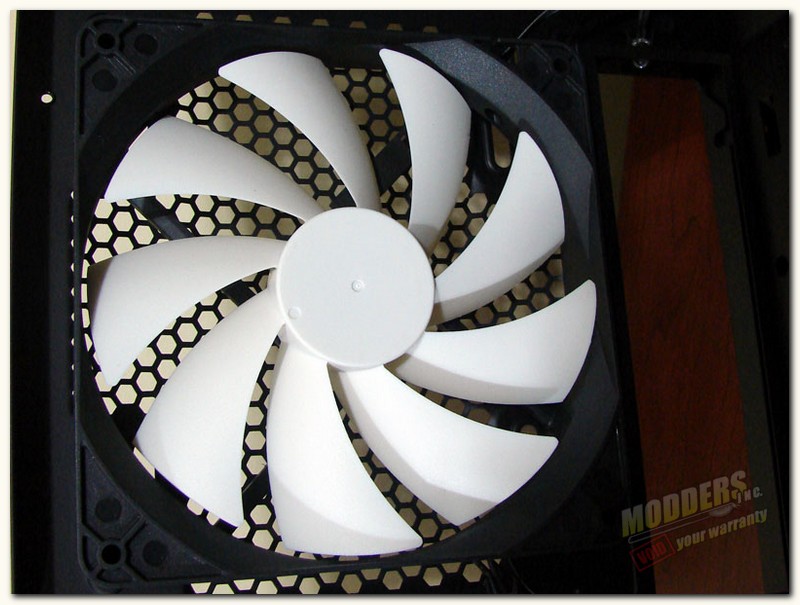
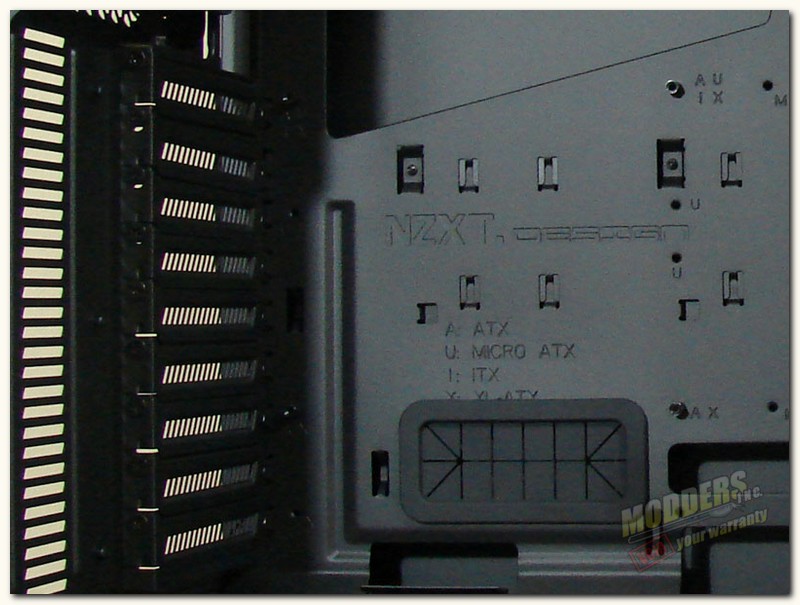
Moving to the rear of the interior, we can now get a closer look at the included 140mm white fan.. We can also, see the expansion slots, however, instead of thumb screws NZXT has opted for regular expansion slot screws. The expansion slots are vented well though and should help in exhausting hot air.
We can also see in the right hand picture that NZXT has stamped the motherboard tray with the accepted motherboard sizes with corresponding letters, so that by each standoff location you will be able to know whether or not to use a stand off for your given motherboard. You can also see in this picture one of several rubber grommeted cable management holes.adorning the motherboard tray.
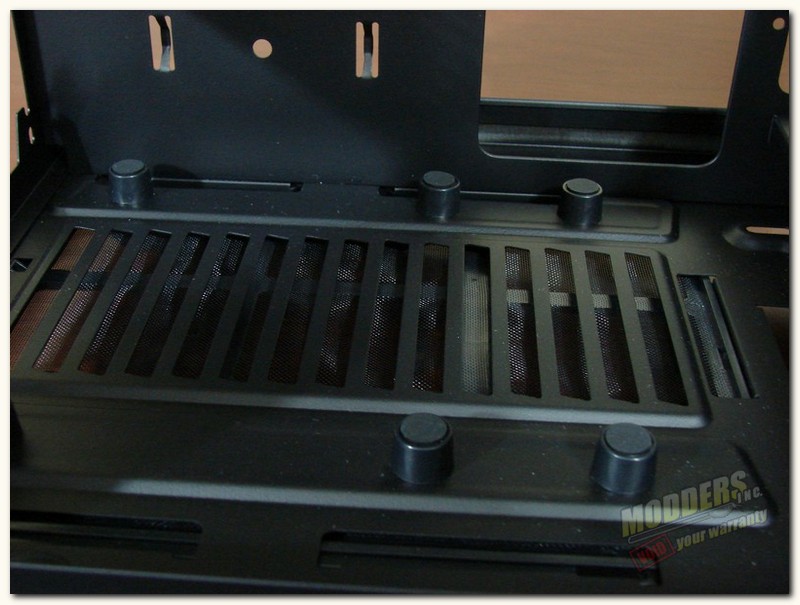
Next on the interior we look toward the psu location, here we find six decent sized psu rubber padded pedestals to help not only support the psu, but to allow for better air flow under the psu as well. the rubber pads atop the pedestals will help greatly to lessen vibration of the chassis when the psu fan is running wide open.
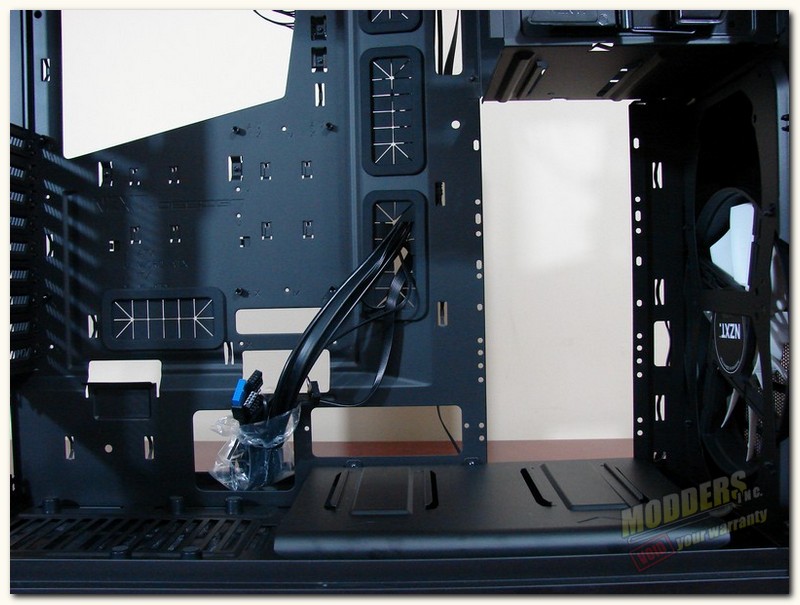
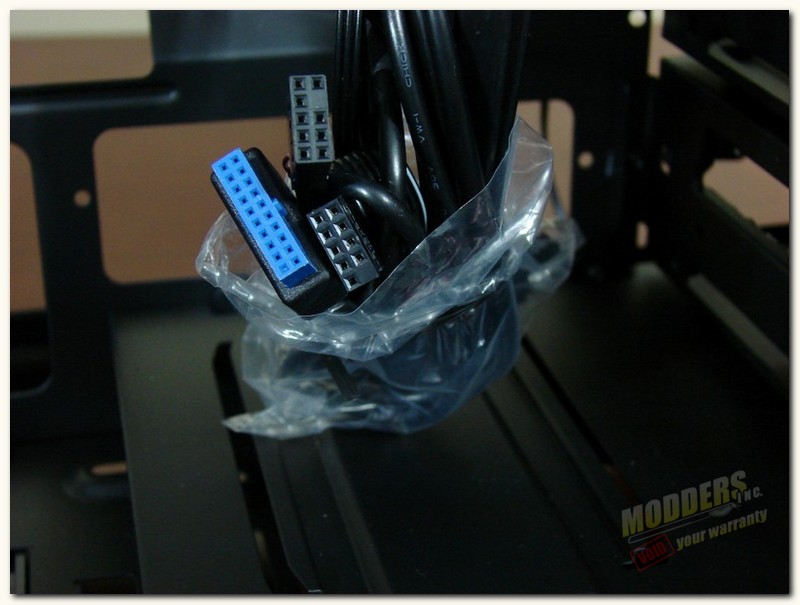
The right hand picture shows the power and I/O cabling bundle which we have come to expect in all cases of the day. The bundle includes all the necessary cables and wires to connect all power sources, including a 20 pin USB 3.0 cable and note that the SD card reader will take up two USB 2.0 connectors.
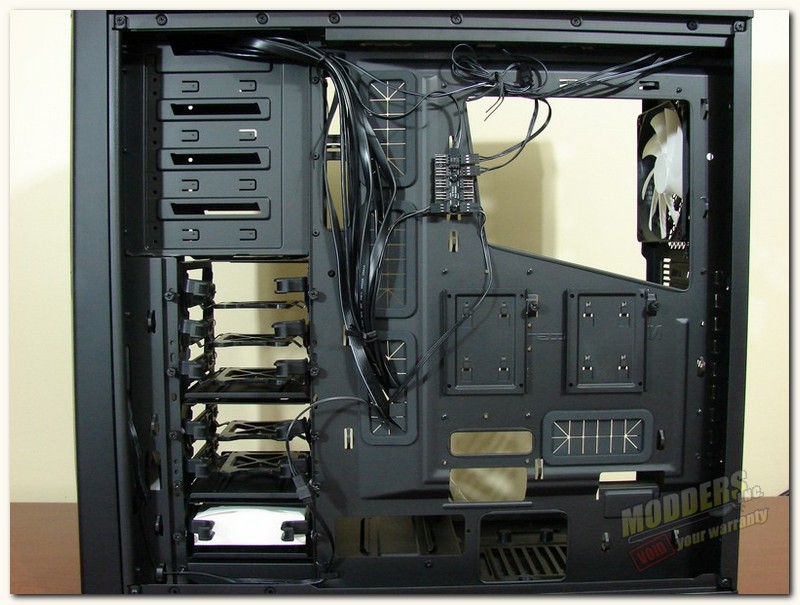
Looking at the rear of the chassis, one can see right off that there are plenty of cable management hols both rubber grommeted and some areas without rubber grommets that you can use to route your wires and cables. There is also no shortage of tie offs included on the back of the case to be used to tie off your cables with all those included wire ties.
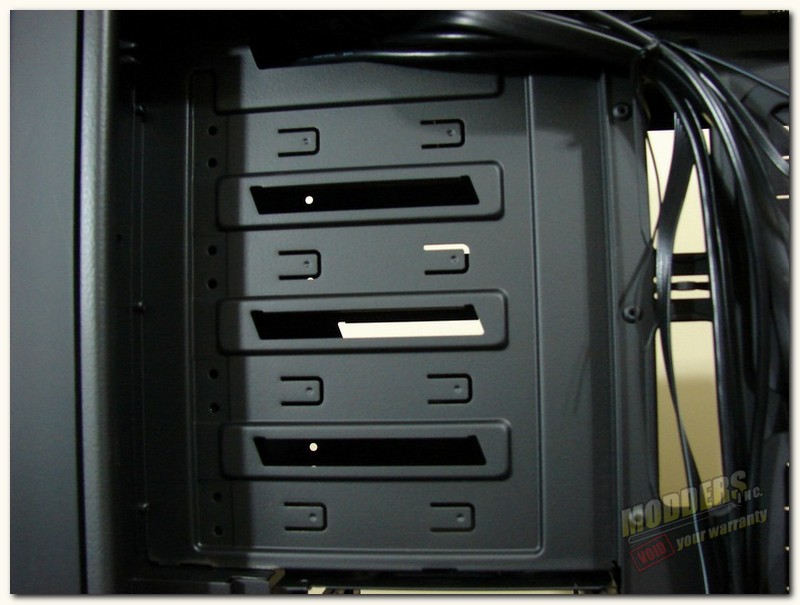
The rear side of the optical bay cage does also include screw holes up front, for those who just have to have everything tightened down to the max. However, the little bobbed tabs will work just fine in conjunction with the heavy duty steel tool-less locking optical drive locks on the other side.
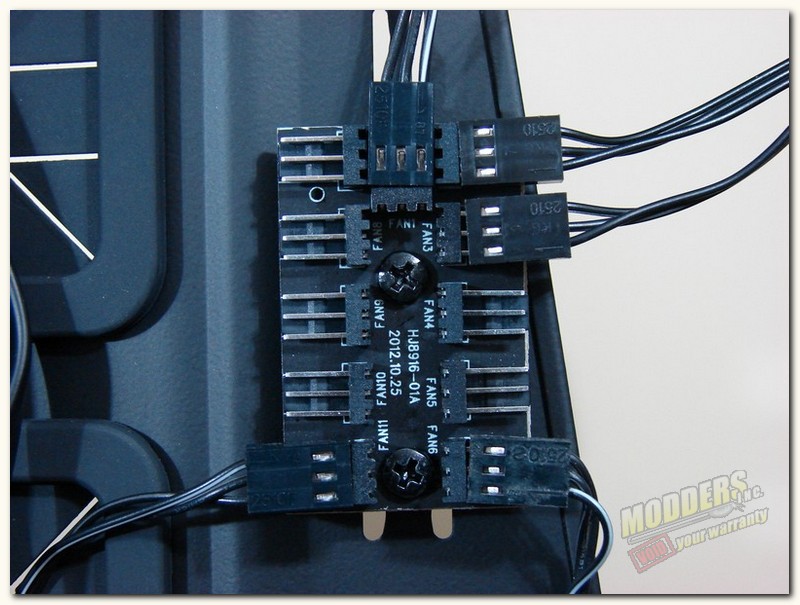
The rear of the NZXT Phantom 630 has another great feature that we need not forget, the 30 watt fan controller. Now, although this fan controller will allow you to connect up to 10 fans to your speed control switch on the top panel, please remember it is only rated at 30 watts. So, you may not want to use high wattage fans here, if you plan on using all ten connections. This little control board is a fantastic way to host most fans a gamer will need.
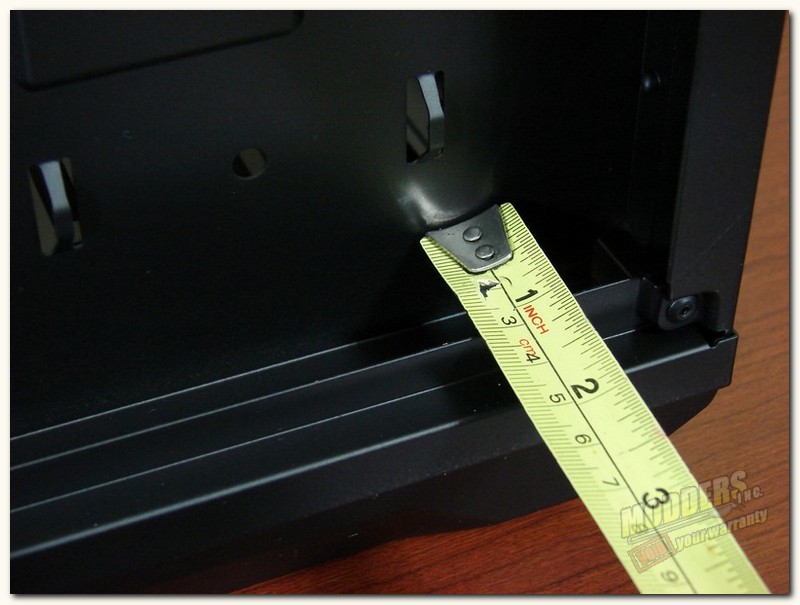
Last but not least, back to cable management for a quick second, the NZXT Phantom 630 High Performance Modular Ultra Tower has almost 1.5″ of clearance between the rear of the chassis and the rear chassis panel. Now, that is some serious room folks for managing your cables. NZXT, seems to understand what we need for cable management and has given us a ton of space to work with.
[dhr]
