Noctua NH-D14 CPU Cooler
How does one mount a monster? |
|
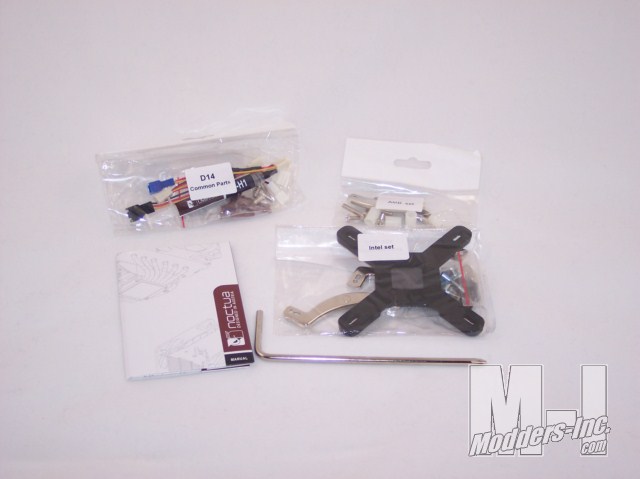
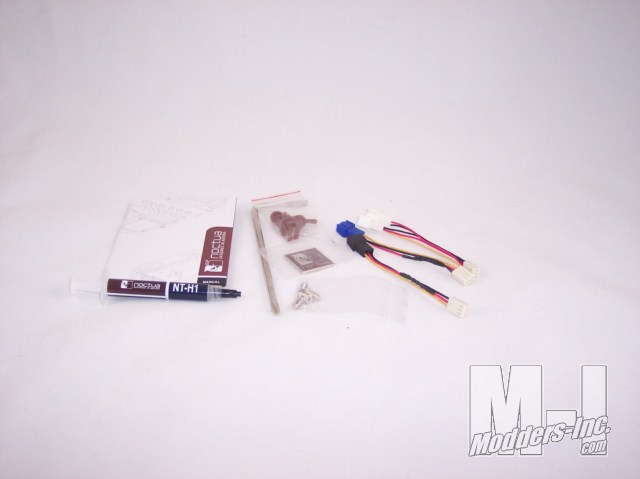
In a single, easy to remember phrase… “Verrry carefully!” 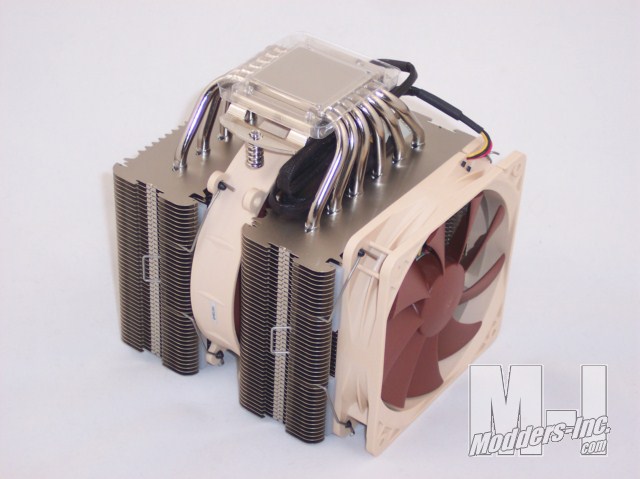 I don’t know about you, but the thought of 1200+g of heatsink pressing on my CPU or hanging over my precious components makes me nervous… unless it has an effective mounting mechanism. The NH-D14 comes with an included backplate for the rear side of the CPU area and tension bars for the topside. They term their system the SecuFirm2 mounting system. Details on mounting the heatsink can be found in their manual here. In the “D14 Connection Parts” bag above, there are 2 fan cables in there that put an inline resistor between your fan and that fan header. This puts the fan in “Ultra Low Noise” mode, if you need the fan to be reeeeealy quiet. Also seen is an included screwdriver for attaching the heatsink to the retention bars, as well as screwing in the tension bolts on each corner of the retaining bars.
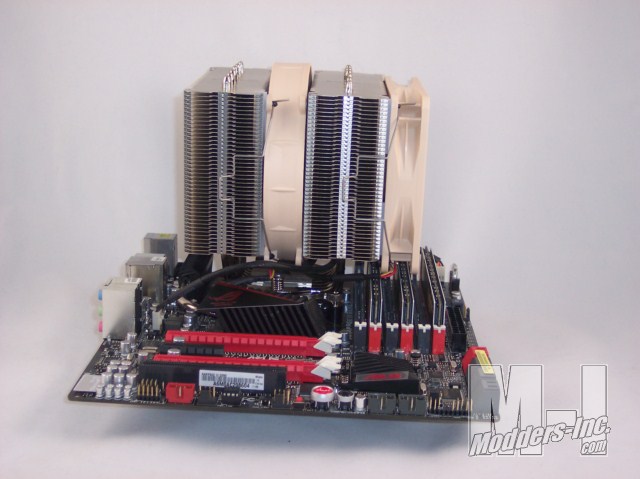
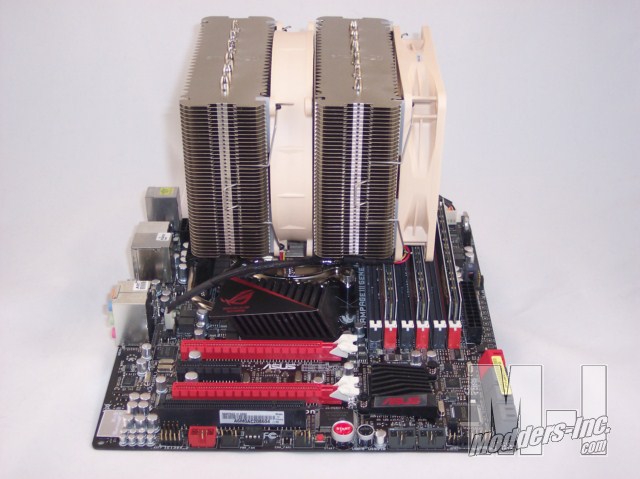
I attached this heatsink to an Asus Maximus GENE series of motherboard. Size is a bit smaller than a normal ATX class motherboard, however, I think that makes this board show the benefits of this heatsink, as things are a bit more “packed in” with less real estate available on the motherboard to solder everything on to. Also, this motherboard uses 2 banks of triple channel RAM, so you will see how high the heatsink actually sits with respect to the RAM. Memory with high, projecting heatsinks will likely have a problem.
So, it’s *big*, as you can see. You get coverage over the first 2 rows of memory slots with the heatsink only, and that hops to 4 when you clip on the fan. As reference, that is Crucial Ballistix Tracers memory modules. If you have tall memory, you might have a problem. But if you have regular height memory, you are in the clear. I’m going to recommend that you pull your motherboard in order to install this heatsink… even if you have a back plate accessible motherboard tray. I say this with the highest regard for your installation abilities, but I’m trying to save you some sanity. Because, it goes something like this… I tried both install methods, and I’ll tell you pulling the motherboard was SOOOOO much easier. Open your mind’s eye and follow me along this pathway for a few moments. You pull the back panel off your case, pop your old CPU heatsink off. Feeling pretty good about your choice of cases right now! You do the right thing and properly clean the old TIM off of your CPU, pull the fans off of this unit to get it installed, applied your new TIM on the CPU die, attached the heatsink, screwed it in place, nice and even! Damn, you are feeling REALLY GOOD! Time to put the fans back on… uh oh. These are clip on fans, which means you need unobstructed access to the sides of the heatsink tower in order to pull the clips into their respective channels. If you have your heatsink installed front/back orientation, then getting your fingers into the top section to get these clips properly seated will be a nightmare. If you have it oriented up/down, then the sides are likely easier to access. I mounted mine front/back and kicked myself several times until I devised a method using some nylon tie down string and a finger pulley method to clip the top clips…. it was quite humorous. You should really try it sometime. I could not mount top/bottom orientation due to interference from my video card. |
