Most of the spotlight mods we bring to your attention have something special and visually capturing. To me, attention to detail is extremely important. I feel that when someone spends enormous time concentrating on something it out to be good and impressive. I have met our next modder in Modders-Inc forums. He goes by the handle “Richie123” and his latest built has captivated me as it has some of the craziest engravings and outstanding design I have ever seen. I just had to do an interview with him.
MI: What is your full name and the City/province you are from?
Richard: I would rather not to disclose my real name, but you can call me Richard. I am originally from London UK, but I moved out when the wife found out she was pregnant and now live in the sleeping suburbs of Kent (also known as the garden of England).
MI: What inspired you to tackle the Timeless Warriors project?
Richard: Well for a start who does not like the stigma surrounding samurai, but in all seriousness I have quite a few swords in my collection, and with a desk this big, I thought the design and layout had to be permanent and long term, so I went for something that will always appeal to me and that is the Samurai after all they are timeless, hence the name.
MI: How long did you work on this project?
Richard: Well it took me about 4 months of trial and error in the beginning designing the artwork for the desk, getting the composition right was important to me as just throwing loads of images together was not going to work, luckily for me I am good friends with a tattooist called Lal Hardy who is well known in the UK and I learned a fair bit from him about composition. Otherwise, the artwork would have looked like a bunch of images thrown together. The engraving took a while, just over a year, but also we had me having to work as well as my wife looking after a young’un, who is only 3 at the moment. So it took a lot longer than planned.
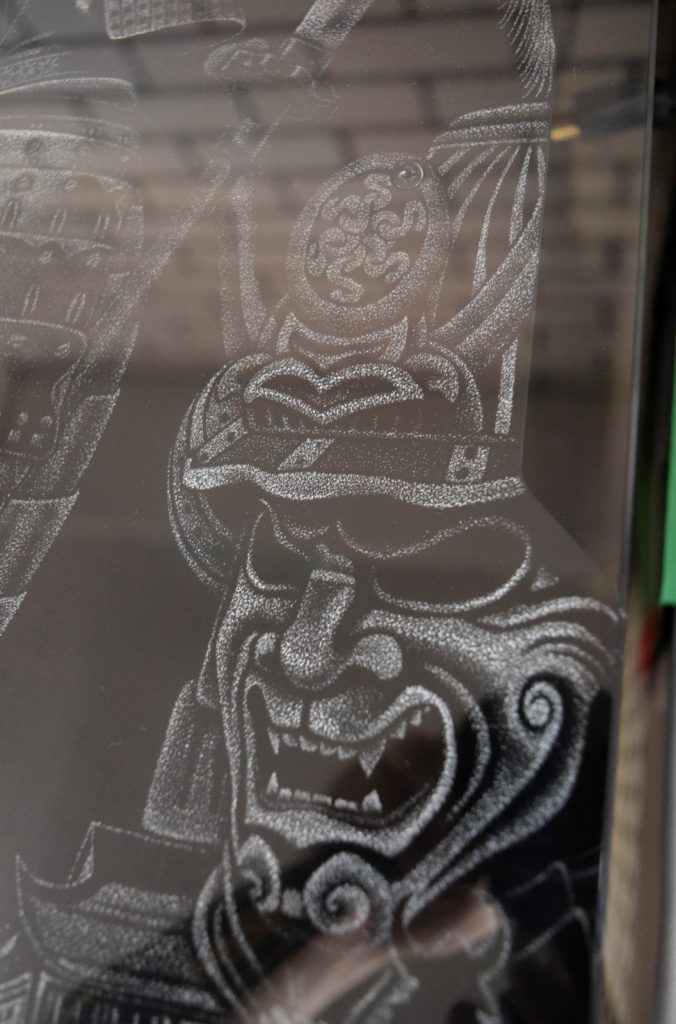
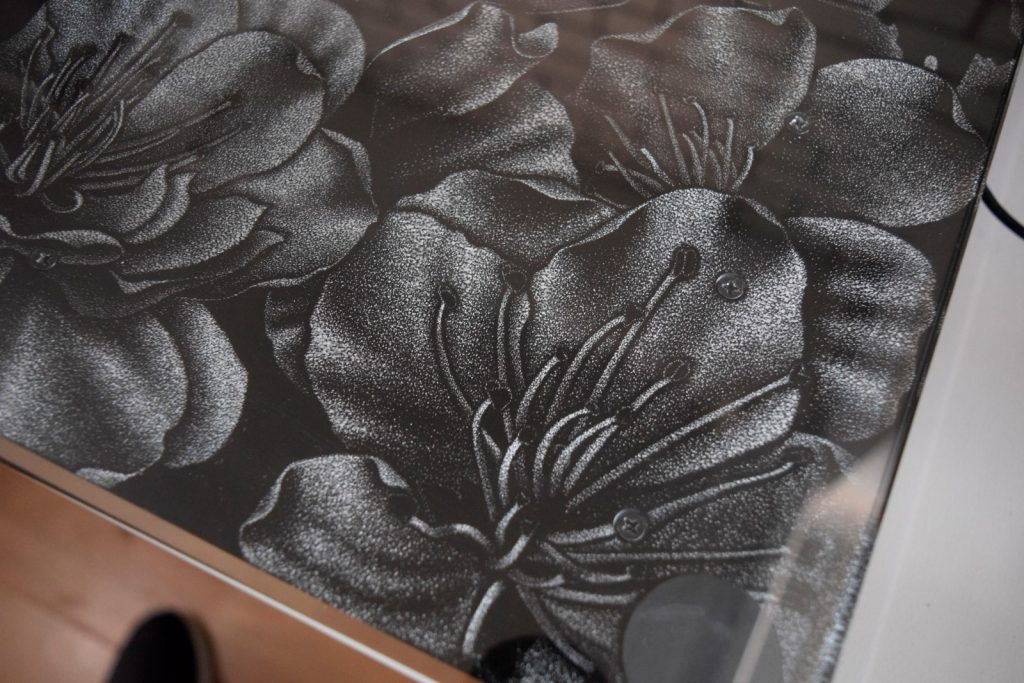
MI: The engraving of the Lian Li DK05X case was very impressive. Did you use any CNC machines or was all of this done by hand?
Richard: This is my wife, a very long time ago, and I mean a long time ago (days of ac Ryan, ATi before AMD purchased them and grey boxes) I built the wife a PC and hand engraved the silhouette of the tomb raider lady, actually glad I don’t have pictures as my engraving skills go as far as lines and solid stuff, then on the second build I was doing for her, she suggested she try to engrave it using dots and a technique called pointillism to create a more depth look and more an actual image with details. So I purchased a piece of Acrylic to let her try as I was not going to mess up a case window, well the rest is history, after that she engraved her first case and I have not touched a Dremel for engraving images since, I will do logos and lines, but hell I can’t come close to what she can do. She does the dot work to create the image on every build I have ever done since as well, the results speak for themselves.
MI: Once you have all the engraving in place have you given any thought on adding some color into the outside imagery?
Richard: I would never do that to the engravings ever, the only time color has been added is when it’s a sheet of acrylic and I can add an edge light it to create different colors, they are art pieces to me and I would not change them ever.
MI: Internal decorations came out good as well. I particularly like the Japanese houses and how you matched the color scheme of the entire case. Any tips in painting you can pass to our readers?
Richard: It depends on a lot of things, for the desk, due to the theme I wanted to create a rough look, for the internal stuff, the Japanese house came about because I wanted to create something to cover the cables coming from the PSU, the towers to give some sort of coverage to the GPU cables too, I also chose the odd color of green for the GPU cables to represent bamboo color to tie in with the whole theme. I mainly wanted to create a rough old wood look, even with the cable covers at the front of the motherboard, to create this look I took the houses, the other cover pieces, the pump plates and gave them a rough sand with 400 grit, then literally blobbed the paint on with a small brush and just spread it out in straight lines in the same direction, slowly curving every so often. This was then placed outside in the sun and color of choice then painted them all with a matt paint as gloss would have been too shiny, the thing I like about this technique, is now you can not see which pieces I made are acrylic and which are wood so the effect works well.
I made some stencils for the dragon and writing on the houses and towers, placed these on and airbrushed them down and yes the stencils were probably the hardest thing to do paint wise on the houses as I had to weed things much tinier that I have ever done lol. The Mice and vanity cover under the desk was a different story though as I was airbrushing onto smooth surfaces, to do this I sand down with 800 grit paper, then wash them down, place under a towel for 24 hours. I then use tack cloths to wipe down any dust or bits from the towels.
On the gold mouse I primed it, unlike most I wet sand after priming with 1200 grit instead of 800, it’s risky as it places a much smoother surface than 800, but I find with airbrushing I get better traction, I then put down a coat of pearl black, once that had dried fully, I then masked off the mouse to leave a rim around the edge and the razer logo and writing, then sprayed with gold pearl paint, once this was dry I removed the masking and then gave the whole mouse two coats of pearl gold with a very light dusting (something iwata brushes really help with as you have the control of how much paint is released and control over the PSI on the brush too). The white mouse is more of the same, but a white pearl coat, followed by masking and the of the edge and then using the black pearl for the logos, I am well happy with how they came out. My biggest tip though is tack cloths and use them in between coats to get any minor specs or dust off as with painting the surface is the most important part.
The most timely thing is the lacquer really as I am still a fan of 2 pack, and that takes ages to fully harden without a spray booth, it also stinks :P
MI: Do you have a website or a channel for our readers to check out your other mods?
Richard: I do not have a current website however there are some links your readers will find interesting.
https://www.facebook.com/
https://www.facebook.com/
and my new YouTube channel that I just started with this build:
https://www.youtube.com/
This will have desk and content on it (desk very soon before you publish this).
Mi: Any interesting projects on your horizon?
Richard: There may be one or two, but that’s all I am prepared to say, but don’t worry they will be posted in the Modders-Inc forum, there has always been those one day I am going to do this build ideas I have and the only thing that delays it is a product I would want to fab into something that could house a fully watercooled PC in is almost 1600 and then I will be cutting it up. :O
Richards build log could be found right here in our forums (Timeless Warriors Project)


