Keyboard Mods
Next remove the PCboard with the lights on it. Desolder the LED's to be replaced, noting any marking for the positioning of the positive side of the LED. Now take your new LED and wire it up so it will reach the key plus a little extra. I used an old mouse cable for wire, and added about 3" to the length for good measure. Then I used the extra in routing and the mistakes of stripping the fine wire. Shrink tube all exposed wire and solder to the board. The third LED is old, showing then and after the new LED wired in.
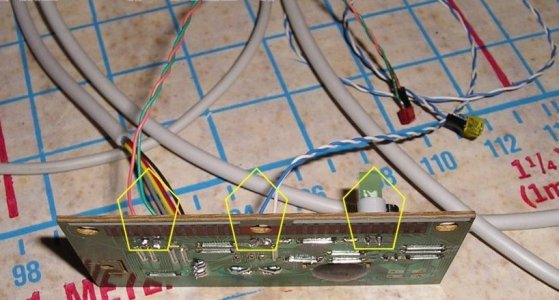
Pentagons show the location of the LEDs to be desoldered and swapped out, two down…
Get out the hacksaw! I cut blanks for the holes I am going to put in the keys from Plexi-glass I had left over from another project. I cut it about 3/32" thick and about 3/8" long. Then I looked over the keys and saw a place to put a hole for the Plexi. Next came out the drill and a bit just a bit smaller then 3/32". I drilled from the back though and finished out the hole with a knife. The type of hole is optional: I went with a rounded rectangle. The Plexi blank was then filed and shaped to a snug fit in the keyhole. I dry fit it once with it taped a file to push it in the hole. Then I glued it in place a little high, using tape to hold it while drying. After the glue set and dried completely, the plexi-glass should then be shaved with a sharp razor blade, until it is even with the key. Now tape over the plexi area of the key to keep it looking good until you mask it for paint or the finish of your choice.
This is not easy to do, but with patience it can be accomplished. The key is to have a spare keyboard – then you can take as much time as you need to do this right. The LED change is straightforward, the key alterations are where thought is needed to get the right placement. I wanted to write more detail into this section for the key window, but the variables were so great that I couldn't come up with precise steps that would be helpful. My best suggestion would be to read all of this keyboard modding and see if what I did to gives you some ideas to help you create the perfect keyboard to compliment your system. The photograph is of the blanks, the plexi-glass, the number lock key with the rough hole, and one of the LED's I used. I didn't show the back, as about every keyboard is different. The other photo is of a finished key and the file with tape on it to position the plexi while gluing. The next photo shows one finished key before hiding it under a protective layer of tape.
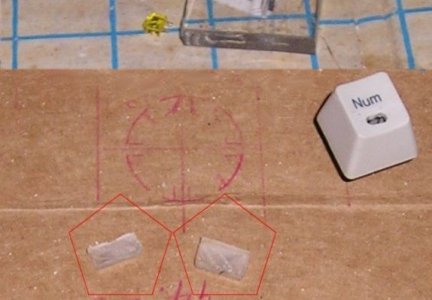
Pentagons show the cut plexi to be installed into the key
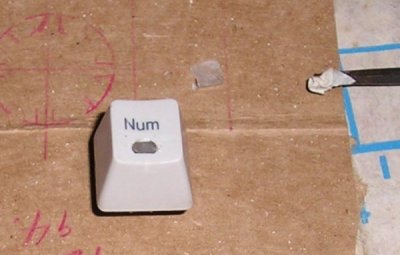
Plexi installed and ready to be masked off for painting
Lighting up the underside of the keys! Now for a direct accent that is just for fun. I put more LED's in this thing for mood and matched them to the case. I have changed the color, and the LED light, as well as their place on my keyboard. Now I want to add some underlighting, or backlighting. I gather up the parts for this section of the project. I am using LED's for this, but I have seen EL wire used to light a keyboard also. I used LED's because the keyboard has a 5 volt supply in it. Remember to use a calculator for the resistor needed, this set up needs to be parallel because of all the LEDs. You may want less light, brighter or different colors, which will change the values and wiring pattern.
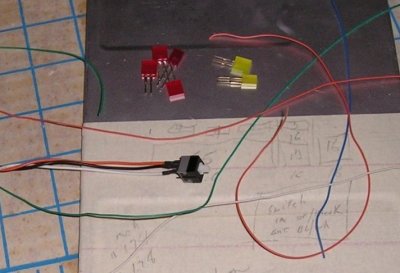
Parts needed to light up the underside of the keyboard
A switch was needed in my case, because the system is in the bedroom, as well as it will help with the life of the LEDs. I found that this switch in the photo was a perfect fit for the hole that guided the key, and I had a turbo key that was never used that could be converted to this switch. As for your keyboard, most of us have a key that isn't used (scroll, printscreen, etc.). So I wired up the switch with leads and shrink tubed them. My other thought on a switch was a switch on the back of the keyboard by the cable where it was hard to see.
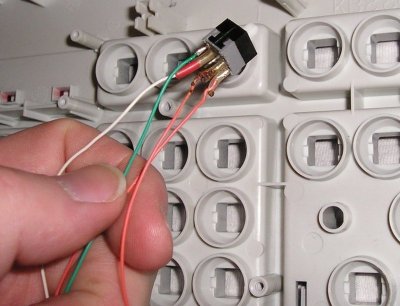
The LEDs will be wired to an on/off switch
I had to cut down the back of the key to keep the same height, and then I cut a small piece of wire insulation (the softer the better) that fit the post of my switch. After that I heated up the gluegun and glued the insulation into the center of the key, and let it to cool. The hot glue works great, as it is still a little pliable. If you don't get it right the first time, remove the glue and try again. The next step is wiring it all together with the resistor and connection to the main cable power.
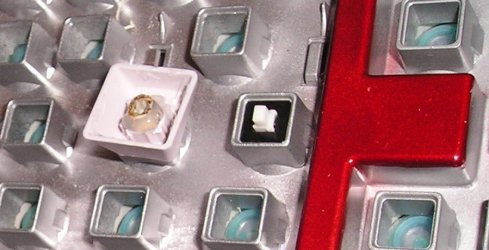
Switch installed and the modded key shown upside down beside it
The keyboard is then drilled for the LEDs to go from the underside of the keys to the inside where the wires are hidden. Then I wire up the LEDs with wire to reach the switch with room extra to run it out of the way. I then bent the leads of the LED to make it lay flat against both sides of the top. When done it looked sort of like a Z or U- shape depending on where the LED laid in respect to the hole and the run of wire. As each LED is fitted to the board it is checked to see how the wires are run to the switch. I can say this is important, as I had to rewire one because of short leads.
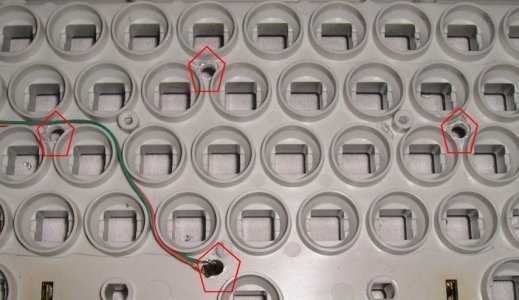
Pentagons show where the LEDs will be installed
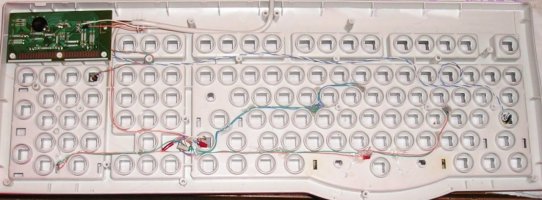
Keyboard base showing the wiring to the LEDs
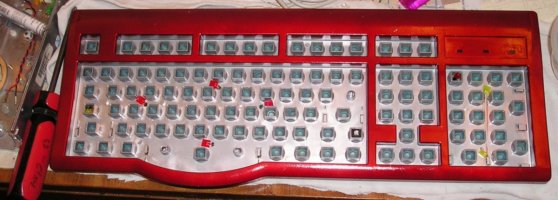
On/off switch and LEDs completely installed
