IN WIN GRone Full Tower Computer Case
Installation Impressions:
I did not install a complete system into the GRone, as installation is pretty straight forward and with it’s more than adequate space and cable management features this full tower case will be a breeze to work with. However, I did try several features that the GRone has that were sure to be of interest, and will touch upon those areas in the following part of the review.
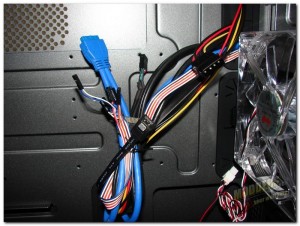 Like all cases, the IN WIN GRone comes with it’s fair share of cables that will have to be connected. This bundle of cables and wires includes:
- Power button, Reset, and various LED connectors
- EZ-Swap Dock SATA and power connectors
- HD Audio connector
- Fan controller 4-pin molex power connector
- USB 2.0 connector
- USB 3.0 – 20 pin connector
Of course with five pre-installed fans in the GRone there are a few fan connectors to be factored in as well.
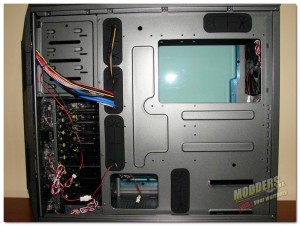 Looking at the backside of the chassis we can get a better look at the provided grommeted cable management holes. As you can see the GRone has five fairly good sized rubber grommeted cable holes to help us manage our wiring and cable management with ease.
This is not including a large open hole (without the grommet) at the bottom, nor does it include the massive CPU rear access hole. Since I brought up that massive CPU rear access hole again, I will ask you why I think it is that large … can you say dual CPU motherboard? Yep, That is why I think it is there and I again give kudos to IN WIN for thinking of it.
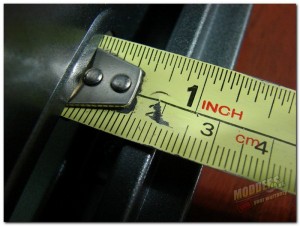 Depending on where exactly you place a tape measure, you will find you have approximately 1″ of clearance between the backside of the chassis and the side panel. Which should give you more than enough clearance for your cables and wires.
Note: At the large CPU access hole, it will still depend on the thickness of the CPU cooler mount that you use in what size fan you will be able to use. I am thinking 20mm thick at the most. If you can squeeze a working 25mm thick 120mm or 140mm fan in there, then that would be a plus for you.
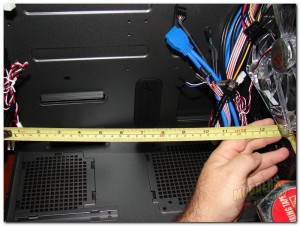 Running a tape from the expansion slots to the HDD cage I get right at 14 1/4″ without the fan and a tad over 13 1/2″ to the fan on the HDD cage. So, the 365mm claim by IN WIN holds true as that is just a tad over the 14 1/4″ that I measured with my old tape measure. With that said bring on that monster video card, the GRone can handle it.
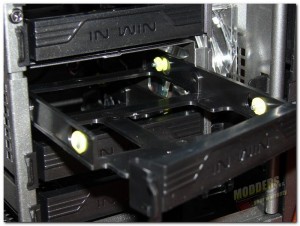 Finally I get back to the HDD cages and the installation of the HDD into the slide out HDD/SSD carriage. Just push the carriage door’s latch slightly to the side and slide it out. You can see the yellow rubber grommeted pins that will be holding the HDD in place.
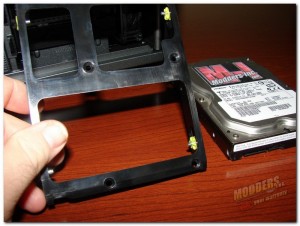 Looking at the bottom of the drive carriage you can see the four screw holes that you would use if you were to use a 2.5″ HDD or SSD. These four holes are countersunk and the screws should go in through the bottom.
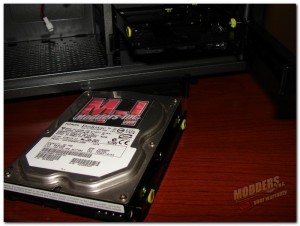 In this image you can see that to install the 3.5″ drive you simply spread the plastic carriage apart and move the drive to where the pins fall into the drives screw holes. I left the right side of the drive sitting on top of the locking pins, but from here just pry it open and let the drive slide down until the pins slide into the screw holes on that side.
Then just slide the carriage back into the cage and hook up your power and drive cables, these days most likely your SATA cables. Then your good to go.
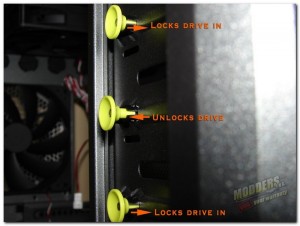 Now, we move to the installation of the 5.25″ optical drives. As I pretty much explained earlier the locking mechanisms on the GRone are a push / pull type. This picture shows what they look like in each position. The middle lock is now ready to for the optical drive to be slide into place.
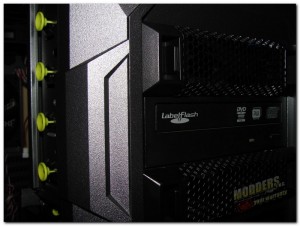 Once it is in place just push in the front and rear locks and the drive is locked into place. Your drive is now securely installed and ready for your cable installation. I was impressed at how well this push / pull type locking system worked, not only was it easy, but the drive seemed to be firmly in place.
Of course for those die hard anti shake folks, there are screw holes on the opposite side to screw the drive down tight.
There you have it a quick rundown on the installation process, minus the motherboard install which should be as easy as anything else I have shown you. All you have to do is decide which hardware and motherboard to put into this beast of a case, the IN WIN GRone.
[dhr]
