PC Cases / Accessories

IN WIN GRone Full Tower Computer Case

« Page 3 | Page 5 »

Interior Impressions Part 1:


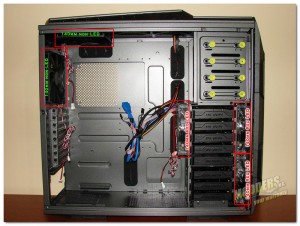
GR1 inside look  Once we remove the side panel we get our first glimpse of the spacious chassis that the IN WIN GRone provides us.

  As you can see from this image, the GRone comes with five pre-loaded 140mm fans. Two of which are black non-LED and three that are RED LED fans. More about the fans a further in the review.


Related Articles


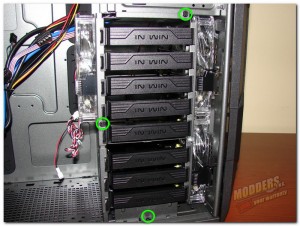
GR1 HDD cages  First we will hit upon the HDD / SSD cages. That’s right I said cages, as in plural. IN WIN has divided the HDD cage into two separate removable cages for more expandability.

  The three screws circled in green are the screws you will have to remove to separate the two HDD cages.

  Not only are the cages removable but they are also tool-less when using 3.5″ drives. Later in the review I will expound upon the installation of the drives a bit.
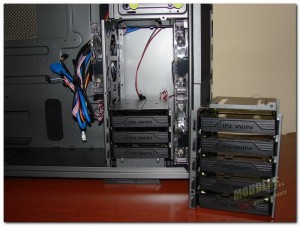
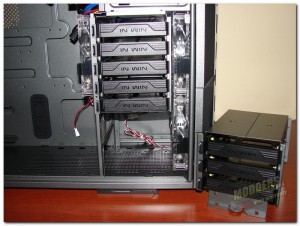


 GR1 upper HDD cage  You need only to remove the top two screws in the above image, to remove the upper HDD cage. The top HDD cage contains five slots to add your HDD / SSD drives. This image shows what the chassis will look like without the top HDD cage. 


GR1 bottom HDD cage removed  To remove the bottom HDD cage you will have to remove the top HDD cage first, the take out the third screw located in front of the bottom HDD cage. Slide the cage forward and tilt it slightly toward you and lift it out.

  This bottom HDD cage holds up to three HDDS / SSDs. It will also have to be removed if you wish to add two intake fans on the bottom panel of the case, or if you plan on using a 240mm radiator for water cooling.

  I must say that I do like the advantage of being able to remove the HDD cages, and the ability to choose which one just makes it that much better.
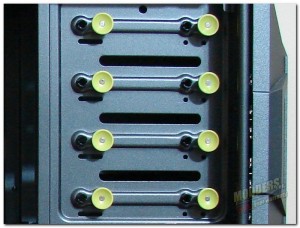
 

 GR1 optical tool-less bays  Above the HDD cages we have the tooless optical drive bays. They use a pull / push type pin locking mechanism. Pull out to unlock the drive push in to lock it in place.

  Note: As I mentioned early on there are only three external accessible 5.25″ drive bays, however, there is one more internal 5.25″ drive bay. Why? Not sure … but you could use it for adding a single HDD/SSD (using a 5.25″ to 3.5″/2.5″ drive adapter) and remove both HDD cages for modding purposes or even just use it for more space for your 360mm water cooling setup at the top of the case. Either way I think it is cool to have the option open.
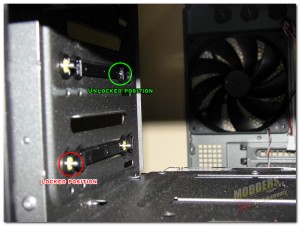
 

GR1 optical pins  Here we can see what the optical drive locking pins look like. When locked they will be inserted into your optical drive, the red circle shows the locked position. The green circle shows the unlocked position.

  I will have bit more to show on this in the Installation Impressions.


[dhr]
Previous page 1 2 3 4 5 6 7Next page
Show More
Please Support Us, Every Purchase Helps Keep the Site Going Please Support Us, Every Purchase Helps Keep the Site Going
Back to top button