The UEFI BIOS and GIGABYTE APP Center
Gigabyte APP Center
All new motherboards come with several programs and utilities that you have the choice to install. Although things such as Norton I’d consider bloatware, Gigabytes App Center is filled with useful programs that make the user experience much better. In the App Center, you’ll find programs such as RGB Fusion, EasyTune, EasyRaid and many more. All programs can be updated directly from the app center. There is even a section for third-party apps in the App Center as well. Over the last few generations, I have noticed vast improvements to the App Center as well. On my Z270 Gaming 5, the App Center would never open. If I needed to use anything in the App Center, I’d have to run the install program and uninstall, then reinstall it. On the Z370 boards I’ve tested so far, the App Center has worked flawlessly.
RGB FUSION
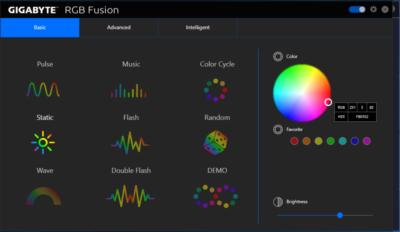
The more I see it, the more RGB lighting grows on me. I’ve always said that when done right, RGB lighting can look great. Another huge part of any RGB ecosystem is its software. The RGB fusion software is very user-friendly. It has two modes, basic and advanced. Although the Z370N WIFI doesn’t have RGB lighting on the board, there are two RGB LED headers on the motherboard. I was able to daisy chain 5 RGB fans off one header. I could have done more, but I ran out of space for fans. The RGB Fusion software comes with nine different lighting effects. The effects are Pulse, Music, Color Cycle, Static, Flash, Random, Wave, Double Flash, and Demo. To the right of the basic presets, there is the color wheel, seven spots for favorite colors, and brightness control. When using RGB fusion, you can also sync any RGB Fusion compatible peripheral, graphics card or accessory to the lights connected to your board. Not only GIGABYTE products either. My G. Skill KM780R can sync with the RGB Fusion software.
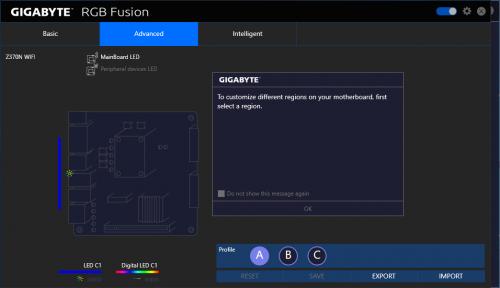
In the advanced section, you can customize each header to different colors and effects. There are also three separate profiles. You can set each profile for different scenarios. I have profile A set to a static color, profile B set to run the color wheel, and profile C has all lighting off. You also can import and export additional profiles to and from where ever you store things like lighting profiler.
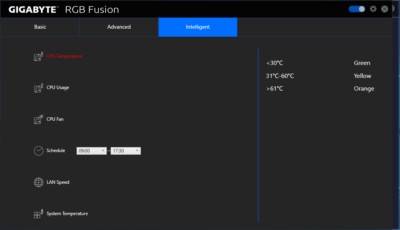
The intelligent section is cool and has some very useful information. In this section, you can monitor CPU temperature and usage, CPU fan speeds and system temperature. These are the four temperature sensors on the Z370N WIFI. You are also able to monitor LAN speeds and set a lighting schedule. RGB Fusion gives you the ability to set a specific time the RGB lighting will be on and go off. Overall, the RGB Fusion software is responsive, easy to navigate and use.
Gigabyte EZ TUNE
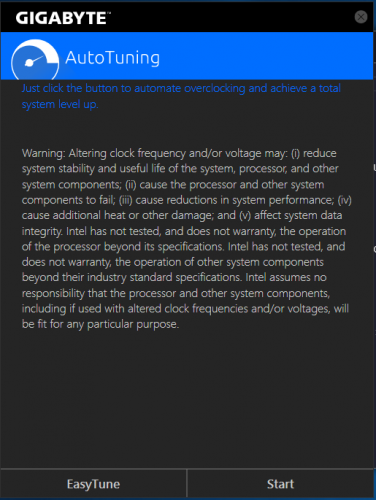
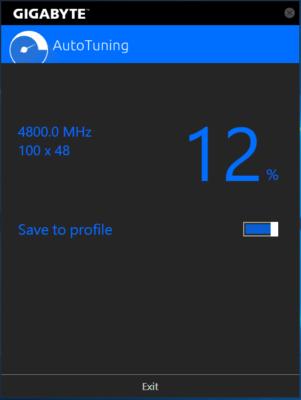
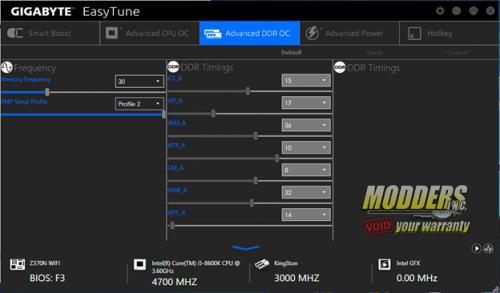
Until recently, if you wanted to overclock your CPU, it could only be done in the BIOS of your motherboard. If your processor had a locked multiplier, you were stuck to BLCK overclocking. That’s if Intel didn’t have that feature locked. The programs such as Intel Xtreme Tuning Utility, or XTU, gave the user the ability to overclock your CPU, and even tweak the voltage on the desktop. Now, to make overclocking as easy as the click of the mouse, we have Gigabytes EZ Tune software. This allows you to set your CPU to a few presets. In addition, you can use the auto-tuning feature to have your system overclock itself to the highest, but most stable overclock settings. Not that I’d recommend you use auto-tuning, then call it a day. But, especially for the less experienced overclocker, it can give you a good base to start at when overclocking in the BIOS. You can even manually overclock the memory in the EZ Tune software. Our retail 8600k was auto-tuned up 12%, to 4.8 GHz and was running at about 1.23 volts.
The UEFI BIOS
The Fist BIOS released for the Z370N WIFI was BIOS F1, released on 9/26/2017. That is the BIOS version shown in the screenshots. However, for testing, we always use the most up to date BIOS. In the case of the Z370N WIFI, its BIOS F53, released on 03/08/2018. This BIOS is designed to improve XMP DDR compatibility, as well as PCIe SSD compatibility. The UEFI BIOS has two settings, advanced mode, and Easy Mode.
UEFI, or Unified Extensible Firmware Interface, a software interface between an operating system and platform firmware. UEFI replaces the Basic Input/Output System (BIOS) firmware interface used in older motherboards. In the UEFI, you can set the basic and advanced functions of your motherboard, as well as update the BIOS. You can set the boot order of specific drives, set fans curves for fans plugged directly into your motherboard and my favorite past time, overclock your CPU to name a few.
Gigabyte has always done a great job on their BIOS. Ever since they refreshed their BIOS and added features such as the Gigabyte App Center and their EasyTune software, the BIOS has gotten even easier to use. When your first set up your system, the BIOS is in Classic Mode. However, dragging the pointer to the bottom of the screen will pull up another menu with a few options. These options are Easy Mode, language select, Q-Flash and Smart Fan. There is another pop-up menu to the right of the screen. This pop up displays the current frequency and voltage of the CPU and the memory.
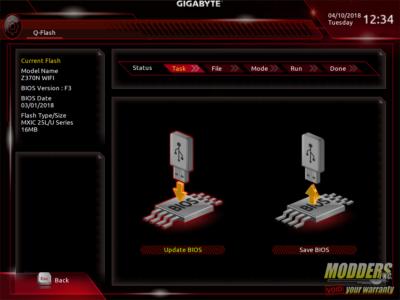
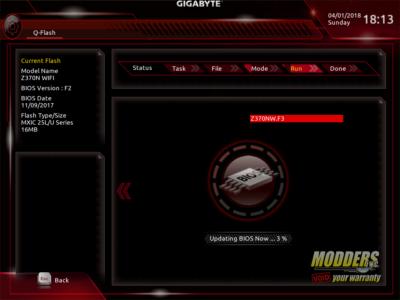
The Q-Flash section can be reached through a pop-up menu on the bottom right-hand corner of the screen. Also, in this menu are Easy Mode, the language selection, and the Smart Fan 5 menu. The Q-Flash section is where you update the BIOS. There is also a section where you can save different BIOS settings.
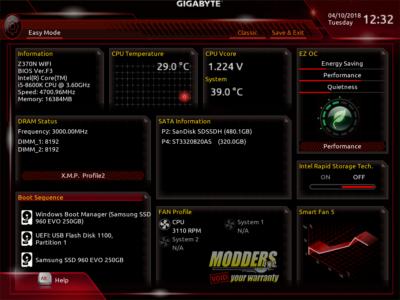
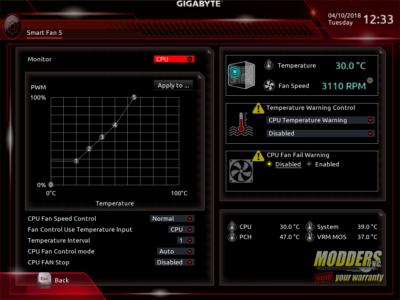
In Easy Mode, you can monitor system fans, rearrange the boot order, check temperatures and voltage, and enable or disable X.M.P. profiles. Advanced or Classic Mode has seven main sections. They consist of M.I.T., System, BIOS, Peripherals, Chipset, Power and Save & Exit. Smart Fan 5 allows you to individually set fan curves for each fan plugged into your motherboard, including the CPU fan. You can also set a temperature control warning so, if a certain sensor gets above a set temperature, the corresponding fan will ramp up its RPM.
The first section, or M.I.T., is where you can set frequency and BLCK settings for the CPU. Essentially, this is where one would overclock their CPU. This is also where you can enable or disable X.M.P. profiles, adjust memory timings and frequencies and adjust the voltages.
The system section displays basic system information. This includes things such as the current date and time. Here is also where you find the model number of the board. Lastly, this is where the BIOS version, date and ID can be found.
The BIOS section is where you can set boot priorities. You can also enable or disable fast boot and set the mouse speed for the BIOS. The stock speed of the mouse in the BIOS is very slow. The next section is the peripheral section. This is where you can configure basically anything connected to your motherboard. For example, SATA, USB and NVME configuration just to name a few.
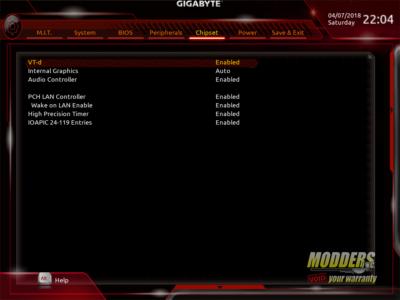
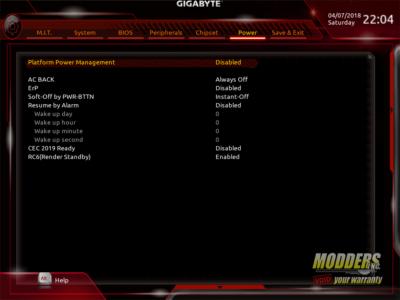
The Chipset section is where you can enable or disable things such as the onboard audio, the internal graphics, and the different LAN controllers. The Power section has exactly what is say, several different power settings. The Save & Exit section is how you exit the BIOS. However, they give you several options before you do. This is also where you can override the boot priority, but just this one time. The next time you boot, it’ll go right back to your first in the boot order.








Am I able to remove the WIreless AC card from this Gigabyte Z370n Wifi board to replace it with another module I’d like to upgrade to?
Tyler, yes you can. look at near the bottom of page 3. It shows it in the pictures. Also, thank you for reading our review.