Gigabyte Z170X-Ultra Gaming Review: Rebel Without a Pause
UEFI Overview and Overclocking
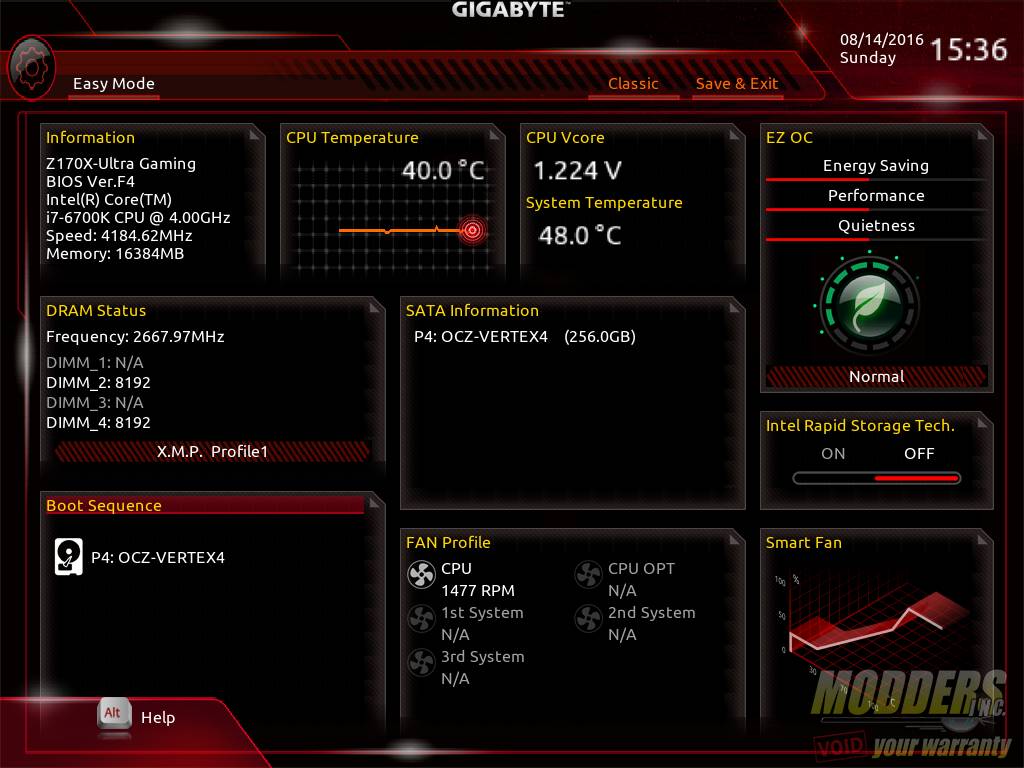
This UEFI overview shows the F4 BIOS (latest non-beta version) available at the time of review (1st week of August 2016). Gigabyte has once again revised their UEFI layout, now simplifying it even further for convenience. Two layouts come standard with the new UEFI. With the F4 update on the Z170X-Ultra Gaming, the default is in classic mode, but users can switch to Easy Mode with a quick click.
Easy Mode:
This Easy Mode shows a single page overview of basic customizable settings as well as a quick monitoring of CPU, system temperature and plugged-in components. Each setting can be expanded with the click of the top right corner of each tab.
Classic mode:
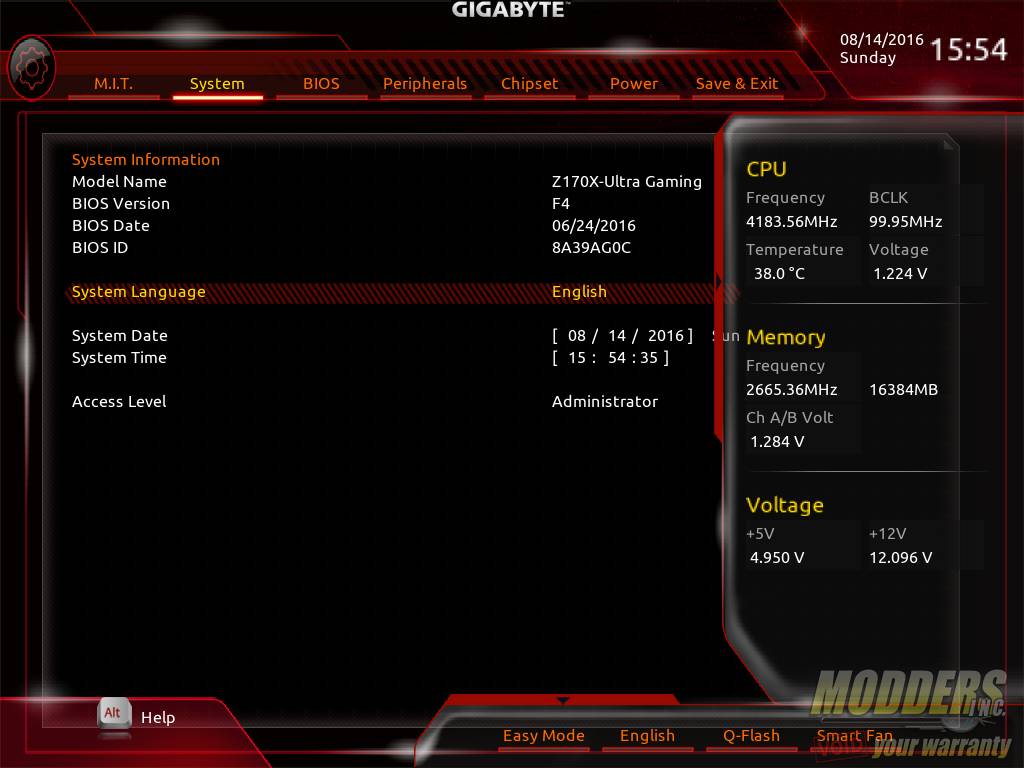
The first default screen is the System Information tab. No information can be changed here other than system language, access level as well as date and time. This is actually the second tab in the Classic mode menu. A hidden menu showing the current system settings are also available to the right and other embedded UEFI features are accessible via a hidden menu on the bottom.
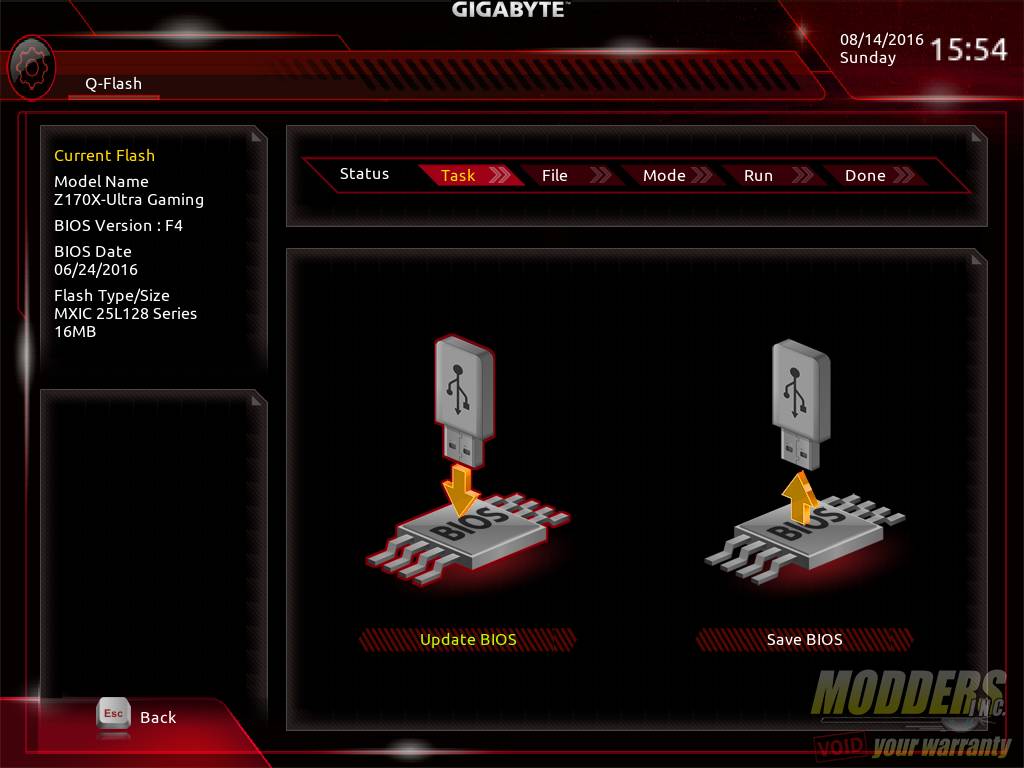
The Q-Flash feature has been updated with a much simpler layout and allows for saving or recall of BIOS settings. A drive plugged into the USB ports is required but it does not work on the USB Type-C port.
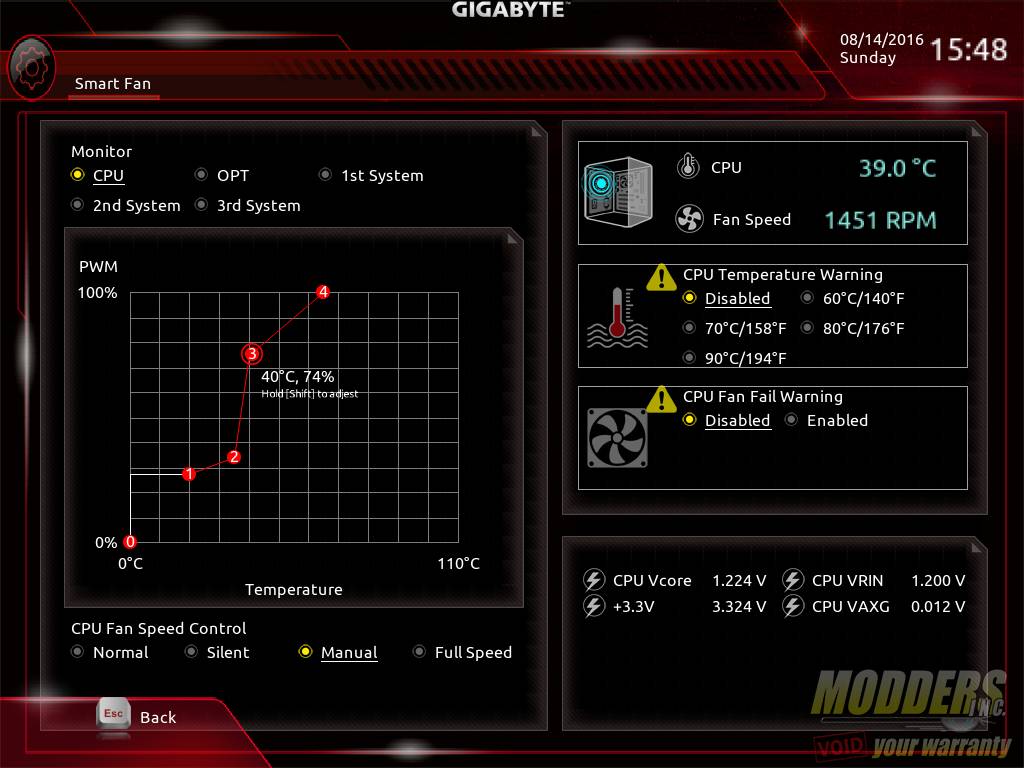
The Smart Fan options are also new, now providing a graphical custom fan curve for users to adjust plugged in fans. As noted in the overview, only the CPU_OPT and SYS_FAN2 headers have DC voltage control for 3-pin fans.
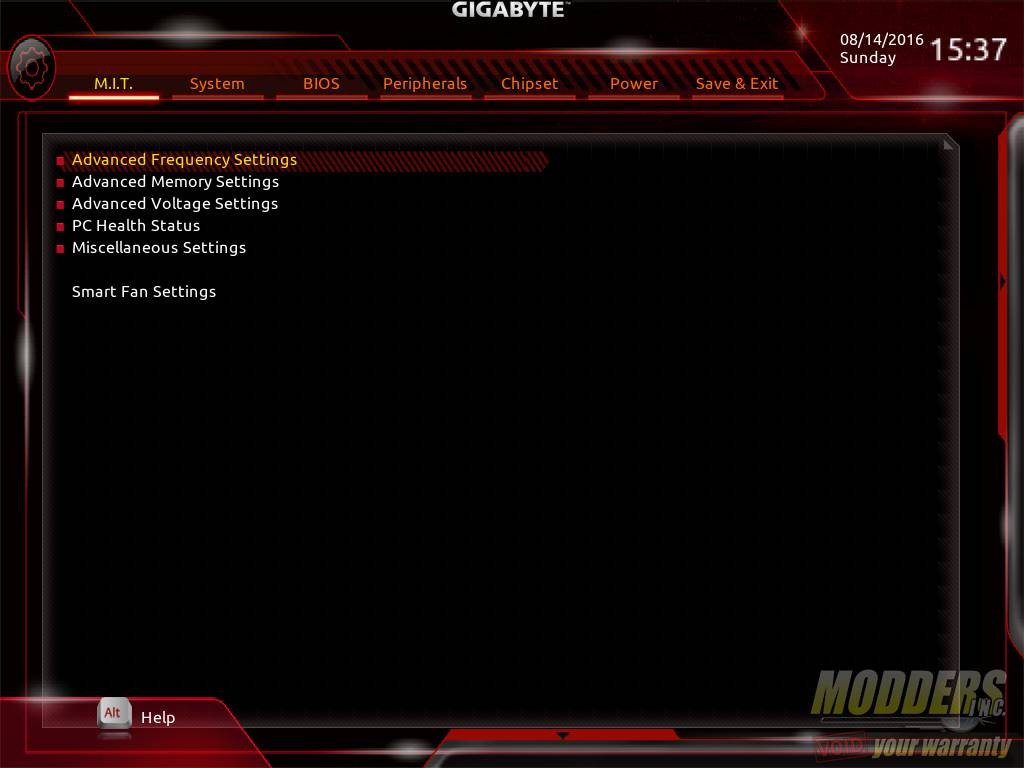
The Motherboard Intelligent Tweaker or M.I.T. tab is where users can overclock their CPU from. All the overclocking settings you need are in this tab including fan control for keeping the thermal levels in check. There are six sub-menus for adjustments here including a redundant Smart Fan settings option.
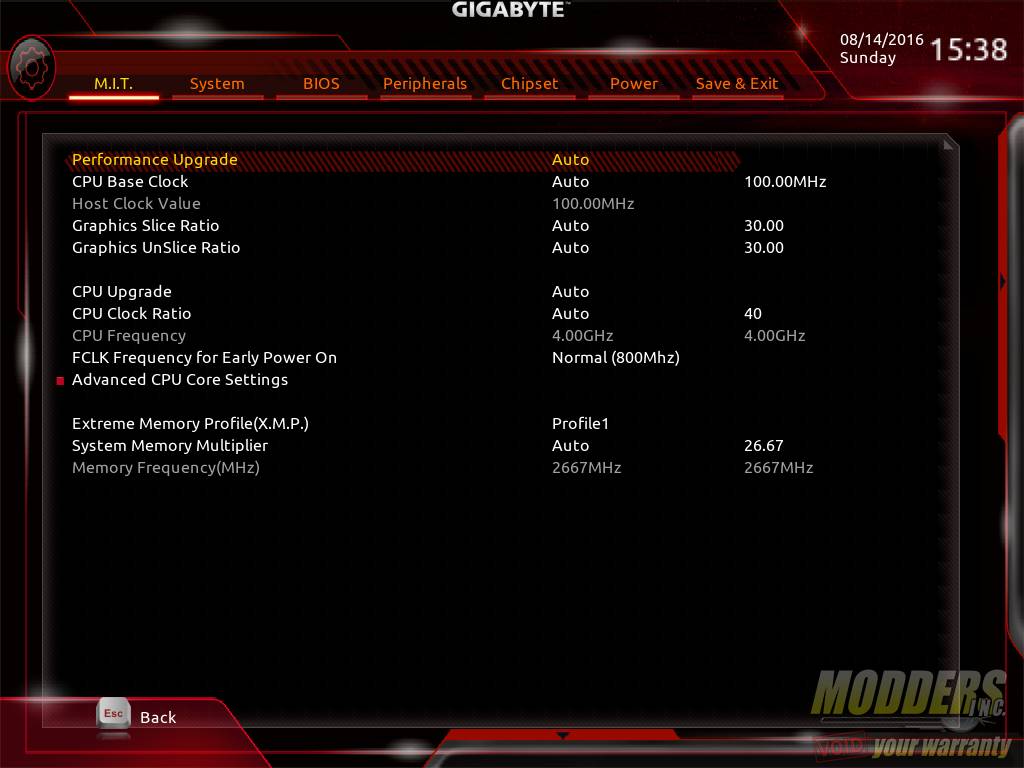
M.I.T.\Advanced Frequency Settings>:This is where overclocking values are changed with options to adjust CPU Base Clock, Integrated Graphics Slice and Unslice ratios , Memory multiplier and a sub-menu for enabling or disabling CPU-specific features. Users can use the PAGE UP or PAGE DOWN keys to increase or decrease values or just simply enter numerical values directly. There is a Performance Upgrade preset (up to 4.7GHz) and CPU Upgrade preset for quick overclocking up to 4.6GHz on the i7-6700K (and some presets for i5-6600K as well). Maximum BCLK adjustment is 500 from 80 and adjustable in 0.01 steps.
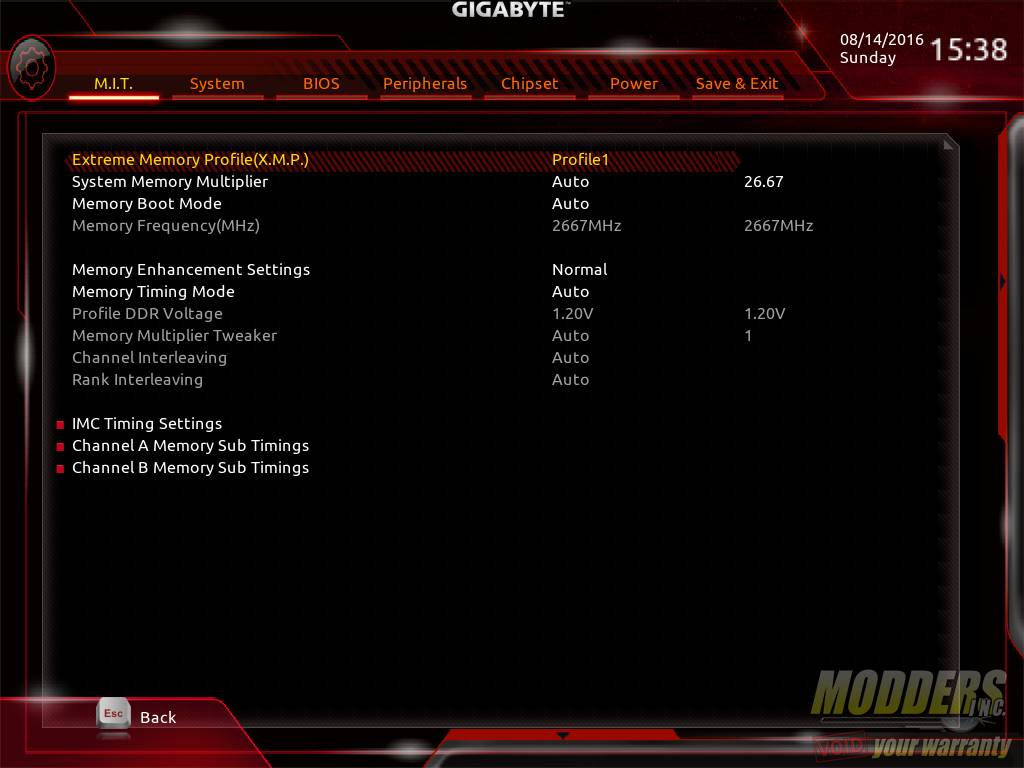
M.I.T.\Advanced Memory Settings>: This is the page for memory overclocking and timing adjustment and allows for memory divider setting up to 4133MHz
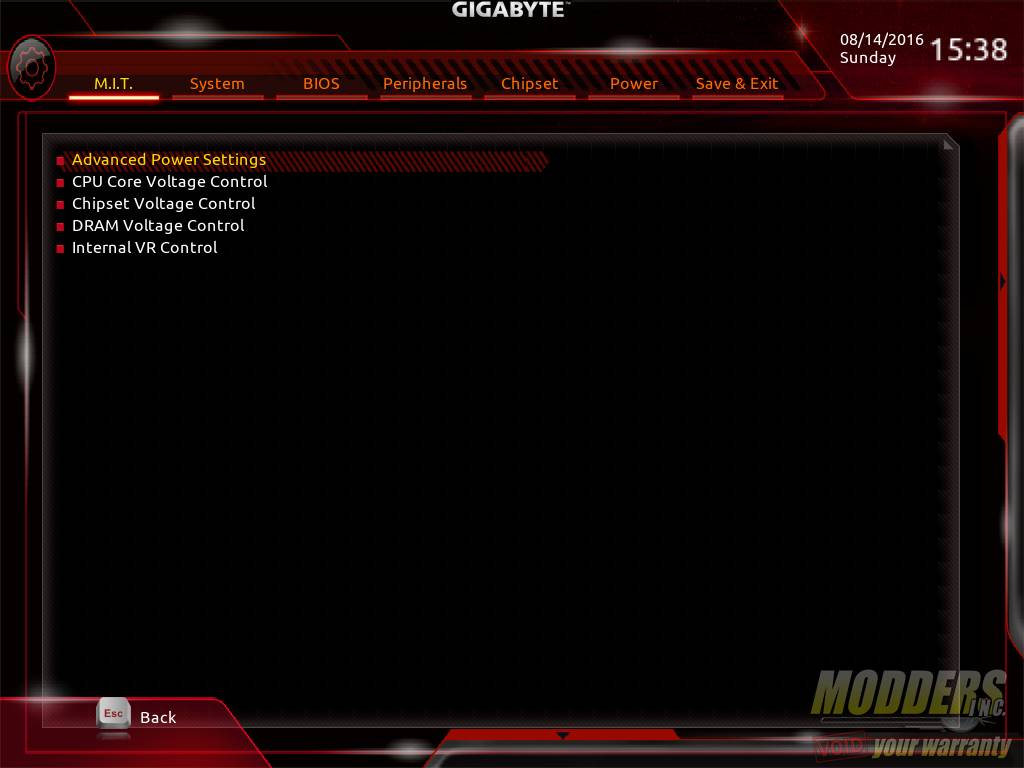
M.I.T.\Advanced Voltage Settings>: This page is for adjusting all the voltage related settings and there are five sub-menus to choose from depending on what to adjust. Advanced Power Settings is where Load Line Calibration is adjusted for the CPU and IGP (AUTO, Standard, High and Turbo).
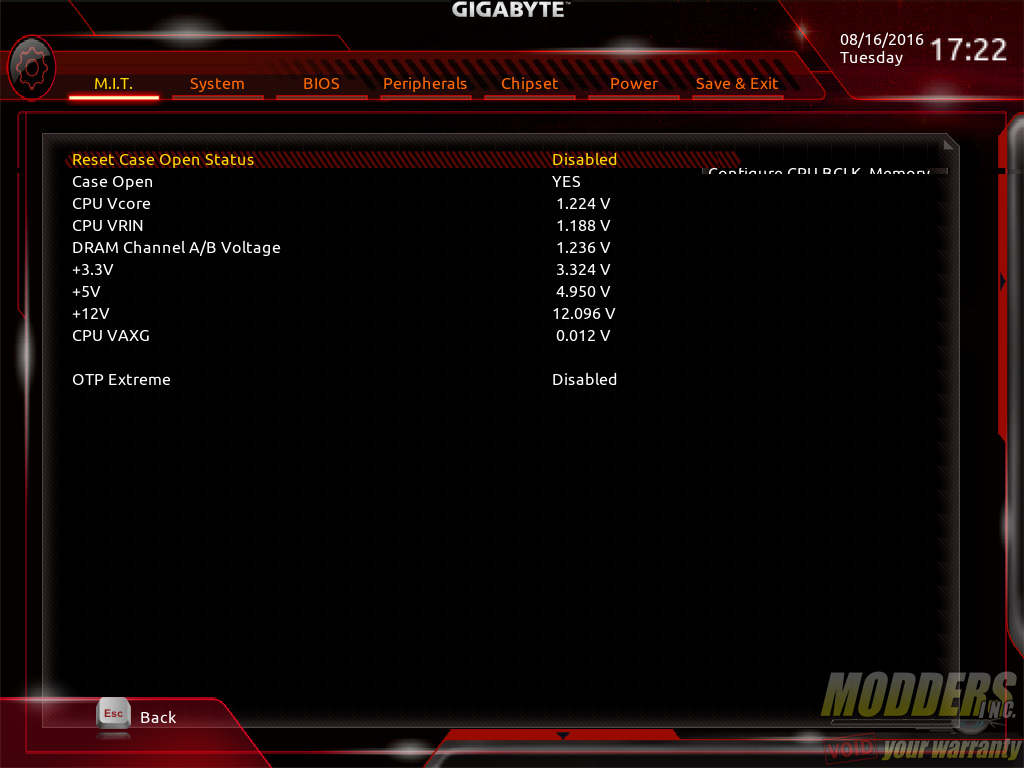
M.I.T.\PC Health Status>: This page contains voltage and fan speed readouts via the SuperIO.
M.I.T.\Miscellaneous Options >: This page only contains two options: Max link speed for PCI-E graphics and 3DMark 01 Enhancement toggle.
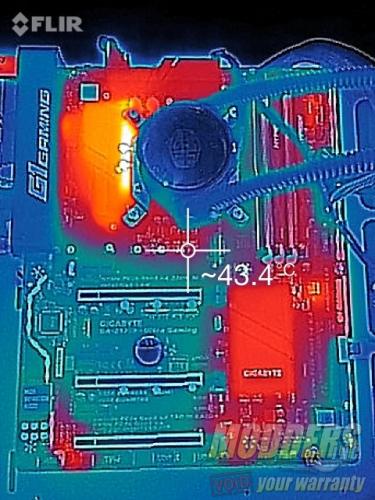
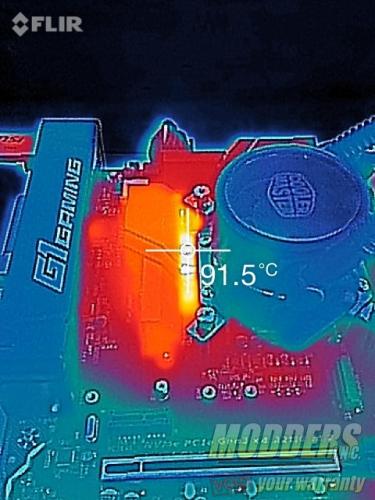
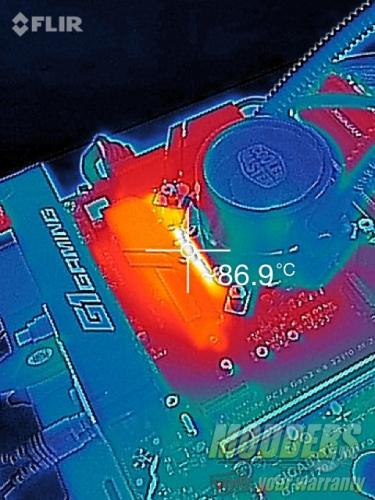
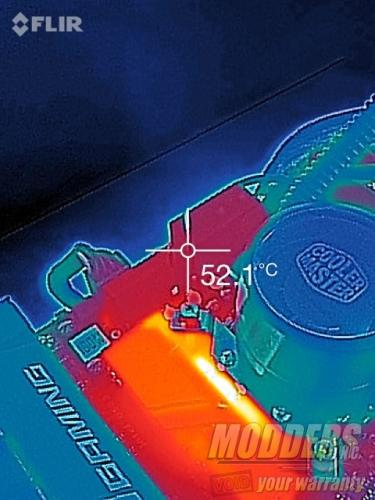
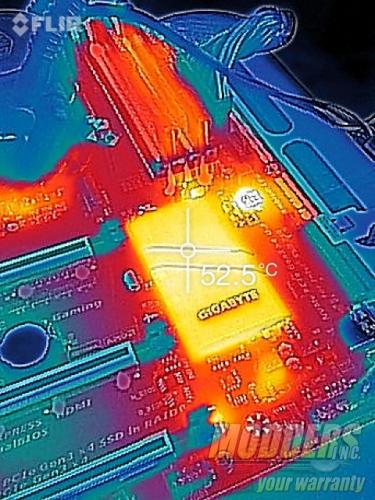
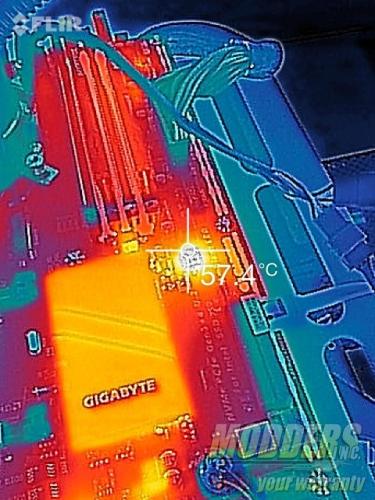
Despite the modest VRM, its not really a problem hitting the usual 4.8GHz @ 1.4V target I use with integrated graphics. This is a reasonable target for high-end aircooling but anything higher requires a considerably powerful cooler. Even the Cooler Master MasterLiquid 240mm AIO I use was not enough and cannot handle the 15 minute load (hits temperature limit after 10 minutes), but a more capable CPU cooler can handle it.
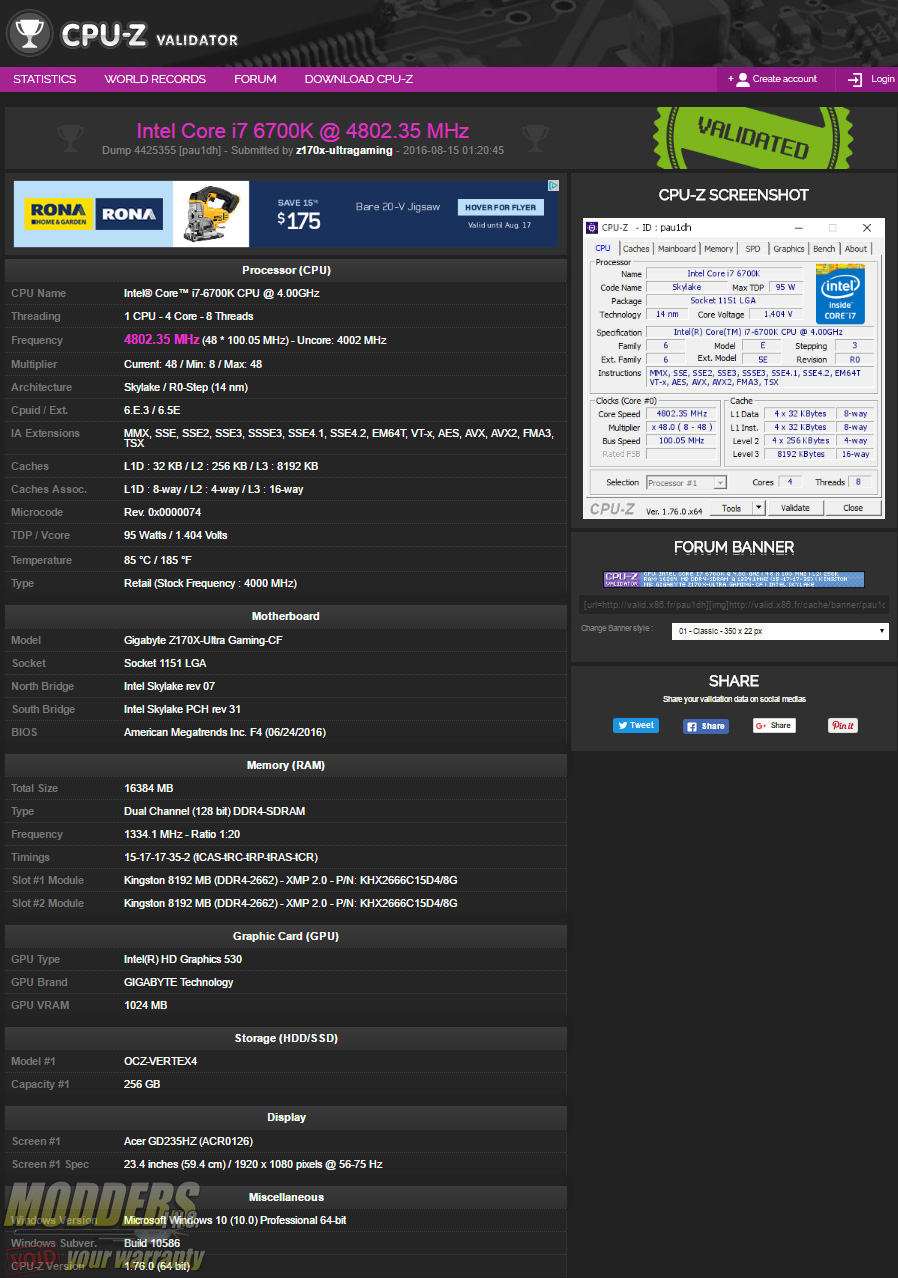
Infrared thermal images under 4.8GHz overclock load after 10 minutes:
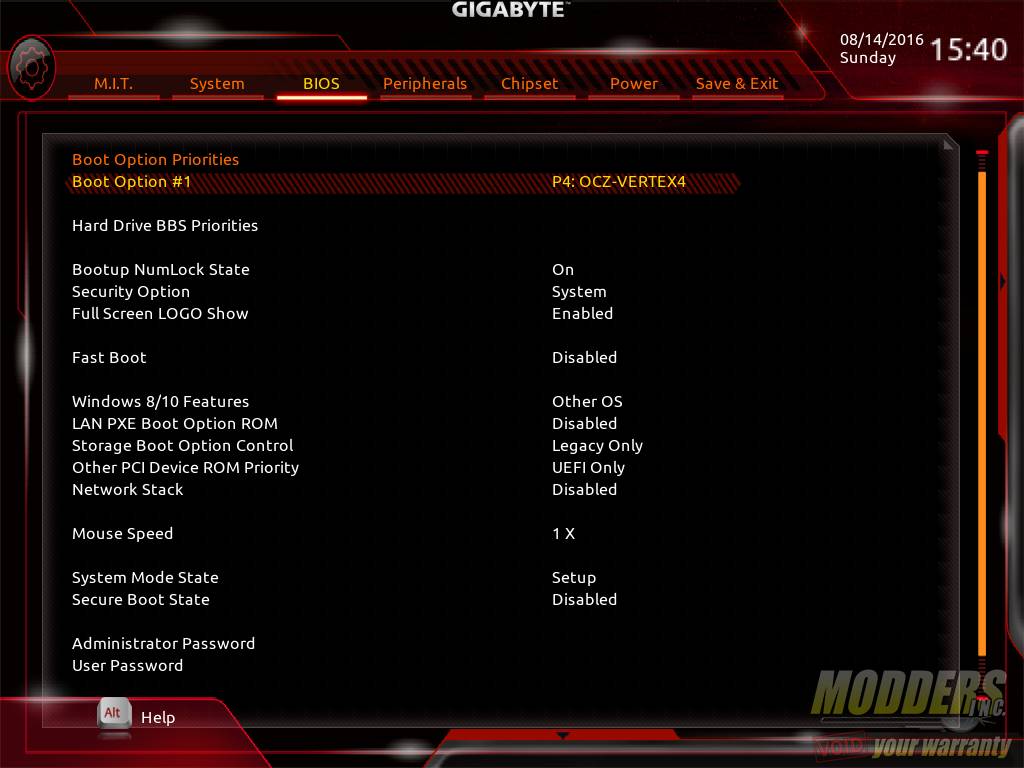
Now onto the rest of the UEFI layout. The third tab is the BIOS features page which allows users to change boot priorities and set other boot options.
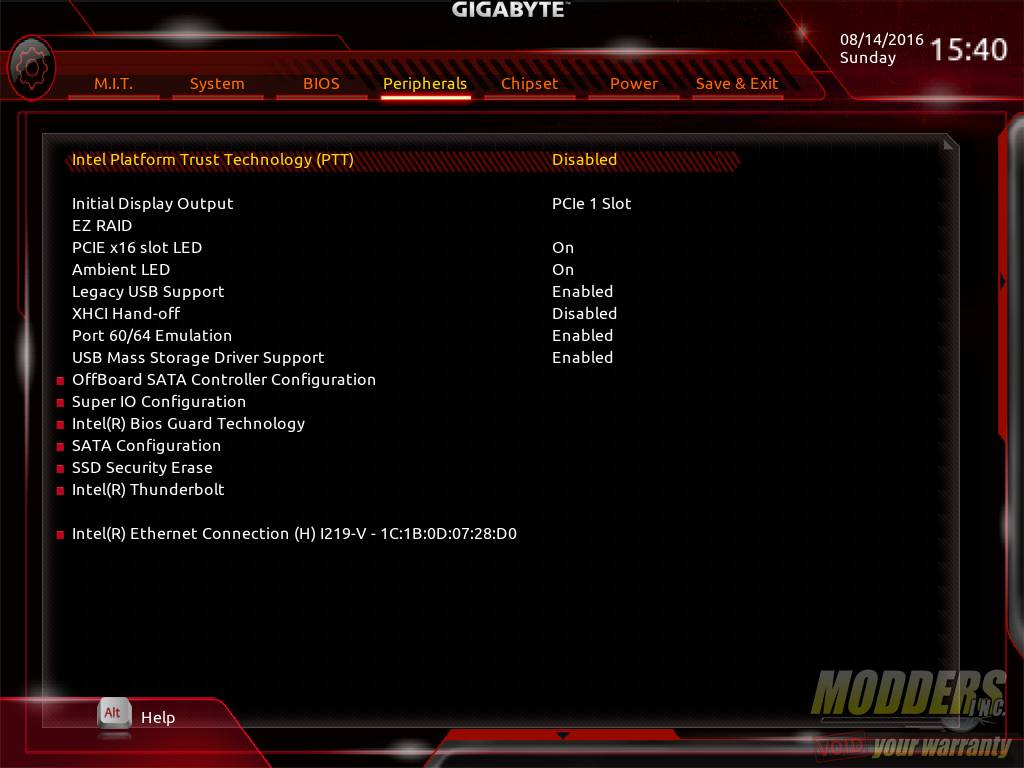
The fourth tab is the Peripherals tab which has the bulk of the motherboard related functions including enabling/disabling hardware such as USB, SATA, display and provides LED control.
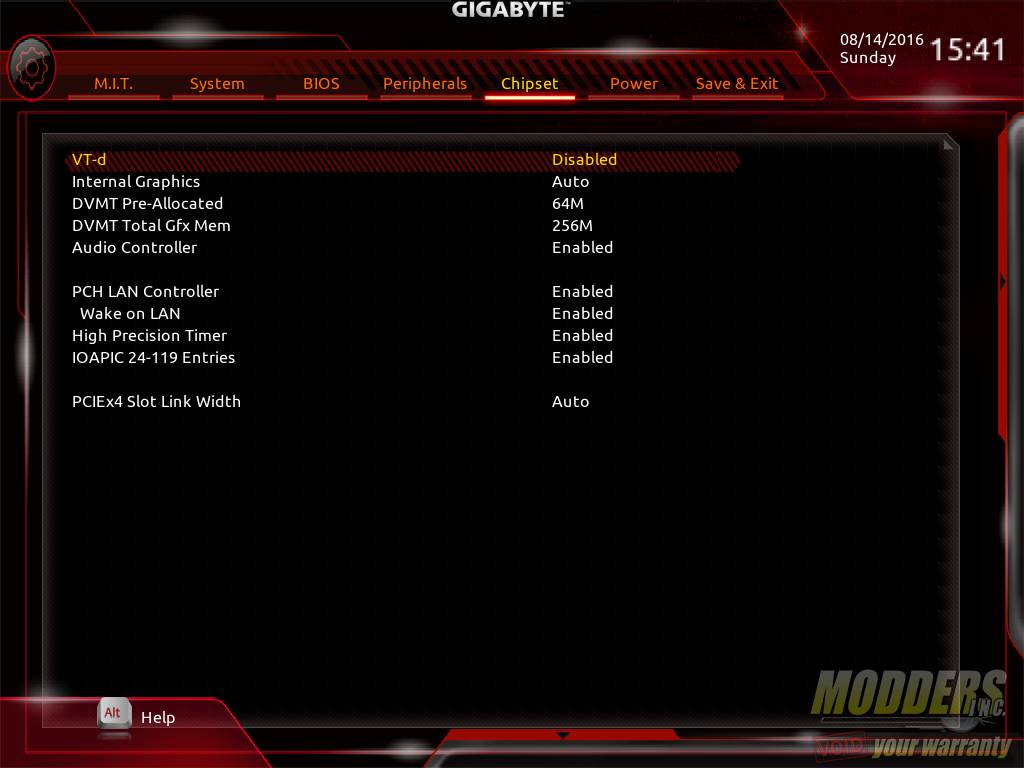
The fifth tab is the Chipset page which toggles features on both the Z170 chipset and CPU northbridge such as internal graphics, audio controller, VT-d and PCH LAN Controller.
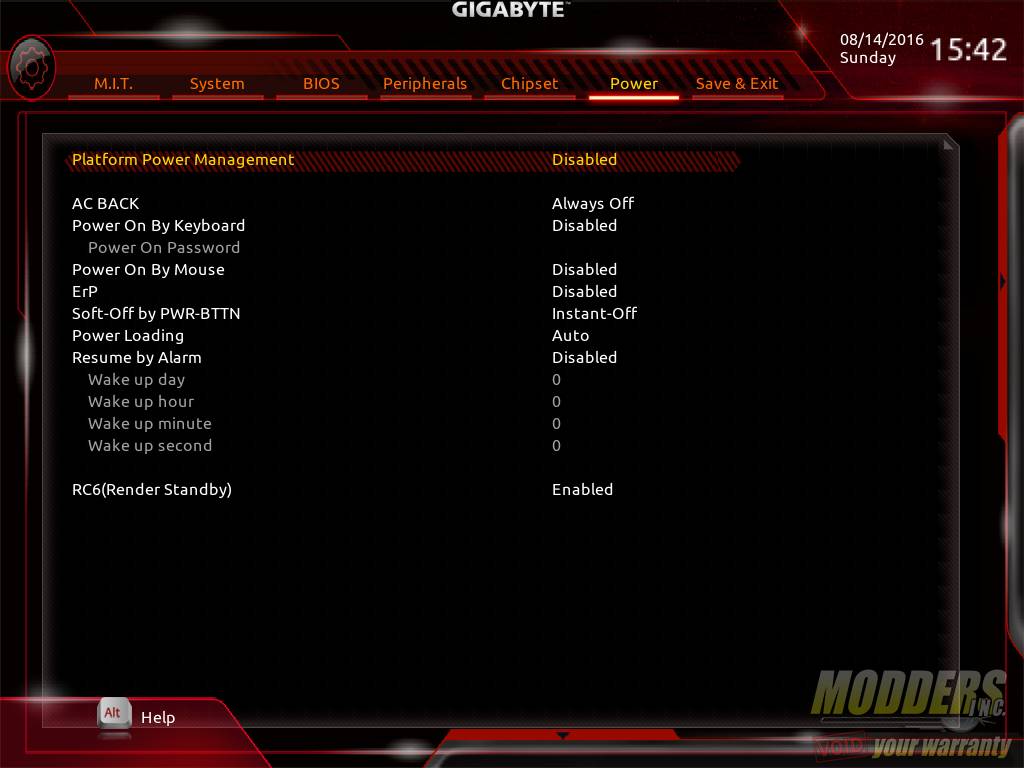
The sixth tab is the Power Management page which enables or disables power saving features as well as several platform power options.
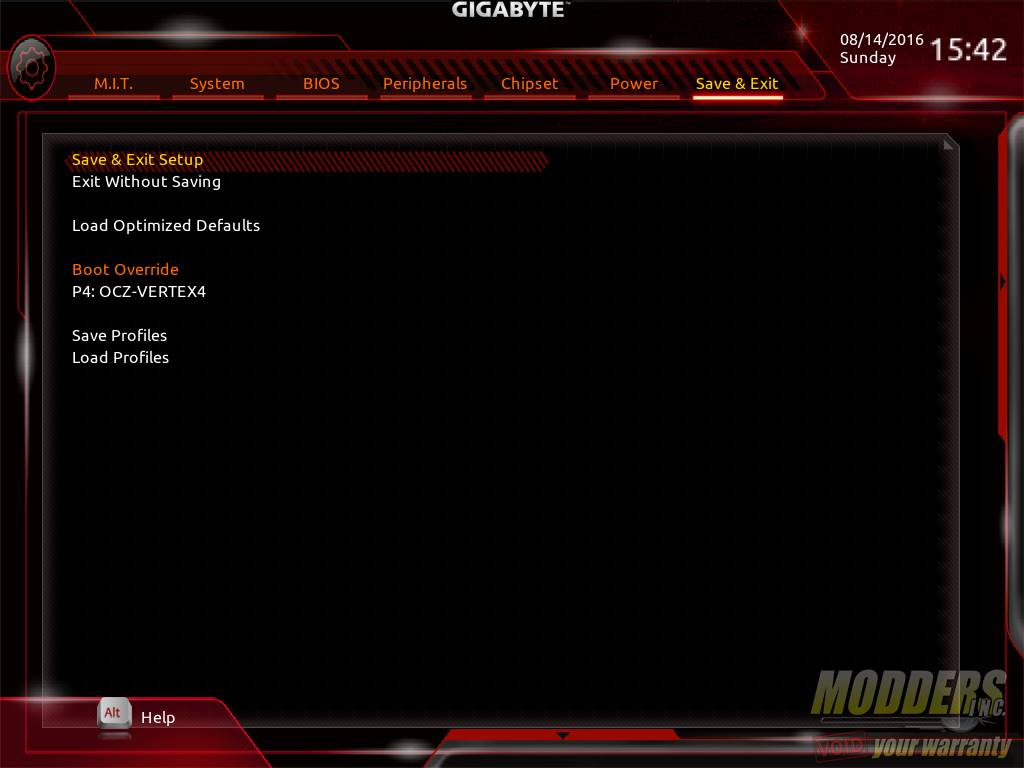
The last page is the Save and Exit page where users can save and exit or save as well as load a profile locally. As with every decent exit page, there is a quick single-click boot override option.







I just got these board to change my hero crappy 8 sorry. nice board. I have a lot of question one is fan header PWM data. if i have a AIO (Capt 360) the pump goes to CPU OP / pump and the fans to CPUfan for the AIO. I have a 3 pin to the rear and 2 front PWM. one on 3 and 2 (pump dc control) these is ok? or I have to make some adjustment. since I want to get a fan hub to put the front in one so i can connect direct to 12volt. your article is clear, but i am not a savvy guy for these. Any help or links will be great top get point on the right purchase direction and knowledge!!! thanks guys
Hi Carlos, sorry I didn’t see this comment earlier. For AIO pumps, it is recommended to run them at full speed (12V). The 3-pin fan is the one you put on the DC control since 3-pin fan speed can only be lowered by undervolting them. The 4-pin PWM of course you put in PWM fan headers and run it with the preset you want. Putting them in a hub, will make them all run at full speed (12V). If you have a 360 so I’m guessing you have 3 fans plus two intake for case and one more for exhaust (6 fans total?). The lowest cost option that I can see is to just get a fan splitter cable for the two front intake fans (so they can share one header) and/or use a molex to fan header adapter to fan connector plug the AIO pump and whatever fan you want to run full speed. There are 5 fan headers on the Z170X-Ultra Gaming motherboard so one two-header splitter (for the two front case intake is recommended) is enough to fit all your needs if you have six fans.
Sample of a fan header two-way splitter (can connect one header to two fans), there are cheaper options out there on Amazon and Alibaba as well: http://www.newegg.com/Product/Product.aspx?Item=9SIAABJ4666313&cm_re=fan_header_cable-_-12-162-026-_-Product
Here are some more options for splitter and/or molex-to-fan connector: http://www.newegg.com/Product/ProductList.aspx?Submit=ENE&DEPA=0&Order=BESTMATCH&Description=molex+to+fan&ignorear=0&N=-1&isNodeId=1
Some cases, CPU coolers, and power supplies also come with fan hubs for free and fan adapters so you can ask your friends if they have some, maybe they can just give you one. NZXT and Phanteks for example have fan hubs built in most of their cases.
HI Ron thanks so much for your reply. I did check all ports here testing with fans. if you still have the board. connect a jet flow or similar (as me here) to the Sys_Fan2_pump i use to test PWM and voltage. On PWM you turn off the fan and the lights still on (so there is 12v there(i do not know how to use a multimeter). on voltage regular option I put the fan in 0 and no lights no rotation. is odd. i use 4 fan to test all ports. unless there is a difference on 2000rpm in 7v or 12v is a odd. i also find other software issues. that is fantastic to expand the new trend since more and more these types of boards are more on the market that use front AIO and 2 fans on back. My idea just change since i can do that most people do, and the other is confirm that i can use. so far it is confirm that SYS_FAN1 and SYS_FAN3 are voltage regulated. So the pump can go to the CPU_OPT_PUMP.??? and the fans to the CPU_FAN??
i was thinking on something like these https://www.amazon.com/Phanteks-PWM-Fan-Controller-PH-PWHUB-01/dp/B00M0R05WE/ref=sr_1_1?ie=UTF8&qid=1479365206&sr=8-1&keywords=phantek+fan+hub OR https://www.amazon.com/SilverStone-System-Cables-Black-CPF04/dp/B00VNW556I/ref=sr_1_sc_1?ie=UTF8&qid=1479365273&sr=8-1-spell&keywords=silverstore+fan+hub
The fans where the ML120/140 or the ELOOP ones or if are 3 pin like other brands.
Yeah that Silverstone one looks good. I’m testing something on a different board right now but I could try to build on the Z170X-Ultra Gaming board next week to test out the headers again.
That is great Ron. I have search a lot regarding these PWM fan, what port do what or does not. I can say that I am almost sure that the Fan_PUMP headers are 12volts If you select on bios (F20b) PWM. Since once you restart and anter again the bios and on manual on PWM the lights of my jet flows stay on. (I can not explain) The top one monitor CPU, the one below monitor PCH. The system fan 1 and 3 is confirm voltage regulated. but still odd since, it is my understanding is not 12v, but my fans spins at max speed(my case i have jet flow) so there is 12v signal but on a different distribution. These new ways fo fans pins comes on ALL new gigabyte motherboard at least on mine, the new blue color, designare both x99 and z170, and i bet that will come on the new board on CES2017. It seams that these ways of fans and buids are a new secret. BTW SpeedFan does not work. At least on mine. I have all manufacture apps install. check also monitor software does not work correct, the only one was HWinfo64 I am changing my case and cooler soon. I can wait on your findings from your side to I can make the correct purchase.