Gigabyte 990FXA-UD3 Rev 4.0 Motherboard Review: Old but Gold
UEFI Overview and Overclocking
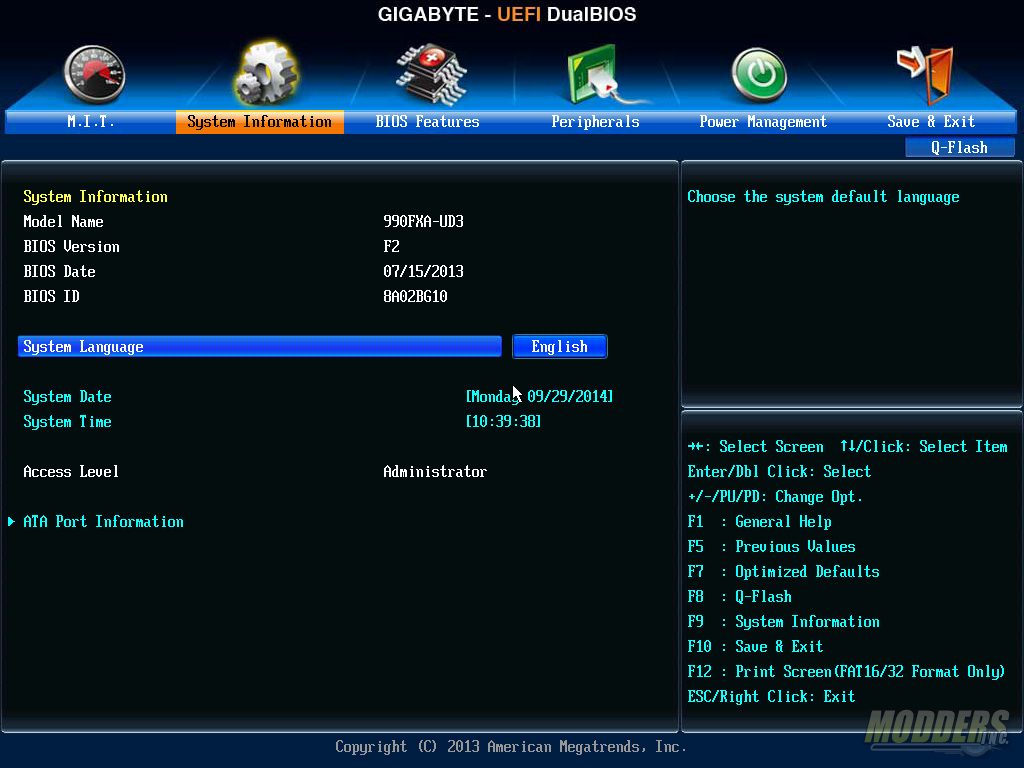
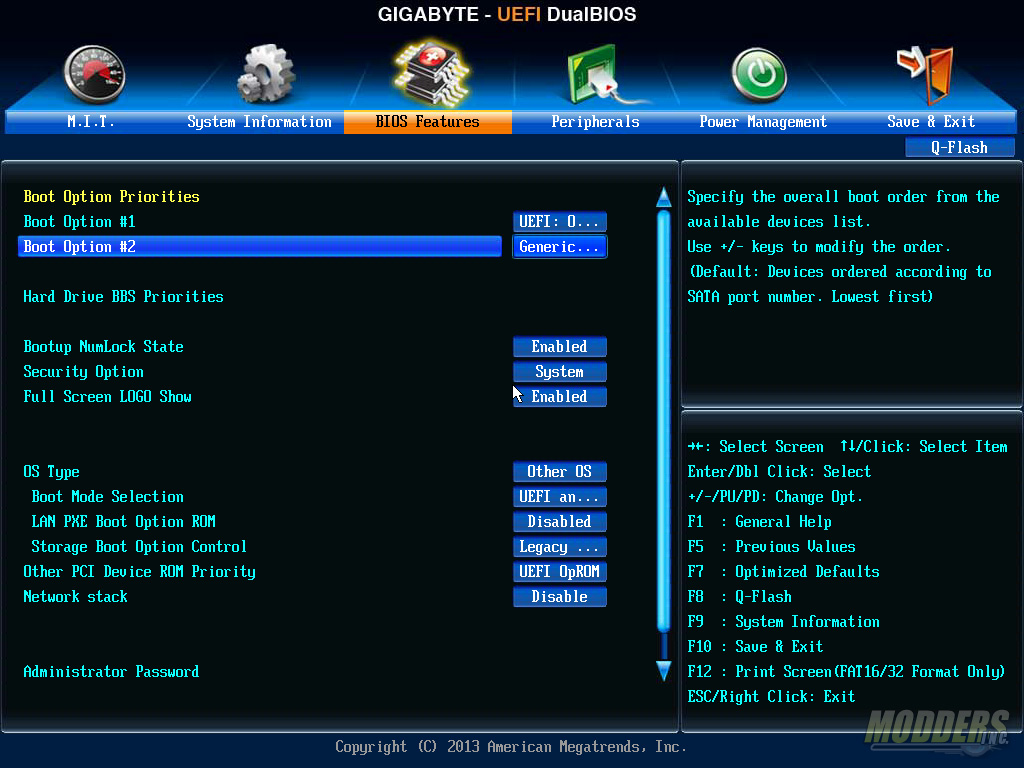
Like with all motherboard BIOS screens, you enter this menu by pressing DEL during boot. The options are separated into six categories with instant access to other features such as System Information or Q-Flash BIOS update utility via function key shortcuts.
Motherboard Intelligent Tweaker (M.I.T.)
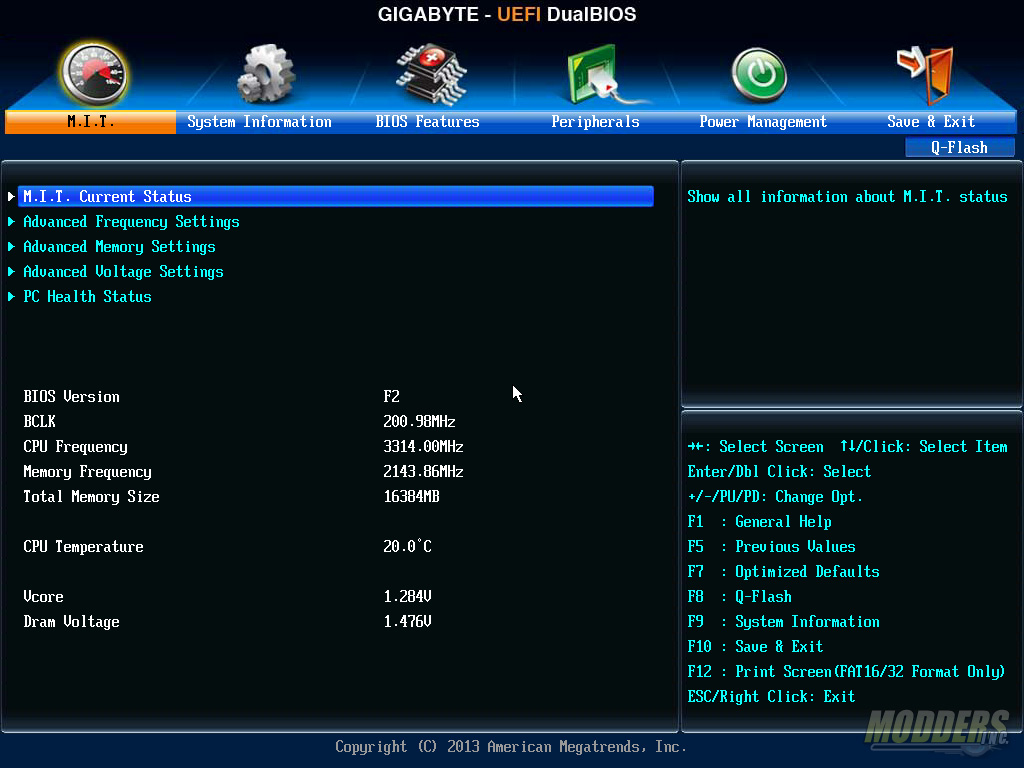
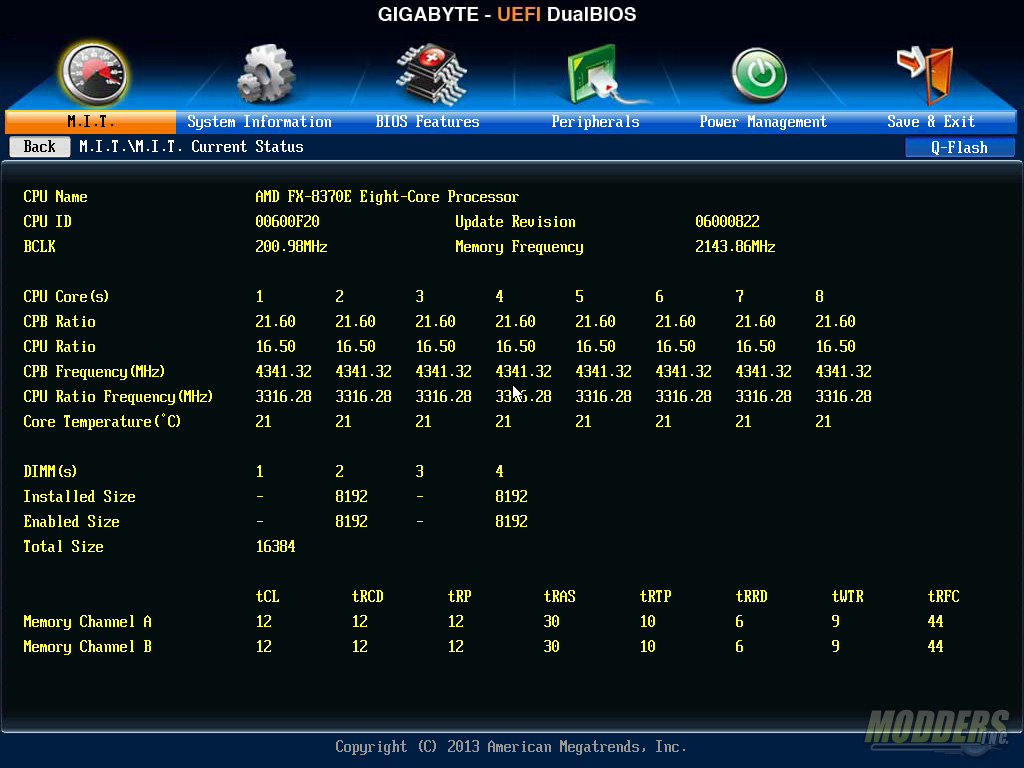
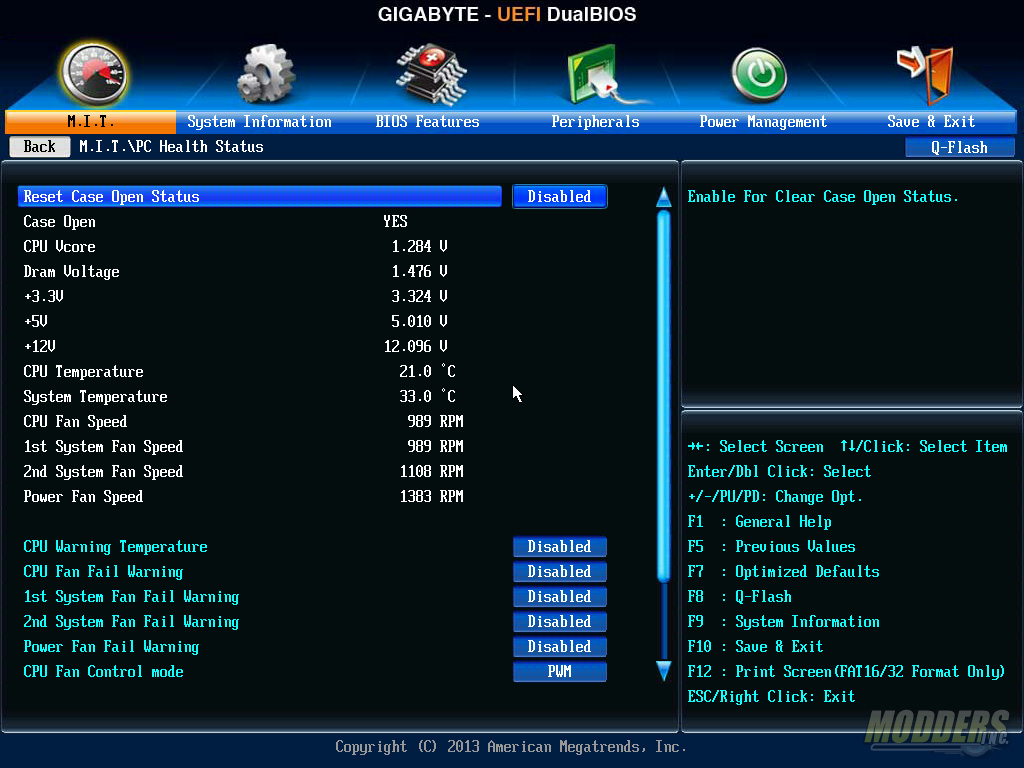

Although an FX-8370E was used for motherboard comparison benchmarks, for this overclocking exercise an FX-9590 will be used instead which we previously reviewed here– Brute Almighty: AMD FX-9590 CPU Review.
There are only a few motherboards that officially support this 220W TDP monster, namely these (prices as of October 1, 2014)
- Asrock 990FX Extreme 9 (P1.20 BIOS or later) = $189.99
- Asrock 990FX Fatal1ty Professional (P1.90 BIOS or later) = $149.99
- ASUS Crosshair V Formula-Z (1403 BIOS or later) = $239.99
- ASUS M5A99FX PRO R2.0 (1903 BIOS or later) = $149.99
- ASUS TUF Sabertooth 990FX R2.0 (1708 BIOS or later) = $179.99
- Gigabyte GA-990FXA-UD3 (Revision 4.0 – F1 BIOS or later) = $119.99
- Gigabyte GA-990FXA-UD5 (Revision 3.0 – FC BIOS or later) = $179.99
- Gigabyte GA-990FXA-UD7 (Revision 3.0 – FC BIOS or later) = $199.99
- MSI 990FXA-GD80 V2 = $169.99
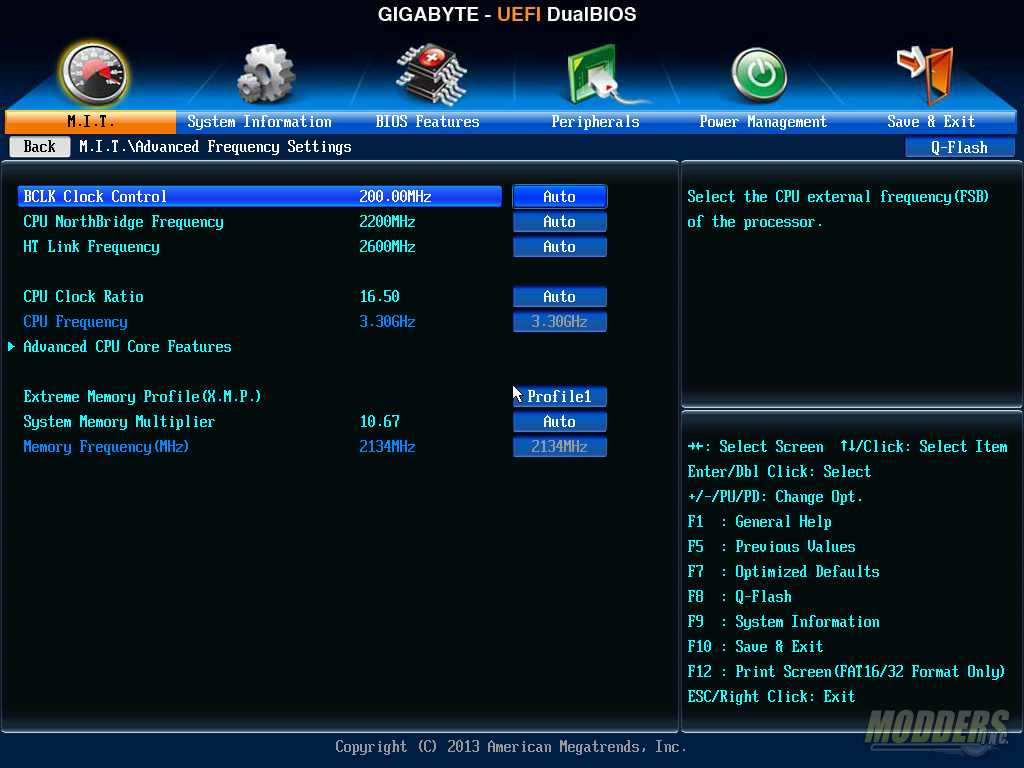
The 990FXA-UD3 Rev 4.0 is capable of running this FX-9590 out of the box as so few motherboards can without modifications. To help with overclocking stability, Cool N’Quiet, C1E, C6, Core Performance boost, and APM will be disabled. Core Performance Boost has its own power management and will throttle voltages so it is important to disable it as well as the APM option to maximize stability. Please do not do this if you do not have enough ventilation or adequate cooling system for your 990FXA-UD3 + FX CPU. Once Core Performance Boost has been disabled, the CPB Ratio will be automatically grayed out. Enabling HPC mode or High-performance mode handles the P-states helps with overclocking as well as it prevents the CPU from throttling down under load. This is a safety feature placed by AMD so that their FX processors do not exceed rated TDP under load. Leave Core Control to automatic. The CPU ratio can also be adjusted directly on this page as well and the resulting frequency is displayed directly below it.

Keep in mind that you need to set the offset to 0.0 instead of the default AUTO if you do not want it closer to actual value. Loadline calibration has 5 level settings with the exception of AUTO : NORMAL, EXTREME, MEDIUM, LOW, and STANDARD. The +100% percentage beside the setting NEVER changes even if you save the settings, I have no idea why, it is always 100% although the voltage observed underload is different. Also, I could not use the EXTREME LLC setting and it always resulted in a black screen.
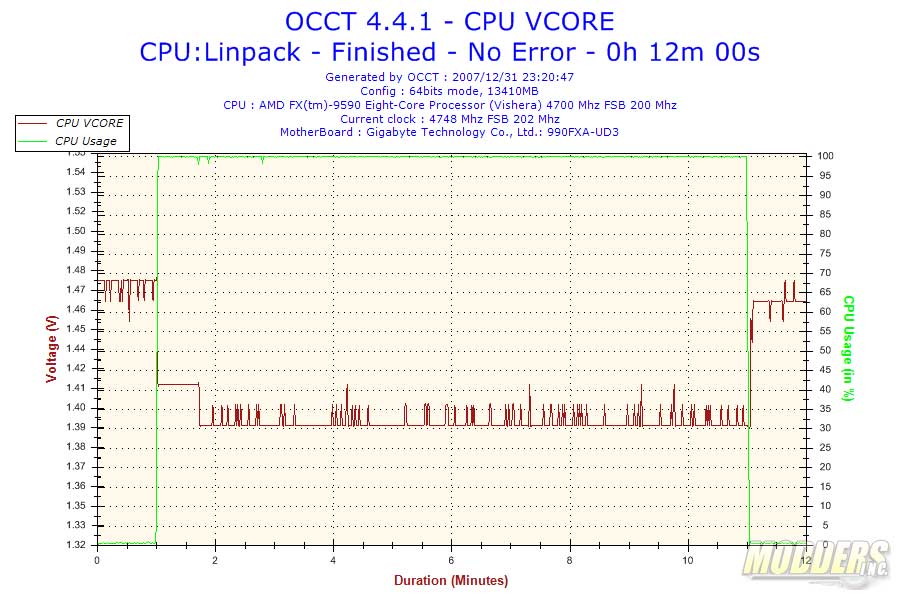
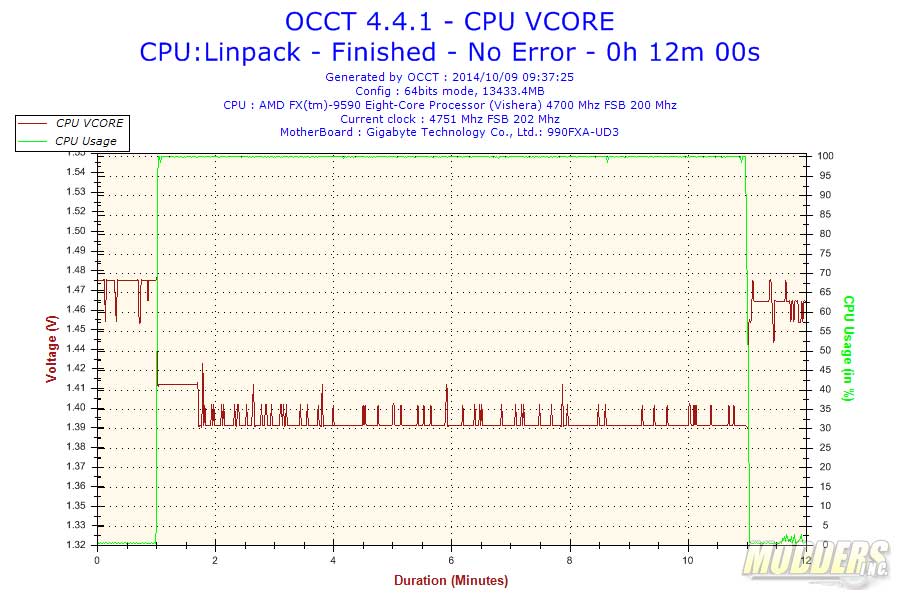
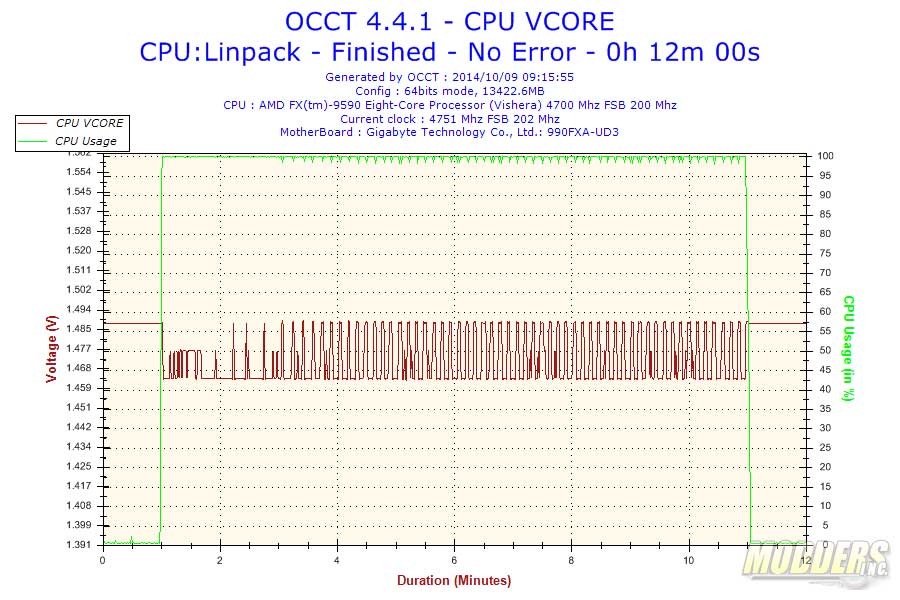
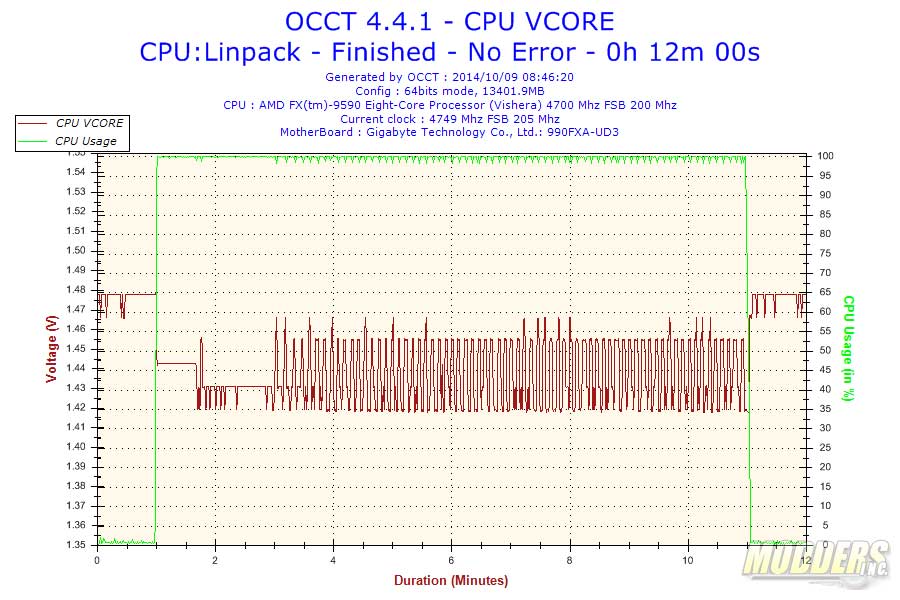
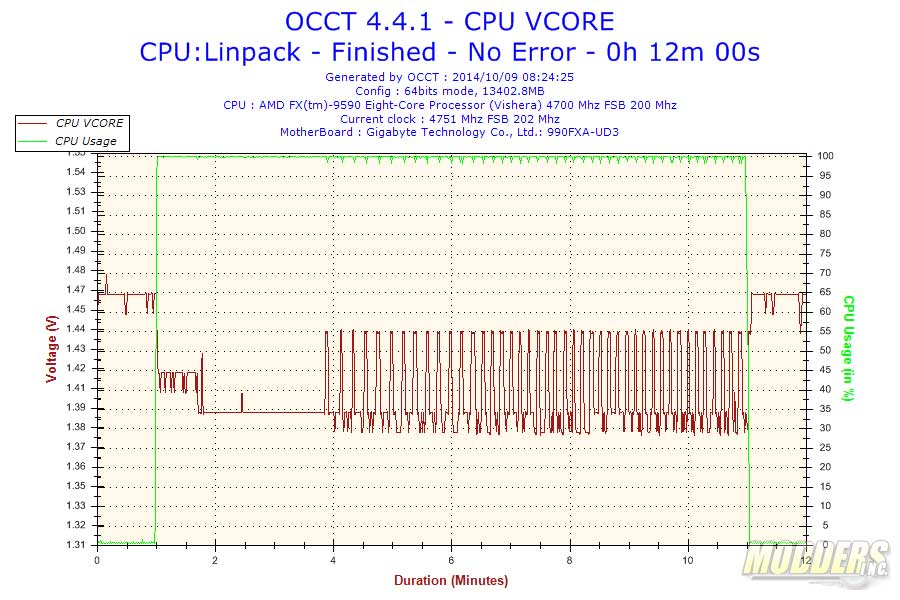
Load Line Calibration behaviour testing with FX-9590 and OCCT 64-bit Linpack + AVX
Settings:
- CPU Clock Ratio: 23.50
- BCLK: 200MHz
- CPU NorthBridge Frequency: 2200MHz
- HT Link Frequency: 2600MHz
- Core Performance Boost, Cool & Quiet, C1E Support, CPU Core Control, Core C6 State, and APM: Disabled
- HPC Mode: Enabled
- CPU Vcore: 1.5 (DVID: +0.0)
- NB Core: 1.3 (NB DVID: +0.0)
- DRAM Voltage: 1.5V
AUTO
NORMAL
MEDIUM
LOW
STANDARD
As you can see, there is massive Vdroop under load and the MEDIUM LLC has the tightest range and is recommended when droops are preventing your stability. Unfortunately, due to problems with getting the system to boot properly with EXTREME LLC settings, I could not display the results of that.
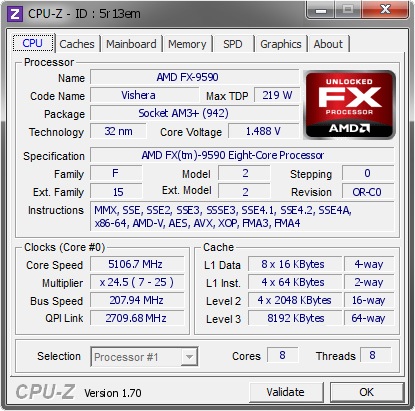
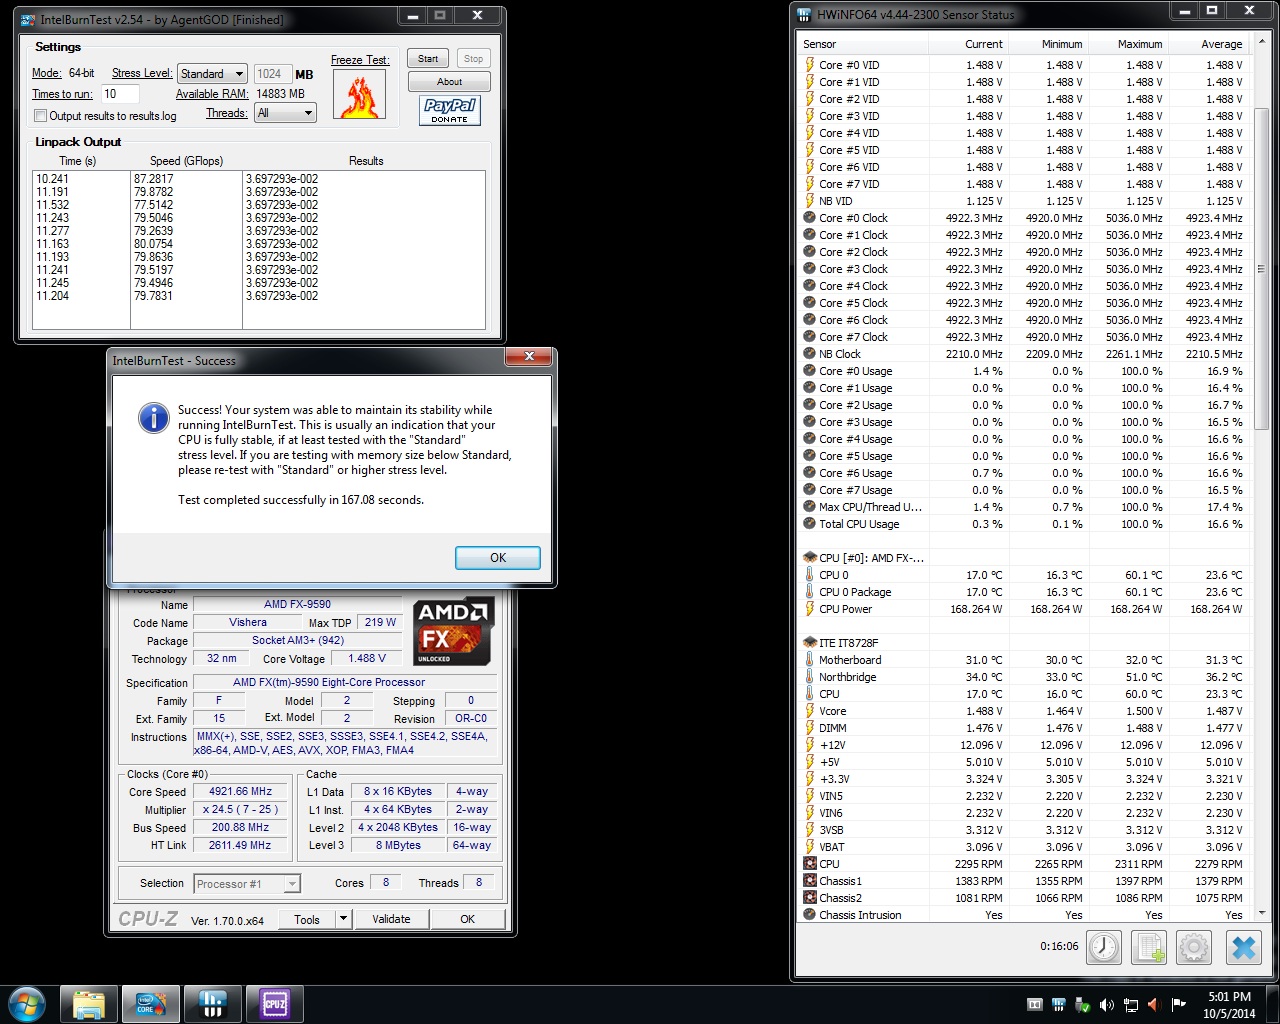
For overclocking, I used most of the similar settings I used here to test Load Line Calibration, except setting the CPU PLL voltage to 2.7V helped with passing Intel Burn Test AVX or OCCT AVX stability test. Highest validated is 5.1GHz but 4.9GHz is IBT AVX stable and manageable with the FX-9590 bundled CM Seidon 120M at 60C peak load.
System Information
BIOS Features
Peripherals
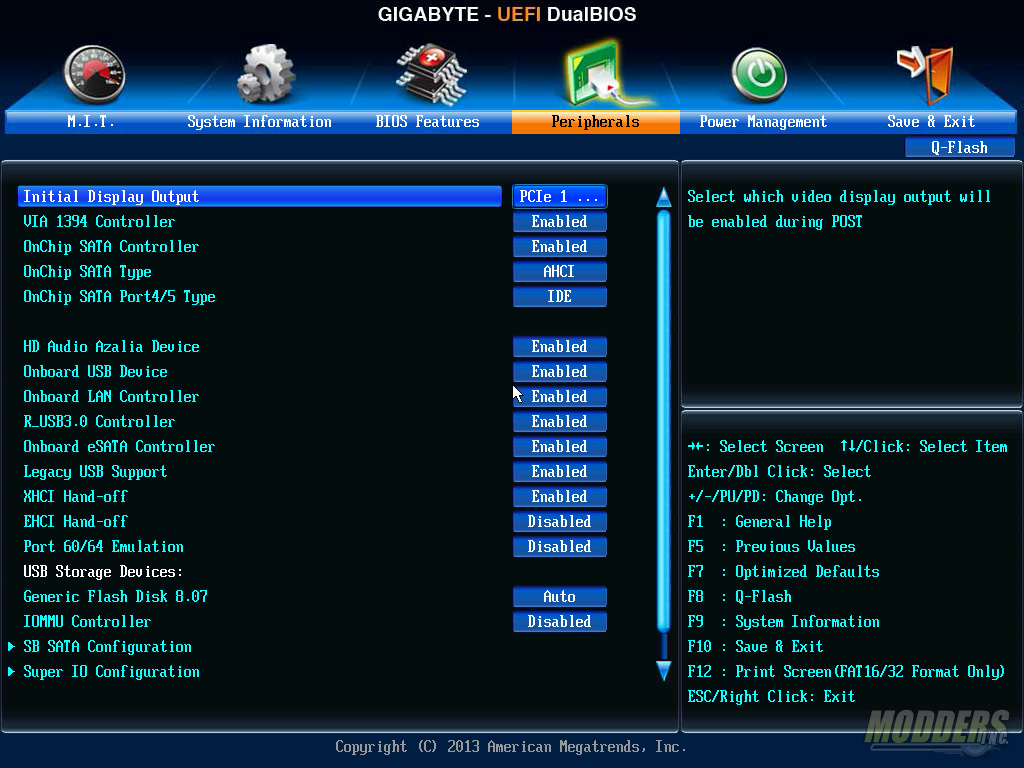
Power Management

Save and Exit


