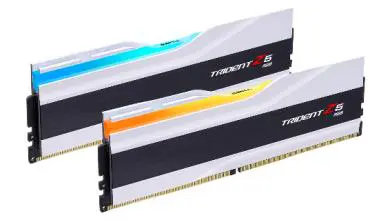
G.Skill Ripjaws X 2133Mhz DDR3 RAM
Testing
Testing Methodology:
System setup:
| CPU: | Intel Core i7 3770K @ 4.6GHz |
| Cooler: | Custom Water Loop |
| Motherboard: | ASUS Maximus V Extreme |
| Memory: | G.Skill Ripjaws X XMP Profile & Tightened Timings |
| Hard Drive: | Kingston HyperX 120Gb SSD’s |
| Case: | Mountain Mods Ascension |
| GPU: | Crossfired AMD Radeon HD 7950’s |
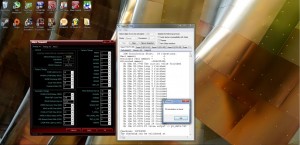
I believe the best way to test the stability of your RAM is to use a program called HyperPi with the 32M setting. To use it you just have to select 32M in the drop down box next to “Select digits of pi to be calculated” and then select the number of threads (or cores) next to where it says “Processors”. This program uses the power of you RAM and CPU to calculate Pi. In this case, 32 million digits into Pi. Now THAT is a stability test.
After a few failed attempts to hit an overclock of 2400Mhz I decided to stick with the stock 2133Mhz, but tighten the timing a little bit. I got down to 10-11-10-29 @ 1.6v and ran HyperPi and these were the results.
SUCCESS!!
Now let’s do some benchmarking at the stock timings, my “tightened” timings, and then compare that to some other RAM out there today.
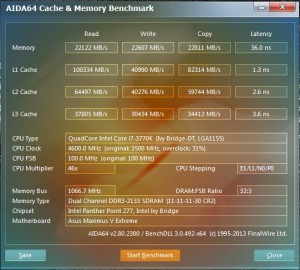
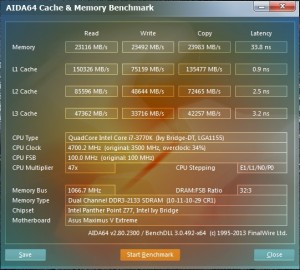
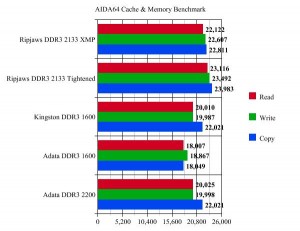
For our first benchmark we are going to use AIDA64. It is an application that displays information about the hardware in the PC. It includes a Cache and memory benchmark as part of the software. This a synthetic benchmark and better results may not necessarily mean that you will actually “see” better performance in daily use.
Here are the results I achieved with the XMP profile selected in the BIOS
and here are the results I achieved with my custom tightened timings
As you can see, my scores improved with my custom timings. Now let’s take a look at how these scores compare with other RAM.
As you can see the Ripjaws X with XMP timings and the tightened timings are superior than the other RAM, even against the Adata DDR3 2200Mhz. Let’s see how it holds up in our next benchmark.
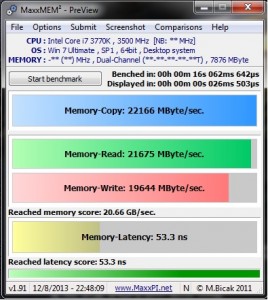
For our next benchmark we are going to use MaxxMem. MaxMemm2 is a synthetic benchmark that measures bandwidth of the memory subsystem.
Here are the results I achieved with the XMP profile selected in the BIOS
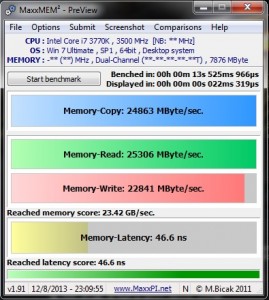
and here are the results I achieved with my custom tightened timings
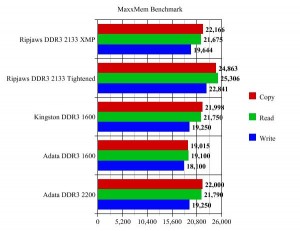
As you can see, my scores improved with my custom timings again. This is why I am passionate about telling people to tweak every part of their system. With some time and effort they can make a $75 component perform on par with a $150 component. Let’s take a look at how these scores compare with other RAM.
This time the Ripjaws XMP profile performed on par with the Kingston DDR3 1600 and the Adata DDR3 2200 memory, but the tightened timings benchmarks blew everything out of the water here. Now lets look at a real world benchmark.
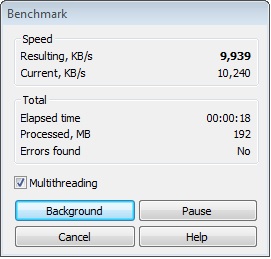
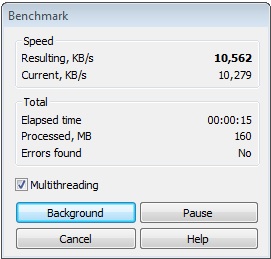
Our last benchmark we will be using is WinRAR. WinRAR is a compression application. Compressing files stresses the CPU and memory subsystems.
Here are the results I achieved with the XMP profile selected in the BIOS
and here are the results I achieved with my custom tightened timings
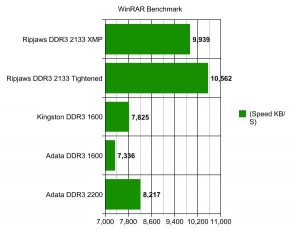
With this non-synthetic benchmark you can see that my results were improved slightly with my tightened timings. Now let’s see how this compares with other RAM.
Again, the Ripjaws X wins the battle and I’m proud to say it has also won the war. It has shown its willingness to eat up benchmarks and real world applications and spit them in the faces of anyone that doubted it. Trident X’s little brother, the brutal Ripjaws X.

