Creating Your Own Custom Decals
Now I will add the flames. I took a BMP image from the internet and traced it and cleaned it up. To do this I used the steps that I went over with you using the Asain characters. I imported the BMP into Corel and used Corel trace to trace the shape. I then Manually went in and cleaned up the curves and lines getting the shape nice and clean. Here you can see the difference again between a .bmp and line art. A bitmap when viewed on a colored background will have a box around it. The Top flame is theVector artwork, it is Filled in with color but is still Line Art.
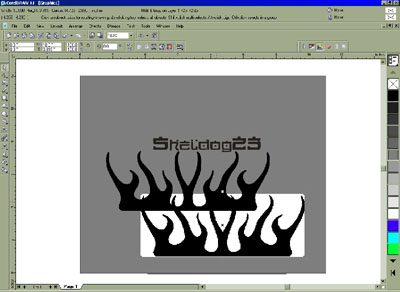
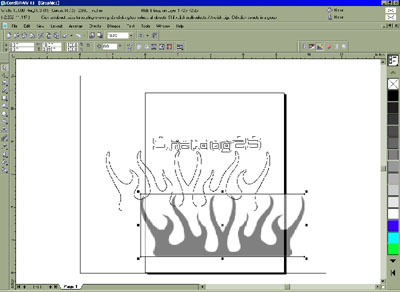
As you can see the line art is basically ready to be cut as is. I can blow it up or shrink it to any size and it will maintain its shape. The bitmap would blur and fade. Also I can merge the two line art logos together where as bitmap can only be layered. The importance of this will be shown in the next step, and in the final cut.
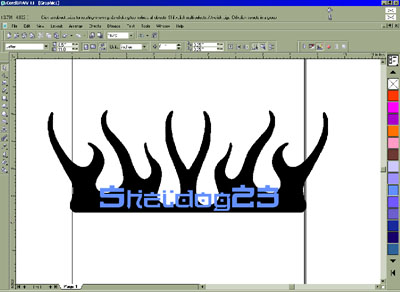
Ok I have placed the two pieces together as I would like them to look. I changed the color of the text to allow me to see it better for placement. This is another benefit of line art, if I so desired I could color each individual letter a different color. If I was getting a design with several different colors included the graphics designer would know what color went where and it would be separate from the rest of the design. You could plot or cut just that letter in one color and not have to waste material. You can also see as I described before that because the text are all individual line art I made the S and the 23 a little larger than the rest of the font. Making the Text more unique and personalized.
