PC Cases / AccessoriesPC Hardware Reviews
Cooler Master HAF 932 Computer Case
« Page 2 | Page 4 »
Installation |
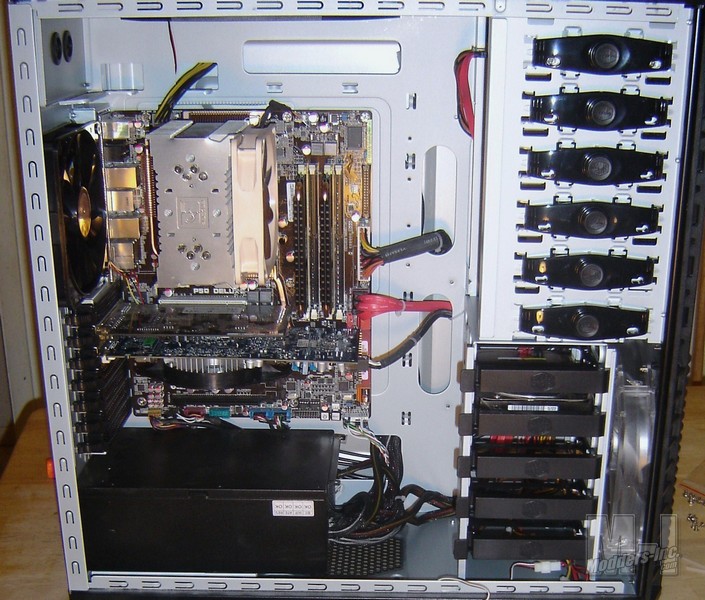
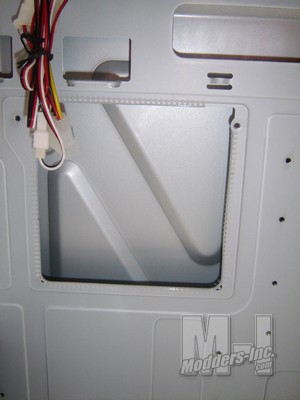
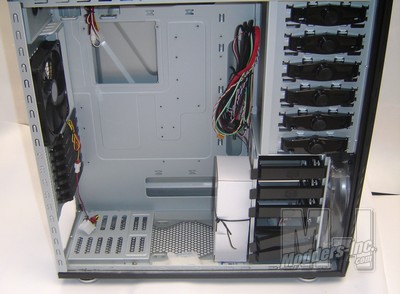 Finally we are to the point where we are installing the hardware into the HAF 932. I’m fairly excited to see how things go in as the case appears to have many great features that should aid in the installation process. Also being a huge geek I relish the idea of new hardware and playing around with it’s features. As you can see from the above overall pic of the interior you will have a large amount of room inside the case to play around in. All the edges are clean and rolled so you won’t have to worry about cutting yourself during the install. Also you can see that there are numerous cut outs in the Motherboard tray. Almost all of these are to aid you in routing cables out of the way which in my opinion is pure genius. I love it when companies do little things like this. I must say that although I have seen many companies do this before I haven’t seen it done to this extent. The amount of holes cut into mobo tray also helps reduce overall weight of this large steel chassis. It’s not much but every little bit counts. The only cut out that isn’t for routing is the large square hole. This is so you can install your CPU cooler on your motherboard when it is installed into the case instead of outside the case. This is a great feature and really needs to be adopted my more in this industry. The only feature I am sad to say doesn’t exist is a removable motherboard tray. I think that this overlooked feature would have rounded out the bunch nicely.
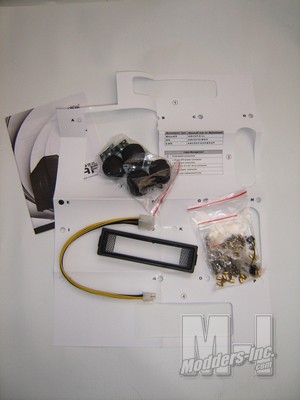
 Moving on I open up the white box that contains all the hardware I need to install with. Included is the manual, a fold out motherboard stand off template, a motherboard 12v extender cable, mesh bezel floppy adapter, casters to replace the case feet, and bag of motherboard stand off bolts and misc. screws. This is a very nice package and really leaves you with a feeling that you have just made a premioum purchase. The inclusion of the 4 caster wheels for those who wish to be able to roll the case around is just an awesome extra.
 Opening the manual up and looking inside your warm fuzzies will multiply as you look at a step by step detailed pictorial of how to install ALL your hardware into this case. Sure, many will feel this is unnecessary, but the fact that it is included just goes a long way to show the amount of attention that cooler master gives to it’s product. I mean if they put that much work into something this simple you have to feel good about how everything else is going to be made. This will also make install easy for those beginners who have never built a ground up system on their own. Many “noobies” may look at a case like this and feel they might be out of their league. A case this large with so many options available might seem overwhelming to a beginner. Well fret not because the manual will help you out with everything down to the smallest detail.
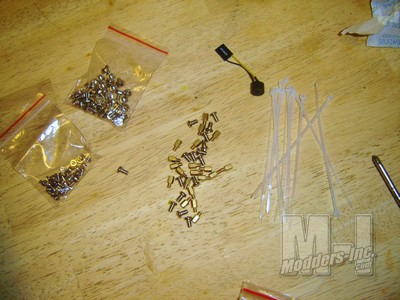
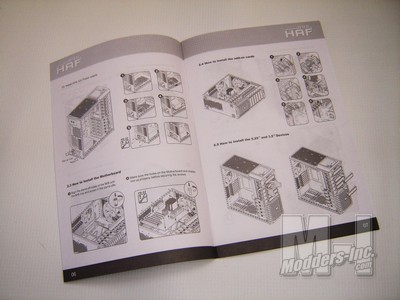 Above you have a super detailed manual. Below you have the included install hardware. Including an ample supply of zip ties to help keep those cables tidy.
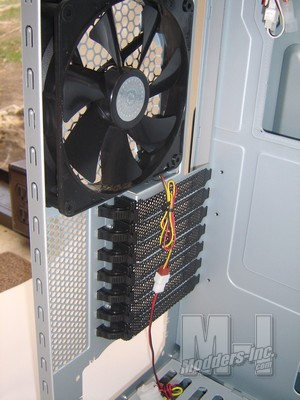
 Installation into the chassis was a cinch. Really I don’t think I’ve had an easier time getting hardware into a case. There is so much room inside it almost feels as though you might be missing some of your hardware. The extra holes came in handy for getting cables out of the way till I need them. They also came in handy for routing the cables out of the way for Tidiness sake. The add in cards installed nicely into the motherboard without too much of the problem. There are quick release tabs for your add in cards so it’s quite easy to pop out the mesh tabs and put your card in. I found that when I put my 4850 in the tabs don’t really hold as firmly down as I would like though. I think if the case were just sitting there or slightly moved around for tweaking purposes these tabs would be fine. If you plan on moving the case to a LAN I would recommend just removing the plastic quick release tab and going with some good thumb screws. I just wouldn’t trust these tabs.
 I had a very similar experience with the installation of the Hard Drive and DVD drive. The Hard drives mount into these quick release plastic holders that clamp and slide into the drive bay. They are kinda flimsy but seem pretty solid once you have a hard drive in them. The hard drive itself seems to really be the back bone of these plastic rails as it is with most of these quick release features. I found when I opened the case after I received it from shipping that two of the tabs had been unlocked and bent down. There was no damage to them as they are very flexible but I worried that they would open easy and allow my hard drives to slide about inside the case. Once installed I tried to pull the drives out and move them around inside the case. Sure there is a little bit of wiggle but I don’t think they are going anywhere. I think what happened is the hardware box was banging around and unlocked these tabs during shipping.
The Bay drives have a quick lock push button system that keeps your drives installed. I didn’t find these to be as sturdy as the push release tabs are as they use more of a compression fit. The push button seems to have more give and my DVD drive had more wiggle than I really wanted. You can still install screws through the plastic or from the other side of the drive cage if this bothers you. Which is exactly what I did. I didn’t think I wanted to hear my drive rattle when it revved up to those high RPM’s when burning or reading a disk. It is really quick though and if your into quick swapping those DVD drives then the push button system is for you. Just push in your drive and you push the button. The Drive is held tentatively in place and your good to go. Give the button another push and the drive will come right out.
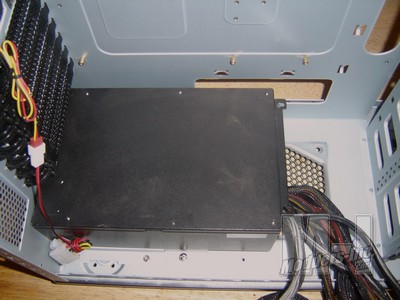 With the HAF 932 case you have the option to install the power supply in either the top or the bottom of the case. I chose to install my PSU in the bottom section and route the cables out the hole directly to the side. You should note that the HAF doesn’t have a reversible back plate that will allow you to flip your PSU so that the intake is facing up. You will be forced to place your power supply with the intake facing down. There is a mesh area so that your PSU will have a fresh air intake from underneath. You can see in the above photo that larger PSU’s like my PC Power and cooling 850 and even PSU’s over 1000W will have plenty of room. Underneath the power supply is a double mount for two 120mm fans or a radiator if you have your PSU up top.
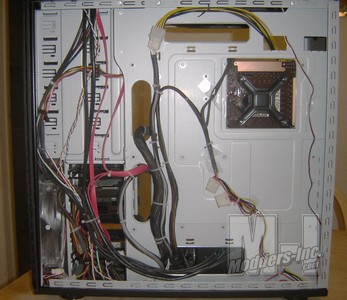 When it comes to installing new hardware into a case the only thing I really dread is the wiring. When done right and everything is neat and placed out of the way it can consume quite a bit of your time. A modular PSU will help alleviate some of the mess but you are still going to have to deal with some wiring at some point. The HAF helps you by giving you several holes cut into the motherboard tray to allow you to pull those cables behind the motherboard and out of site. There are also several places that allow you to make use of the included zip ties and secure those cables down. This is a great help in keeping the larger motherboard power cables down.
Usually the problems you will run into when running cabling behind the mobo is either it’s hard to get the cables to fit without making the case door bulge out. Either that or the wiring harness for the Case switches and LED’s isn’t made long enough to reach when routed out of the way. With the HAF you don’t have to worry about either of these scenarios. With the case having the extra width you have an unheard of nearly 1/2″ of space behind the motherboard tray. The cases cables for the Power, Reset and front ports are long enough that you can route them a variety of ways and still have plenty of room left over.
In the end if you do your work right you will have a clean looking case with very little in the way for a smooth and healthy air flow.
|
