Cooler Master HAF 922 Mid Tower Case
Installation
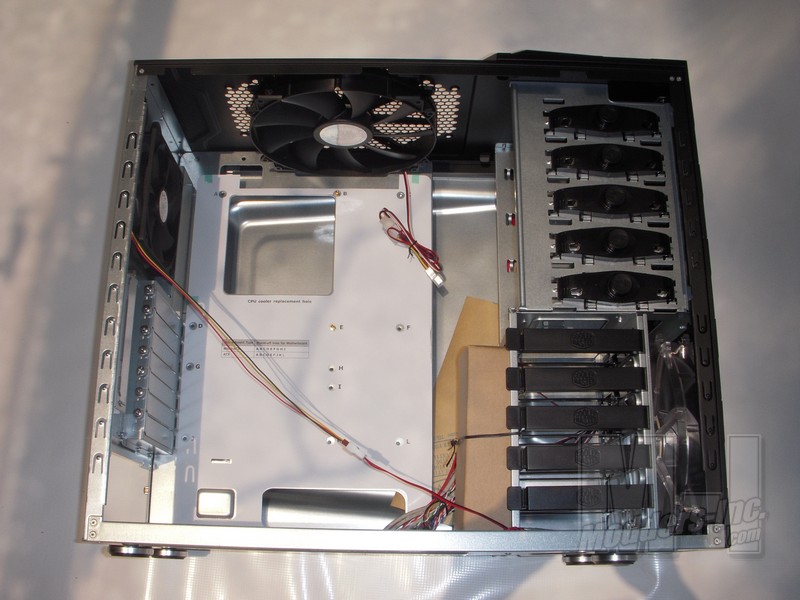
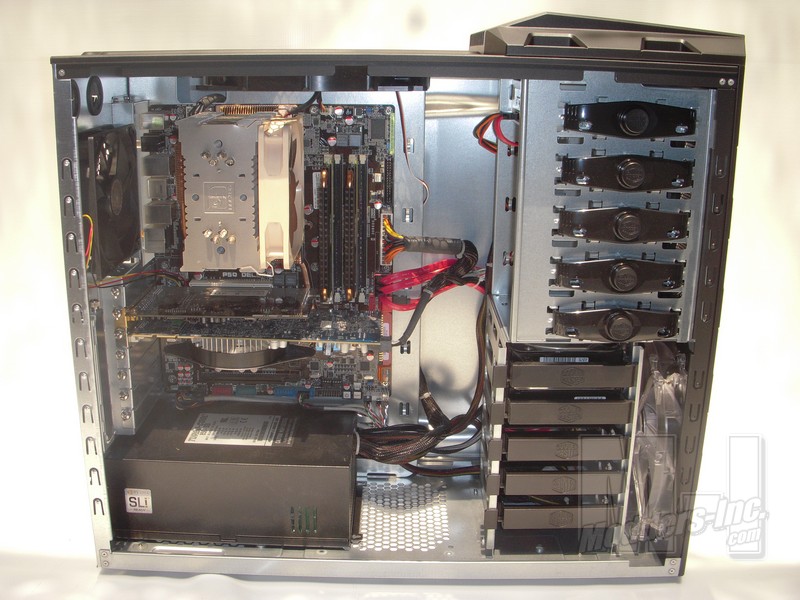
Now we move on to installation of the hardware into the HAF 922 case. Looking right off you will see there is a ton of space inside the case. You are going to have no problems getting your hardware in and even the longest of graphics cards is going to have plenty of room to live and breathe inside this case. As you can see from the above picture the case has 5 expansion slots for both hard drive and DVD drive bays. Each one has a specialized tool-less feature that allows quick swapping of components and ease of use. The DVD drive bays use a system that allows you to slide in your DVD drive and with a push of a button you have it locked into place. This is a nice quick method for installing hardware but I don’t find it to be that secure. Thankfully you are still able to add screws to help further secure it into place. This isn’t entirely necessary but I like to do it in case I have to move it later. It also helps cut down on vibration when the DVD is ramping up reading a disk.
The hard drives sit inside a drive holder that works on a rail system. There are rubber grommets with pins on them that hold the drive inside the rails. The rails then slide into the Drive cage frame and are held in by a lever that locks them into place inside the drive cage. Again this method is nice and quick for swapping in and out hardware. It is also going to be fairly secure except under the most severe conditions. 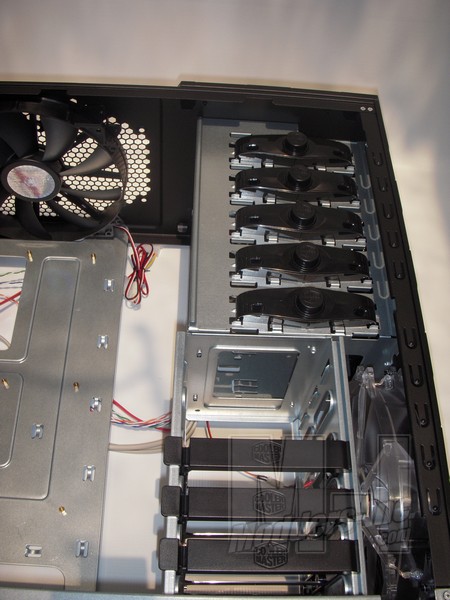 ] ]The rest of the case is tool-less for the most part as well as the case doors and motherboard expansion slots use thumbscrews to hold everything in place. This is a slight change from the HAF 932 which used plastic latches to secure the expansion slot devices. The older method works Ok when it comes to things like a wireless or sound card but larger heavier devices like graphics cards really need more support than those flimsy clips. So in this regard it’s good to see Cooler Master move back to the thumbscrew with the HAF 922. While I’m on the subject of the expansion slots, you will notice the slot covers are solid metal this time and not a mesh material like what was seen in the HAF 932. A small and perhaps insignificant detail but a detail none the less. 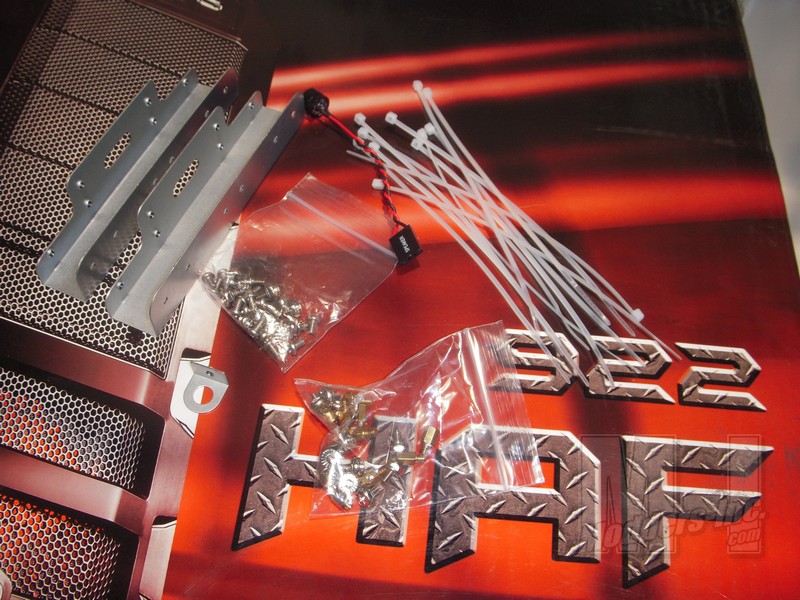
The hardware provided for install is fairly run of the mill. You get several bags of screw for installation of the motherboard and a little bag of screws for securing down your DVD drive if you so chose. You also receive zip ties for wire management, a small speaker, a case lock, and two rails to add in a disk drive or smaller device into the lower 5 1/4″ bay.
You do get a rather exceptional manual that gives detailed drawings on installation of already installed hardware, like the fans that are included, as well as additional add in hardware like the fans that are not included. It gives detailed drawings on all aspects of the case from motherboard installation to hard drive installation. There isn’t a lot of helpful verbage to accompany the drawing but most users will be able to get where they need to go using the excellent drawings.
As far as installation of the hardware goes there is no removable motherboard tray but honestly you don’t really need one with so much room inside. You will find your motherboard seems insignificantly alone inside the large interior. Not until you begin to add on cards and coolers does it seem to begin to fill up. Even then it remains spacious.
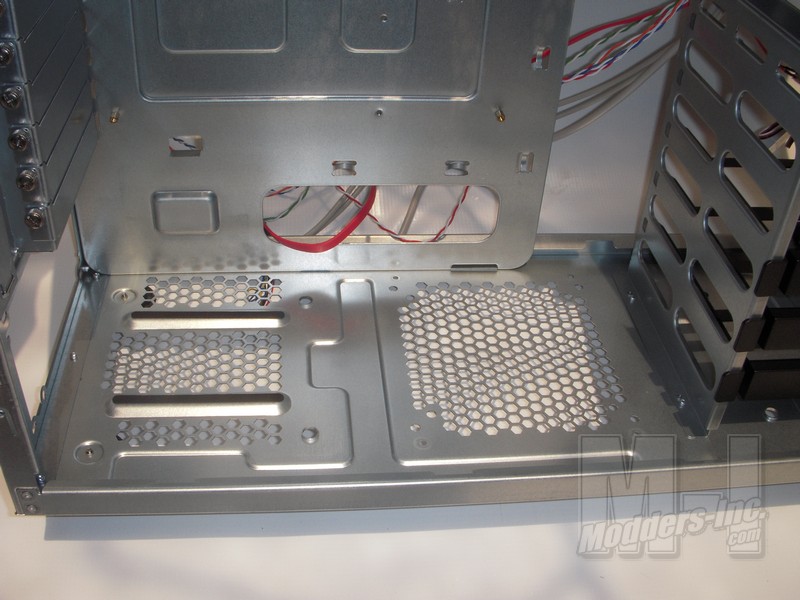
It’s worth mentioning the flexibility that this case allows even the most casual of enthusiast. For example the Power supply now allows you to mount the intake fan facing down pulling in cool air from underneath the case or flipped around pulling in air from inside the case and exhausting it out the back end. All while sitting on two rubber dampening strips. The case also includes several places for the addition of extra cooling potential. In front of the power supply you have the ability to add an extra 120mm fan or even water cooling radiator. You also have the option to add fans to the side door and the case has rubber grommets at the top for water cooling hoses to be fed through.
Editors Note: If you’re mounting the PSU so that its intake fan is drawing in its fresh air from under the case. You will want to note where the intake fan is positioned on the PSU. With the longer PSU’s (like the CM UCP 900) the fan is further toward the front of the unit which would cause the fan opening to sit over the solid part of the case floor between the lower fan and PSU vent. This could restrict air flow to the PSU a little.
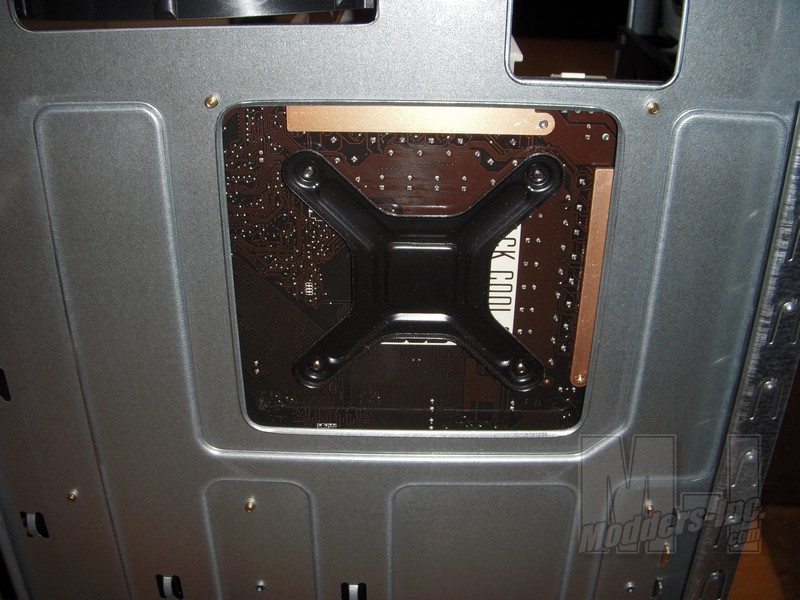
The case also offers several cutouts in the mother board tray to route wiring through as well as ample room behind the motherboard tray to accommodate it. Giving you the greater ability to provide stealthy and neat looking cable management. Again this is one of the great features that was carried over from the original HAF 932 case that we are glad to see. We love a case that provides the option for good wire management. Not only does it open your case up for non restricted air flow but it also when done properly makes the case appear cleaner and shows off your hardware not your cabling.
The only cutout whose purpose isn’t for cabling is the hole designed to help you mount larger CPU coolers. Most newer coolers require you to add an additional back plate for support and trying to work on a desktop with the motherboard, the cooler the back plate and the supplied mounting screws can sometimes seem like a huge task that requires more hands than the two you have. The motherboard cut out hole lets you position the cooler without having to worry about what the motherboard is doing. Possibly keeping you from damaging it in the process.
All in all the installation of all hardware into the Cooler Master HAF922 went smoothly and without even the slightest hitch. It almost feels like cheating with so much room to maneuver and places to stash the cabling. Again comparing it to the HAF 932 the install isn’t all that much different. The only real noticeable difference is the large area missing at the top of the case for a large radiator or optional PSU placement.
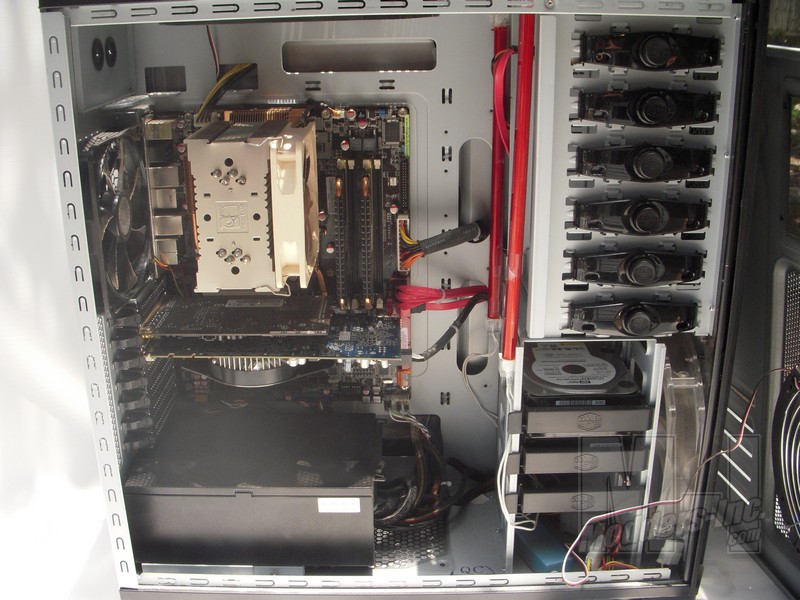
( inside of the HAF 932 ) So the only real difference one would notice is if you were putting a water cooling setup into both cases. Again, the only difference being the large extra area at the top of the HAF 932. You are still able to add a radiator to the top of the smaller HAF 922 but the spacing is just going to be very tight. You will have less than a half inch between the radiator fans and the CPU cooler. You will also have to either remove the large 200mm fan that comes installed in the top of the case or use that as the fan that cools the radiator.
The HAF 922 will only allow(at stock) a double rad to sit atop the case where as the larger HAF 932 has the ability to accommodate a triple rad. That’s not to say you don’t have the space to add a triple rad. There certainly is plenty there. You would just have to do some slight modification to the case to make it work. Any other standard water cooling options like adding a single radiator off the back or inside the bottom will still work similarly in both cases.
( inside of the HAF 922 ) Besides the overall look and design of a case a top concern (If not THE top concern) among enthusiast are the features that the chassis provides for ease of installation and overall maintenance and performance of the internal hardware. Things like airflow, tool-less or snap in features, places for routing wiring, and expansion possibilities, modability and the option to use water cooling components. Basically how well does the case function. Not just as a place to store your hardware but a place that will help enhance the performance of the hardware and also enhance the experience of using said hardware. After this install I think that the Cooler Master HAF 922 addresses and in fact excels at most, if not all of those points.
|
