Cooler Master Cosmos-S Full Tower Chassis
A Closer Look |
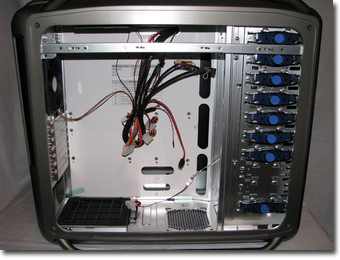
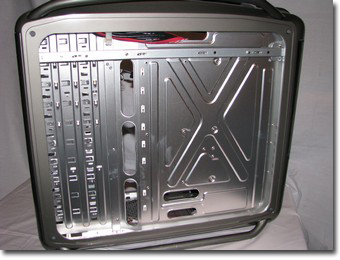
Now comes the time where we pull the side off the Cosmos-S and see how the inside is setup. From first glance we can see that the wiring is neatly tied together to key them in order during shipping. One of the main differences between the Cosmos-S and the original Cosmos is the chassis is constructed from aluminum instead of steel. This gives the Cosmos-S a slight advantage in the weight category as well, coming in at 30.4 lbs compared to the Cosmos’s 41.6 lbs. Another notable difference between the two is the hard drive cage areas. The Cosmos had 6 drive bays which slid in from the side of the case. The Cosmos-S however has a standard drive configuration which uses a special drive cage insert that we will discuss a little later on.
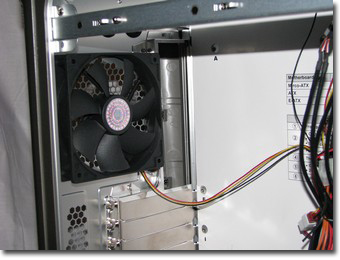
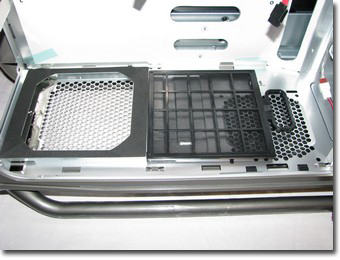
Looking at the upper rear section we will find the standard rear exhaust fan (120mm) that is included, which mounts beside the rear I/O panel. Below those are the standard 7 PCI expansion slots. Further down we will find the PSU mounting area. We can see in the below image that the intake for the PSU is meant to be facing the bottom of the case and does utilize a filter. With minimal components installed this will not be to bad to clean. However, if you have a fully packed system, this might pose to be an issue. Install one of the higher wattage non-modular power supplies and you will find that the filter handle and space in front of the lower fan mount are quickly being covered up.
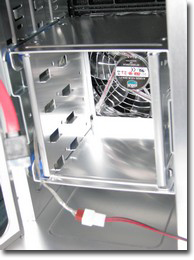
Now if you plan things out and plumb the majority of your cables behind the mobo tray, you will have less issues trying to clean the PSU intake filter. I personally liked the original Cosmos’s lower filter system a little better. Both the PSU intake filter and the front lower intake fans filter could be removed and cleaned without having to remove the side of the case. Although getting to the rear one might have been an issue for some users. Below to the right we have the one included hard drive cage. This cage will hold a total of four 3.5″ hard drives. The cage also utilizes an anti-vibration system that is kind of unique.
Most anti-vibration systems consist of small silicone rubber grommets used when mounting the hard drives. It has the standard cage that mounts four drives sandwiched between two outer panels. These panels have four prongs on each panel that fit into four silicone rubber grommets on each side of the cage. The hard drive cage also has a 120mm Red LED intake fan mounted to the front of it using four plastic pins. The setup is relatively easy to remove and relocate in different drives bays. The only thing that is going to slow you down is how well you handle your wiring. The Cosmos-S only comes with one of these cages stock, but one can purchase addition cages from Cooler Masters Store for only $9.99 US. So adding additional hard drives will not cost you an arm and a leg.
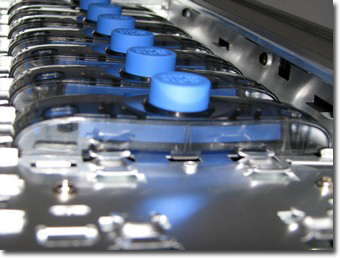
Looking at the upper section of the drive cage we will find the tool-less drive locking system. Now, I personally am not a fan of tool-less designs beyond the use of thumbscrews. The Cooler Master Cosmos-S uses the same tool-less locks that the original Cosmos uses. A simple push of the button and the lock will engage to hold the drive in place. Another push will release the lock so the drive can be slid out. These work just like the standard click type ball point pen. They have a pair of springs on each side that keep pressure against a small gear located under the button.
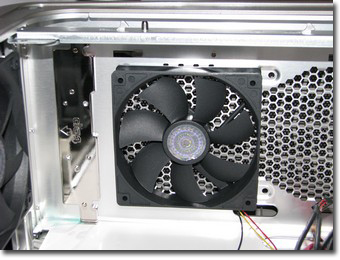
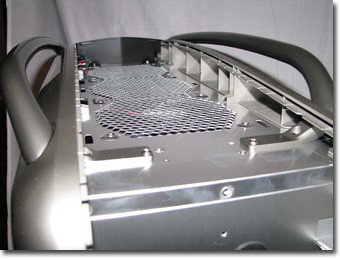
At the top of the chassis, we find mounting locations for three more 120mm fans. Cooler Master has included one fan mounted in the rear position. Not only has Cooler Master given us the option of mounting three 120mm fans in the top of the chassis, they also give us options on how we choose to mount them. Looking at the image on the right, we can see the fan is mounted internally. Well, you can also mount the three upper fans on the outside under the top panel, which would make hiding the wiring for the fans a lot easier. To top it all off, if your into water cooling, you can easily mount a 120, 240, or a 360mm radiator in the top of the chassis. What more could one ask for in cooling options?
Although not all users are going to be concerned about cable routing options when they are purchasing a case, it is a important part of the decision for those of us that want something to look and perform up to par. The Cosmos-S has the same basic options as the original. The only major difference here is the hard drive area. Looking at the rear of the chassis, we can see that there are several large holes to allow users to route the cables behind the hard drive cage and mobo tray areas.
One helpful hint that i will give you right off. When routing the cables behind the mobo tray. Keep them neat and as flat as possible. The side panel for the case has a rather thick frame structure on it, and it will become an issue if you overlap to many cables behind the mobo tray. There is plenty of room to handle most cable configurations on a setup here, but if you run a large high wattage power supply that offers every cable in the world and you only use a few of them. You might find hiding them all to be a real challenge. So take your time and utilize the cable tie options Cooler Master includes with the Cosmos-S.
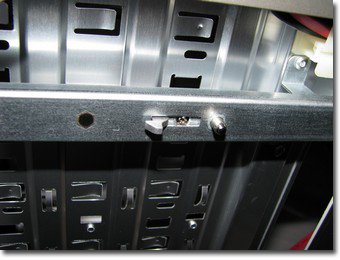
The Cooler Master Cosmos series utilizes a unique side panel latch system. Although the Cosmos isn’t the first chassis to use a unique side panel mount such as this. I do feel that Cooler Master has come up with one of the best options. In the locked position, the tooth of the latch is toward the rear of the case. As you lift the lever(s) in the rear of the chassis, the four teeth slide forward releasing the top of the side panel from the chassis. This allows you to gently lean the panel out and lift it off the lower lip at the bottom. The only thing that caught my eye here is the front to rear alignment of the panel. Taking the time and money to put a high dollar finish on the Cosmos / Cosmos-S, you will find that when installing the side panel that you could potentially nick the finish around the side panel. I think a little more of a positive guide on the bottom lip would help alleviate any problems in this area.
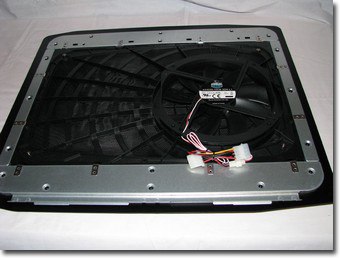
Here we have a rear view of the left hand panel. As you can see, there is a large 200mm fan mounted to the panel. For those that plan on running a large CPU cooler, I would suggest that you take the time to verify the measurements of the cooler to ensure that it will fit. It might be necessary to remove the side fan if you must have your large CPU cooler (CM V8 – CM V10 for example). Having the desire to achieve the lowest temperatures I can in my builds. My first thought was to completely remove the fan and its mount from the side. If this is something that you would want to do. You will need to make a few modifications if you plan to leave the mesh vent on the side of the Cosmos-S. The plastic frame that the fan mounts to also acts as the filter and the mount that holds the mesh in place. Located around the inside edge of the panels you will find the frame structure that gives the panel a solid feel. This is nice but does come at a price. The panels are relatively heavy, plus the extra width in these areas will possibly give you some clearance issues when it comes time to routing the cables behind the mobo tray.
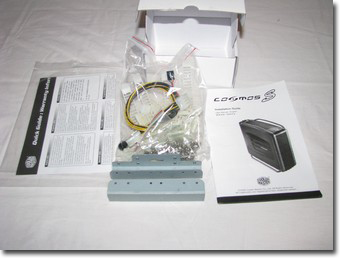
Opening up the accessory box that was secured in the hard drive cage, we will find all the goodies Cooler Master includes with the Cosoms-S. The Installation Manual, a Warranty Guide, 3.5″ to 5.25″ brackets, bag of screws, stand offs, wire ties, PCI-E adapter, and a case speaker. The Cosmos-S also comes with 1 x 120mm Red LED intake fan, 2 x 120mm Black exhaust fans, and 1 x 230x200x30mm side intake fan. You can add 2 x 120mm exhaust fans to the top of the chassis, and 1 x 120mm intake to the bottom of the chassis, giving you a total of seven fans. Not sure why CM doesn’t list the lower fan on their site, but the option is there. |
