Computer Case Cable Management
There comes a day that most of have to face a fear that we have and the quickest way to do that is by doing it.
One of those fears that seem to be out there in full force in the land of computers is the tangle web of wires and cables inside our PC’s. This guide will help you do some computer case cable management for a cleaner look
and ease of access to your hardware.
To many times I have heard “What if I short out something?” or “What’s the bother, it is just a computer.”… now
that one that hurts right where it counts. It is just a computer? This is the same person that says “Well it runs for
a little while then it just kind of dies.” “When was the last time you took off the side panel and clean the inside
with some canned air?”…”Do what?”.
More people nowadays are piecing together their PC’s and that lends itself to the unsightly rats nest
of wires inside of their computer case. This unorganized aspect of the build process can hinder the
performance of the PC and it could help bring it to an untimely demise. If not done correctly it could
help restrict the air flow though the case and cause the CPU or the graphics card to overheat.
With this tutorial I will help you understand how to create the perfect innards of a PC with proper
wire and computer case cable management.
In order to demonstrate this process I thought that I would go a little “old school” and drag out an old
case that was never designed for cable management to help reveal how it can be done. The case tha
t I will be using for this demo was from many years ago and it had made its rounds thought my household.
With it being a mid-tower case there is not a lot of room, but that is the point I want to get across that even
with a less than stellar case you can achieve cable management harmony.
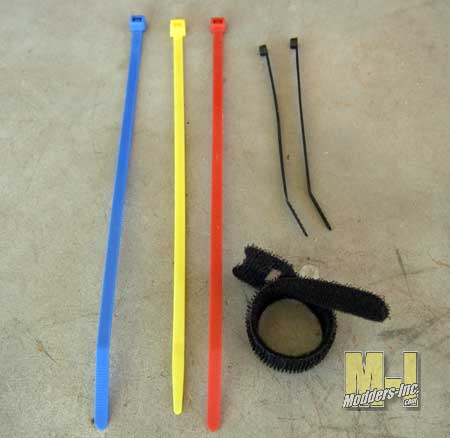
we start off with cable ties. For those that may not know what cable ties are they made to do just as the name
applies and that is to tie cables. They can be used to bundle numerous wires together or to hold a single cable
in place. Pictured below are some cable ties that you know of or may have seen. The ties are commonly made
from plastic and come in many different color and sizes which is great for us as it can help create a more
regular look to the overall color scheme of the wiring. The colorful ties on the left are a good example of how
you can find the right colored ties to fit your needs. These ties are also fairly long at eight inches in length.
The black ones are only four inches long and will pretty much fit any need you may want to use them for.
The last tie in the picture is one that it made from Velcro and it can be useful for wire that may need to come
apart often.
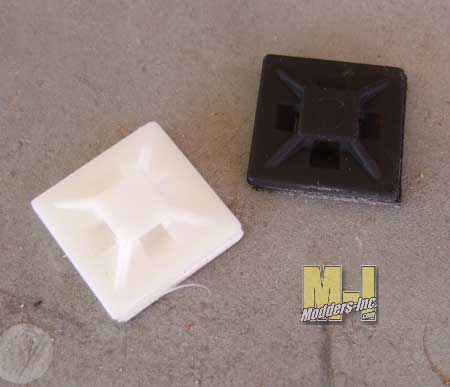
Now if you want to hold down a bundle of wires and you cannot find a place to attach the cable tie to you
can always use these adhesive holding pads. Like the wire ties they too can be found in different sizes
and colors or you can even paint them to the color you want. I did just that with the two you see as the
original color was white and I needed them to be a flat black; so out came the spray paint and within
a few moments I have what I need.
As I said before I decide to use an older case so let’s see what we have to work with. This might be a
somewhat typical system that most of you might have or seen. Inside we have a standard ATX motherboard
and power supply, 2 hard drives, a ROM drive, and a 10 inch graphics card. Add to that all the other wires
or cables that come with your PCcase and well you have a crap load of stuff to put into it. I will do my best
to show you a few things and pointers but remember every case is different and what you like and do is
completely up to you.
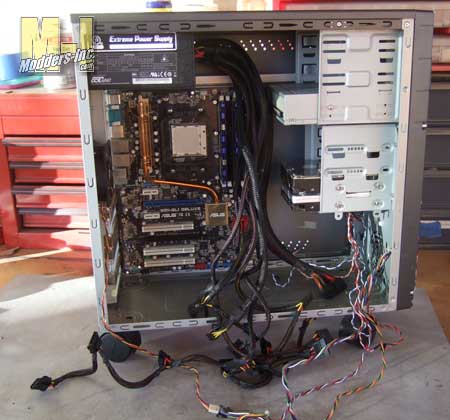
OK let’s take a look at what we have to work with here. Not to bad actually but enough of a challenge
to get the job done for this tutorial. We have all the power cables for the devices and the front panel wires.
I think we will jump on the wires that come from the front of the case first.
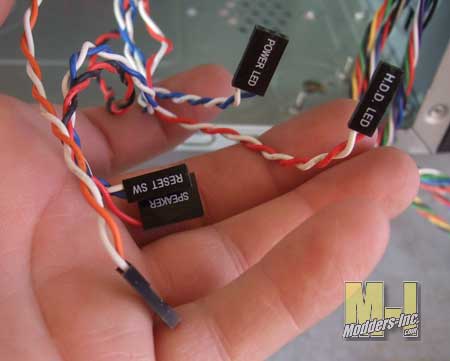
and read the tiny little printing on the board and with fingers cross that you got them on the right pins.
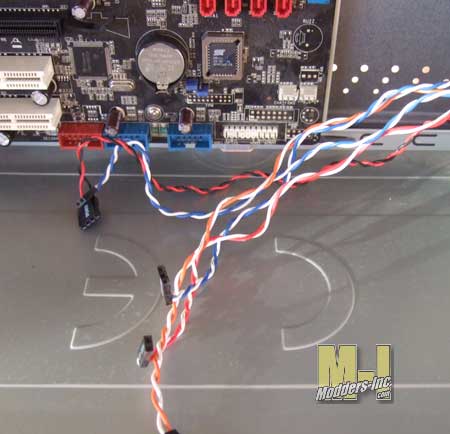
I would think that by now the manufactures would have taken care of this problem, but hey it gives me
something to grip about right. Looking at the image we can see that each plug has two wires connected
to it and that can mean as many as 10-12 wires are just laying loose, well not in my house. I will give
you two quick options on how to take care of this issue.


