BitFenix Shadow ATX Case Review
THE BUILD
ATX ECS Black Series X79R-AX MotherBoard
ADATA 128 Gb SSD
WD 500 Gb HDD
Thermaltake EVO_BLUE 2.0 650W PSU
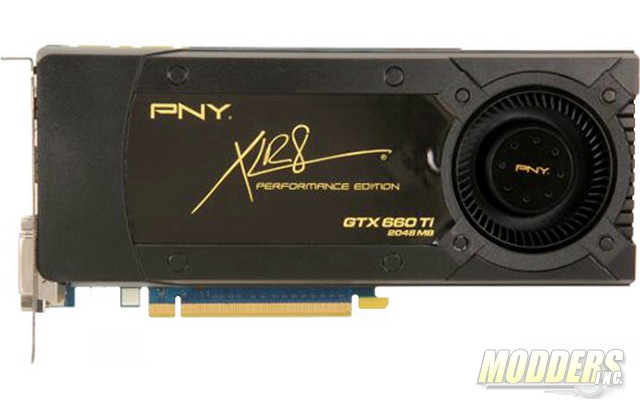
PNY XLR8 Gaming GTX 660 Ti 2Gb GPU
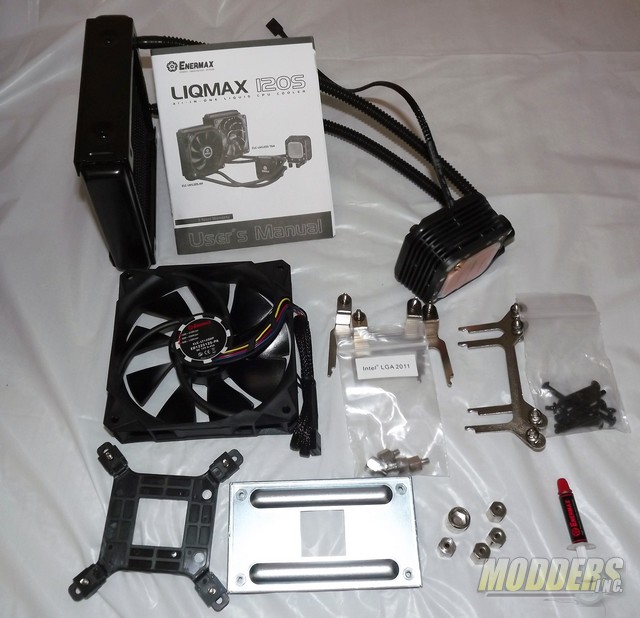
Enermax LIQMAX 120S AIO Liquid CPU Cooler
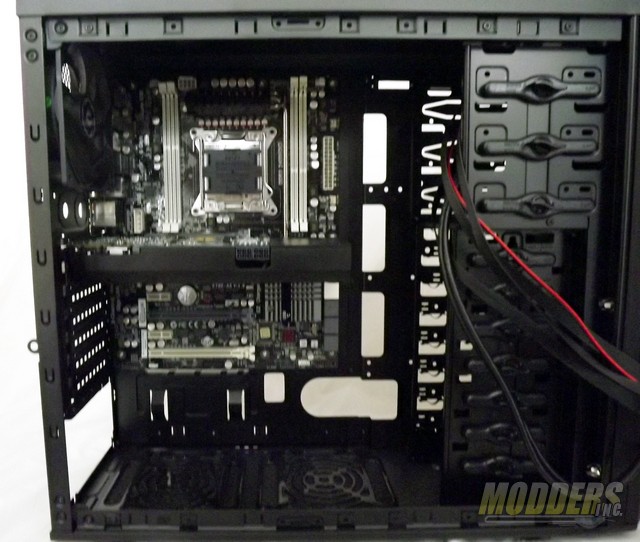
The Mother board, rear I/O panel and GPU mount nicely to the built-in standoffs, rear slots and i/o panel access areas. The case claims no Water cooling support but the Primary Ad picture and gallery in the BitFenix site shows a AIO cooled set-up. So I planned that and soon realized I had a problem.
Some Motherboards have the memory on both sides of the CPU like the 2011 I’m using in this build.
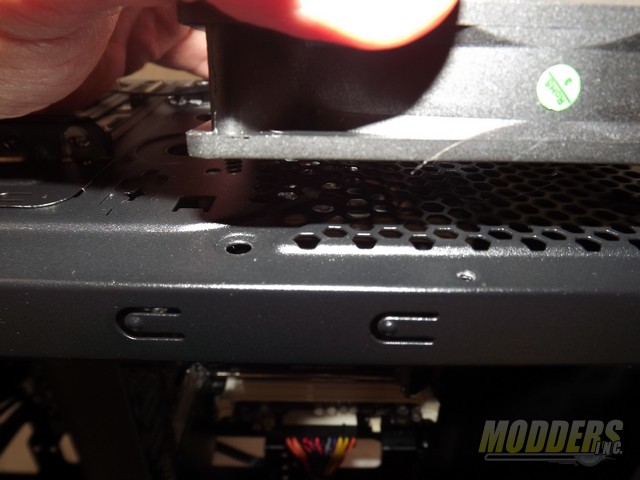
I wanted to try the fan on the outer side of the case but the protruding fan mesh would not allow the screws that came with the AIO or the 4 that came with case to mount up to the radiator inside. So I decided to try another AIO CPU cooler a Seidon 120V and something was wrong. I tried the radiator in both directions, inside outside and found this:
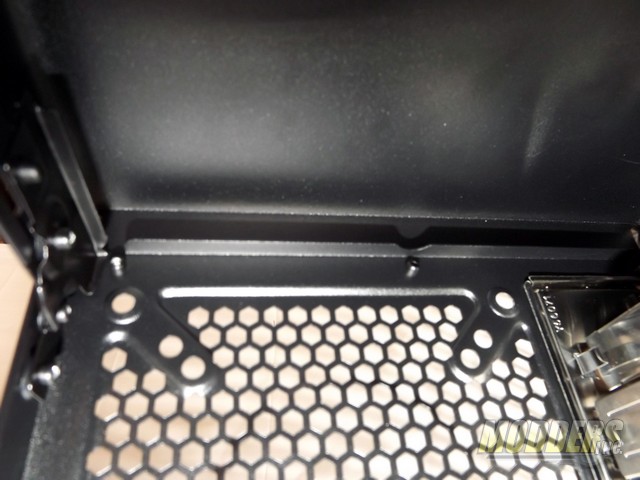
The upper area above the fan has rivets and a lip from the case top. Neither of the radiators would mount. Fan in the rear would not mount due to the protrusion and would require special custom screws, careful not to puncture the rad. Now you could go with the default CPU cooler and you’d be fine. Or a low profile CPU Air Cooler and be OK. OR a special undocumented mounting solution found later.
Any Air Cooler that is less than 5 1/2 inches out from the Mother Board would work. However, If you put any load on your rig and planning a AIO cooler you have to plan well. DO NOT consider a AIO with the thicker Radiators. This mount with the Fan in Push I had to cut my own length screws but in a normal build you should not have to so later you’ll see the natural solution. The reason I’m sticking to the rear is there is not enough room on the floor of the case either. With even a small profile PSU.
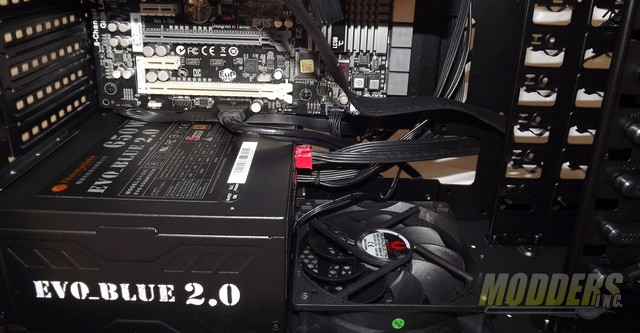
This is a smaller Thermaltake PSU with DIMENSIONs: 5.9”(W) x 3.4”(H) x 6.3”(L); 150mm(W) x 86mm(H) x 160mm(L)
There is no room for a radiator up against it mounting in the standard Fan. Matter of fact you have to limit yourself on PSU’s since there is no adapter or pass thru the rear for extending out the back so 160mm appears to be the max if you want the fan to remain or your not planning to MOD to fit.
With all that said, after wrestling for some time I found a mounting solution for AIO cooler set-up with the Shadow. You’ll notice in the AD presentation they also have the Fan in a pull behind the Radiator set-up.
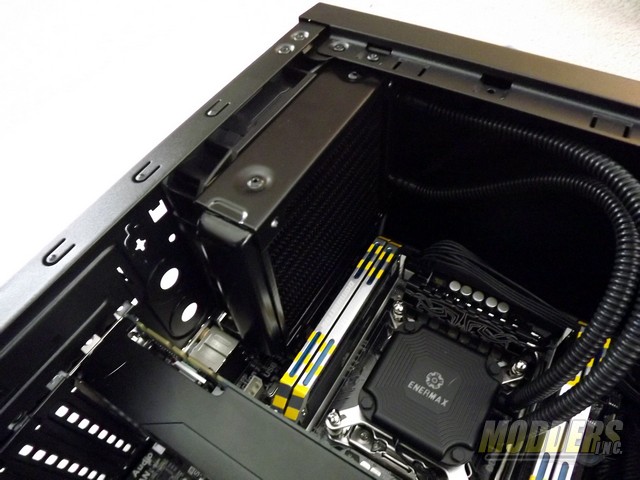
With the fan pulling out the rear it mounts up OK.
This is a 2 1/4″ fan+rad, 1 1/4″ thick radiator. With this style MOBO you do not have room for a push fan but if all memory was mounted elsewhere you probably could.
This Coolers CPU mounts right to the CPU bracket and no rear mounts necessary. Tight but this is after all marketed towards the smaller ATX case buyers and some tightness should be expected. A thicker radiator as some AIO coolers are when combined with a x79 motherboard (DRR3 modules are located on both side of the CPU) and this case you may have issues installing your ram so plan your parts carefully.
The Enermax LIQMAX 120S AIO CPU Cooler kit to be mounted.
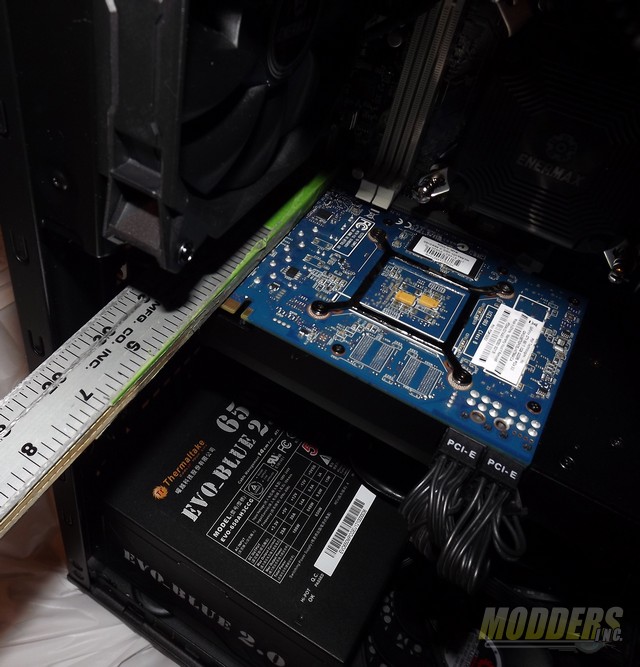
GPU is 9 1/2″ 241mm long PNY XLR8 GTX 660 Ti Signature Series
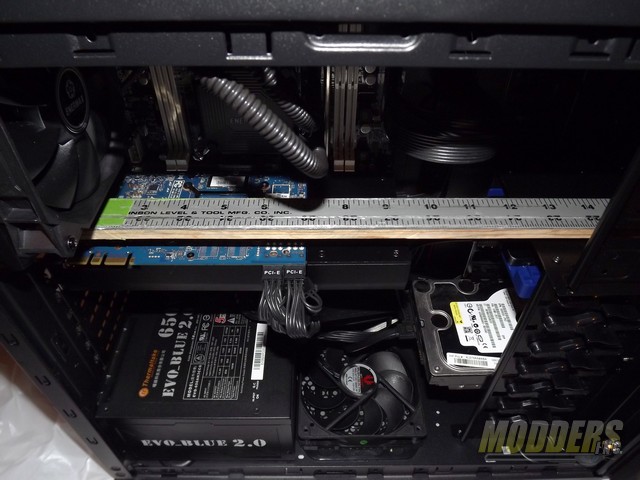
This is a small case so plan your build well. If there is no HDD in the way you can probably use up to a 12″ GPU card otherwise 9 1/2″ with a HDD is tight and HDD connectors close or touching the GPU shroud.

A well written and un-bias review. Thank you Al Shuryan
Hij, thank you for the great review!
I do have one question about the bottom dust filters. The filter underneath the PSU, are you sure that one can also be mounted underneath the case? I am building my new system in this case and it looks like the feet are in the way of the filter. How would I mount the filter underneath the feet?
Greetings, Luneya
Yes I’m sure you can But, remember if your sliding it around on carpet that the mesh in the filter is fragile. I mounted the fan from the bottom then put the filter over that area. The clip holes work top or bottom.