Motherboard ReviewsPC Hardware Reviews
ASUS P7H55D-M Evo LGA1156 Motherboard
« Intro | Page 3 »
A Closer Look |
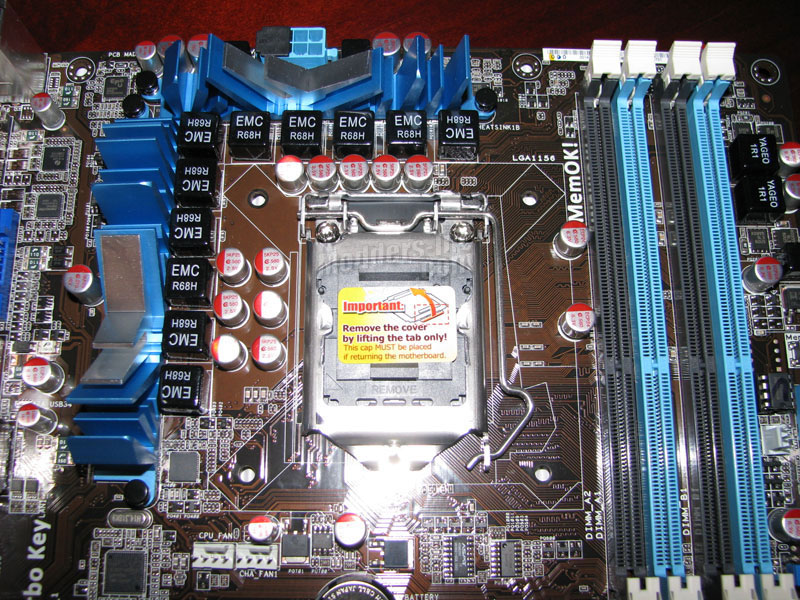
Looking at the CPU socket area of the board we can see the new CPU retainer that is used on all the LGA 1156 motherboards. To the left and top of the CPU socket we have the Solid Capacitors and Chokes, and the Mosfets (under the heatsinks) that make up the Xtreme Phase 8+3 Power Design. This power design provides longer life and higher efficiency. Just below and left of the CPU socket we find the CPU fan header and Chassis 1 fan header.
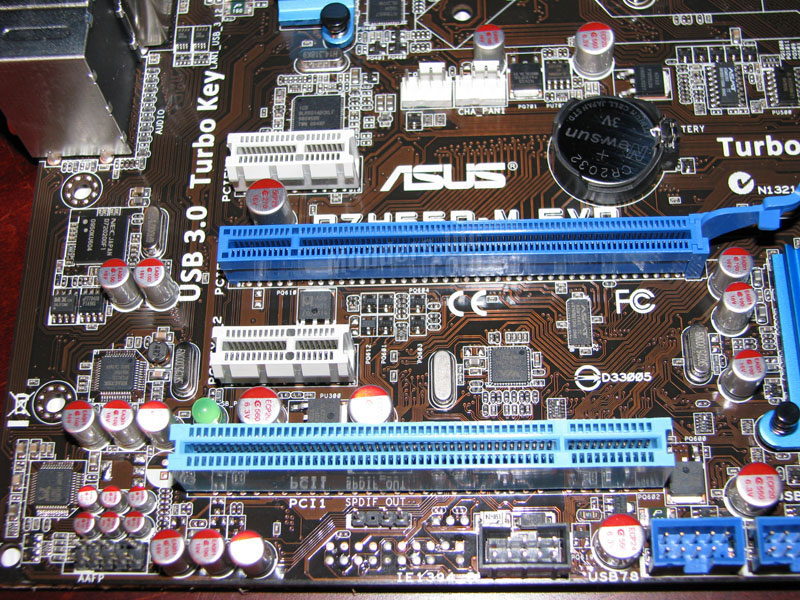
As we can see in the above photo, the P7H55D-M Evo has 2 PCI-E x1 slots, 1 PCI-E x16 slot, and 1 PCI slot, which I feel is plenty for a Micro-ATX board, unless your planning on building a compact gaming machine that utilizes dual graphics cards. The x16 slot will also double as a x1 slot if you plan to pair the board with one of the new Clarkdale processors with the integrated Intel Graphics. Just above and to the left of the PCI slot we have the Standby Power LED. Located down and to the left is the Front Panel Audio header (marked AAFP). In the center directly below the PCI slot is the SPDIF out header, to the right of that we have the IEEE 1394a header.
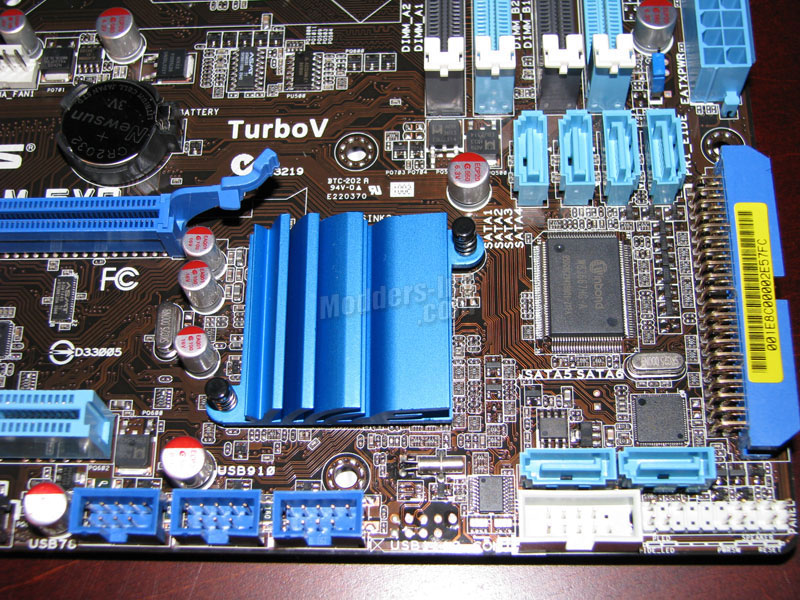
Next we have the USB 7/8, USB 9/10, and USB 11/12 headers offering you another 6 USB ports. To the right of that we the Serial port header followed up by the Front Panel header. To the right of the PCI and PCI-E slots we have the passively cooled Southbridge. Just above the Front Panel header we have 2 SATA 3.0 connectors with 4 more just a little further up. To the right of those we have the IDE connector.
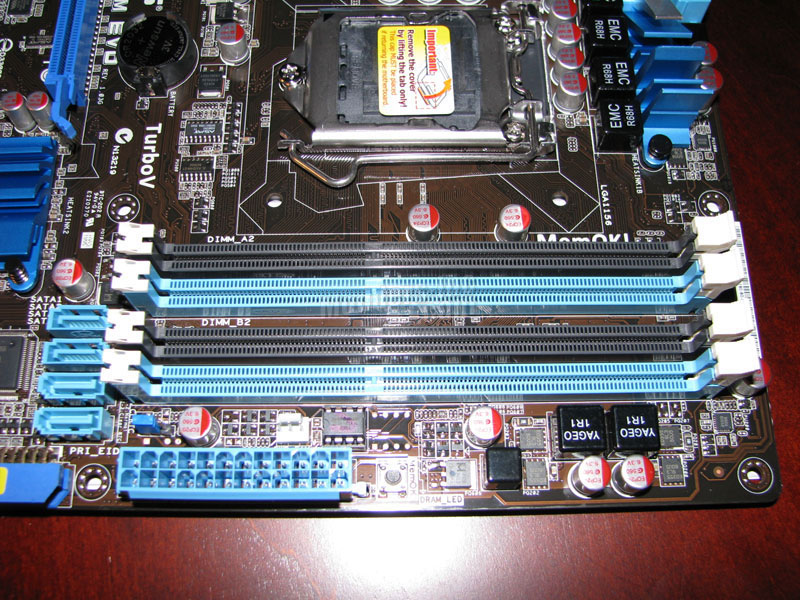
Just above the IDE connector we have the ATX Power connector. Beside that we have the Clear RTC RAM jumper. Followed by a 3-pin Power Fan connector. Just above the ATX Power connector we have the MEM OK switch with the DRAM LED just to the side of it. The MEM OK feature can come in handy for those that like to push the Overclocking a little. Rather than having to power the system down and clear the CMOS after a failed OC. The user can simply push the MEM OK switch to have the system reset the memory to failsafe settings and allow it to boot up quicker. The P7H55D-M Evo supports DDR3 memory that features data transfer rates of 2133(OC) / 1333 / 1066 MHz up to 16GB and also supports Intel Extreme Memory Profiles (XMP).
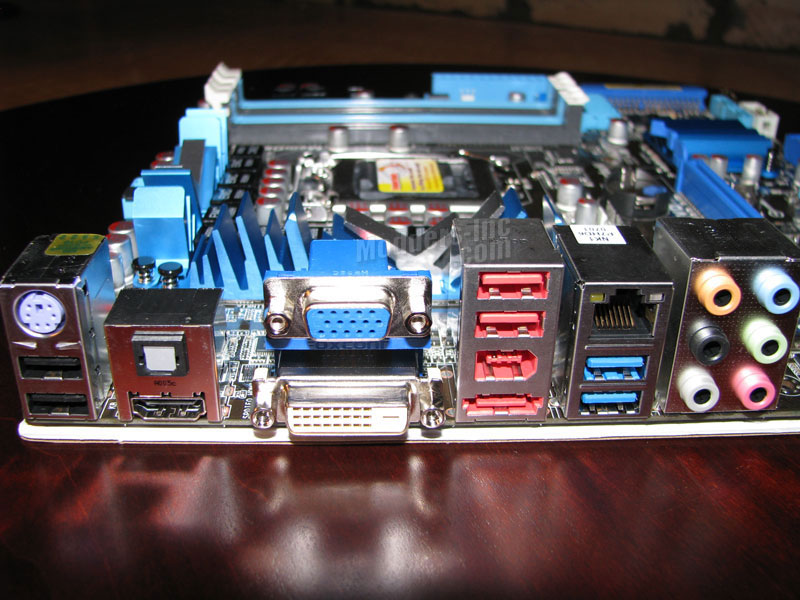
Looking at the rear I/O panel we a PS2 port, 2 USB 2.O ports, Optical SPDIF Out port, HDMI port, VGA port, DVI port, 2 more USB 2.0 ports, IEEE 1394a port, External SATA port, LAN port, 2 USB 3.0 ports, and the Audio ports
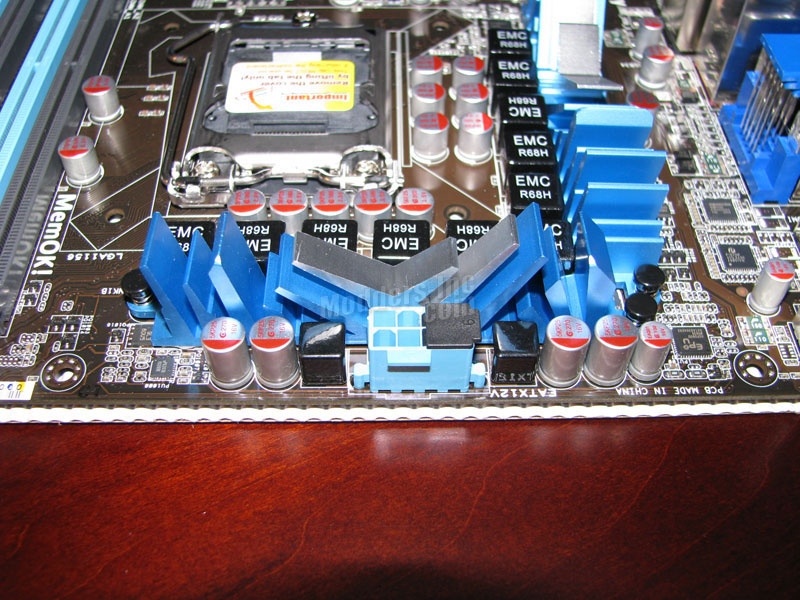
Located just above the CPU area we will find the ATX 4-pin/8-pin Power connector. We also get a better shot of the heatsinks cooling the Mosfets. With the Crystal (think snow flake) shaped heatsink, Asus has not only improved on the visual aspects but they also improved upon the heat-exchange which will allow the chipset and power phase areas to stay cooler.
|
