Making a Better Case Mod
You have been bitten by the modding bug and you have finished your first case mod from either a Plain-Jane or pre-modded case. You added a LED lighted fan, mastered the spray can one color case change, but it is just not what you wanted or you think you can do better. You know you want to take your next case mod that you do to the next level but you are unsure on the correct ways to do this. Well you are in luck as we will be taking a look at a couple key areas and how to achieve the refined look you are striving for.
Creating that master piece is not just done by power tools alone. There are many things to take into consideration such as how much time you really want to dedicate to build. No you are not going to construct a killer mod over the weekend or in an hour like the cars and bike shows. Items like tools and materials you have available to you to use can also determine what you can accomplish, but there is one equalizer: hard work.
Ideas:
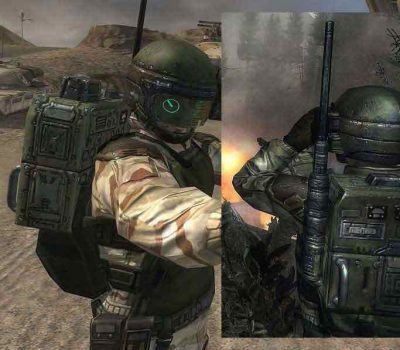
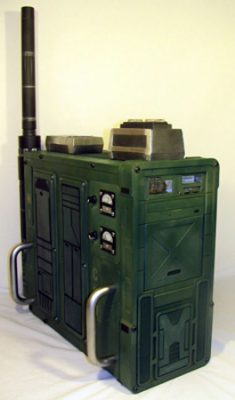
Running a drill press and other tools needed is old hand to you but you lack the most important aspect for a mod, an idea. Man this may be one of the hardest things to do if you do not already have a plan. The easiest type of mod to build up is a theme mod. We all have our own favorite movie, TV show, game, sport team or etc. Find something that you like about that particular theme and go with it. Here is an example. I was asked a few years ago to make a mod that CPU Magazine could giveaway at QuakeCon, talk about pressure. Anyways I did some hard thinking about it and began an idea process…”Lets see QuakeCon, id software, Quake4, Enemy Territories: Quake Wars… That’s it!” At that time they were just coming out with ET:QW and it was going to be previewed at QuakeCon, but what to base the case off of? After tracking down the limited screen shots of the game I found what I was looking for. One the human solders was wearing a radio pack. PERFECT! It was in the basic shape of a computer case so I ran with it.
Sometimes as you are scanning through websites that have case mods you might see one that catches your eye and something that may spark an idea. There is nothing wrong with borrowing an idea from each other, why do you think we post our work logs in forums? To help show how we did something and pass on our knowledge. Now if you blatantly ripped off another modders mod, you will never ever be able to live that one down.
The Case:
Do Not, I repeat, Do Not mod the computer case that houses your current hardware. Think about it, every time you want to work on the case you would have to tear it down and put it back together again and after a few times of doing this you will not want to continue. If it is the case you want to mod then go get yourself a $20 case and install you stuff in there. Or if you are in the market for a case upgrade it’s the right time to mod it before anything goes into it. Look for a case that best fits your idea or need. Want it to look like a box, maybe use a small form factor computer case. Is it going to be a tall building? Grab yourself a full tower. There are so many different styles that you should be able to find something that will fit into the style you want. During this time look at all the options that you may need when building up your mod. Now is the time to figure out if you the case needs to have a door that covers the drive bays, ports on the top, fan locations or a pre-cut window.
TIP: Choose a subject that you are familiar with. It will make the ideas come easier.
Tools:
Working with the right tools makes the job so much easier. Working with the right good tools makes it even better. The last thing you want to do is buy cheap tools because if you do and you can’t use them correctly or have issue with all you are doing is wasting tike and materials. Spending a few extra bucks on a good jigsaw or a set of files is well worth it and you will feel more confident in your work. No you don’t have to buy a $200 jigsaw, well you could, but one for about $50-$60 dollars will do. Look for one that has an option for variable speed control for the blade. This great when cutting Plexiglas as something you need to cut a little slower to not overheat the plexi and have melt back together. Also if the blade moves to fast, for some metals, you get a lot of vibration and end with jagged edges. Something else you might consider is a jigsaw with a scroll option, or known as a Sabre Saw. This allows you to rotate the cutting blade without having to move the whole saw and allows you to get an little detail and freedom with you cuts.
Now if you really want to go big time you need to grab yourself a real scroll saw. Unlike the hand held saws the blades are stationary and you turn the material to get the desired cuts. There are different types but I will talk about the table top version. The table top type is just like it sounds it can be place on a work bench when need and can be stored away when not in use. There is nothing wrong with this model type for case mods and it will do everything you need. Don’t get one that is not to shallow, unless you only plan on cutting smaller pieces. Going all out would be getting your hands on a freestanding scroll saw has its own base and normally has a much deeper area for you to rotate items around the blade.
TIP: You are only as good as your tools you work with.
Power Supplies:
One of the biggest headaches that any modders has is the power supply. It is one of those necessary evils that you must have, but hate when it comes to all the additional wire and cable it adds it the inside of the case. One of the main keys to a clean professional looking case is the lack of a big ball of cluttered wires. You have multiple power wires running to every device you use and most are much longer than they need to be. Yeah you know what I am talking about, I can see it on your face.
So who comes the rescue? Why a case modder of course. Modders were the first to remove any extra wires protruding out of the power supply. But one that was done you could never go back. So once again a modder came up with cutting the wires and using molex connectors to make the first modular power supply. This mod became so popular that the power supply manufactures started to make and sell them in many different configurations.
Finding the right color power supply unit to go exactly with your mods theme can sometimes be a real pain, but hey that’s why we mod right? You can carefully take apart the power supply to paint it like you would any other part of the computer case. If you have to open up the power supply be sure to be very careful around the capacitors as they DO hold a charge for a length of time. It is not going to kill you if you happen to discharge one of the capacitors, but you will have to change your underwear.
A quick and easy way to improve the look of your power supply is to remove all the stickers. If you don’t wan to do them all them at least remove the ones that show. Some of the better manufactures have again learned from us modders and began to place the required stickers on either the top side or on the side closets to the right side panel.
Most power supplies nowadays come with the power cable already sleeved and more time than not they are black. Black is a good neutral color for them to choose but it does not always compliment your mod or go with the design you are trying to pull off. Do not hesitate to change the color of the sleeving. There are many different colored PSU modding kits out there that can be had for a little bit of money. Not only do you get enough sleeve material to do the power supply but you also get enough to cover the other wires in your PC.
TIP: To ease the removal of stickers you can us a heat gun, goop-off or even WD40.
Painting:
This is a must do process if you want to create that super mod. The stock paint on that computer case is just not going to cut it. But before you can get that highly polished mirrored finish you have to start off like any journey, at the beginning. Prep work is what gets you to the final product. How well it is done will reflect in the end. Removing the paint completely is the best possible solution and it can be done a few different ways. One is by hand with a sanding block and sand paper which is fine if you need to build up your arms and have a week or two of nothing to do. Jump to a power sander that holds either a half sheet or quarter sheet of paper. Doing so will cut your work load way down, but if you really want it done and done fast you can get everything sand blasted or also known as media blasted. Sand blasting is done by forcing silicon sand or other media through a hose and sprayer at a high rate. A whole side panel can be done in just a matter of minutes. Where can you find someone that has a sand blaster? Try a local hot rod shop. They have to clean off parts all the time and if you tell what you are trying to do I bet they would help you out. They do to cars what you are trying to do to your PC, trick them out. It may cost you 20 bucks or more but the time it saves is worth it. So while you are there you might as well ask them about paint your case or if they know anybody that does air brushing. It never hurts to find out and if their service are needed you have an in with them. But if you are like most modders you want to paint this master piece yourself.
Automotive paint has demonstrated to be among the highest quality, durable paint finishes available and has a longer life than that of a spray can finish. Automotive paint comes in any color you can think of or make up with matte, gloss, metallic, pearl and color-shifting colors. In order to do this you will need to have the right equipment to do this and they are an air compressor, hoses, sprayer, tape, a rack, clothes, air mask, a place to spray the paint and good weather. You are only as good as the tools you use so try and not skimp out here. If you do not plan on doing nothing more than one color spray jobs then you could run down to the Mega Hardware store and get a general purpose spray gun and a decent size air compressor (2.5 horse power or more) and you will probably spend in the neighbor hood of 175-200 dollars. When you are look for a spray gun try and find on that allows you to adjust the air flow, paint flow and the spray pattern. For doing PC cases you really only need a smaller gun that hold 4oz or so and a gravity fed gun is the best choice. Theses tend to not splatter when you get towards the end of using the paint up.
Airbrushing can take your mod to the next level and is quite an art in itself. This is not something that you just jump into. Like anything else you want to do well you need good equipment and time to practice. A good duel action brush is the one you want to go for. This allows you to control the amount of paint flows out with the touch of a finger. With airbrushes you definitely get what you pay for so look towards a good and you can’t go wrong with Paasche or an Iwata. Iwata has a decent small starter kit, R 4600, that does not require you to own a compressor. It uses a small compressed air can, like the one you use to blow out the inside of you computer and can be had for about $150.
When using an air brush stencils are you best friend. Using some pre-made stencils will give you the basic shapes and designs needed. Everything from skulls, flames, letter and so forth can be found, but if you need something special you just might have to make it yourself. Cruise on down to a craft store near you and you will be able to find a few different items to make them out of. The one I use is semi-transparent, which is a benefit as you can print a design you made or found onto some paper, place it under the sheet, tape it and cut out the desired stencil.
When using a free form stencil (one that has many different curves to it) remember that the edges is your most important part. You spray across the edge and let most of the paint hit it to give you a sharp clean line on the painted surface. Move a bit over the top of the edge of the stencil to give the softer/feathered painted edge.
Once you get the hang of using the airbrush you will be able to free hand quite a bit and this is where you can get really creative in you designs. An endless number of possibilities can be thought of and created. You can also use the brush for highlighting small parts and areas. Let’s say you wan to make something that looks old and rusted with the brush you can make shadows and rust streaks with a stroke of a hand.
Tape:
Automotive tape:
This is the tape of choice. It is made to stay in place and it will adjust to the contour of the surface you are working on. The skinny 1/8 inch tape, that looks like pin striping, is the idea tape to use to create your flame designs or other free flowing graphics. By using one finger and applying down pressure to the tape while holding the leading length of tape taut you can twist and turn it to create your design. Once you have your design laid out you will need to go back and cover the areas that you do not want painted with a wider tape thus your are making a mask.
Blue painters tape:
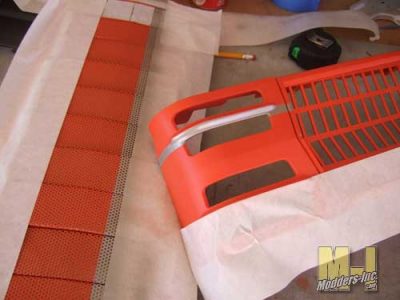
You may or may not have seen this at the local mega hardware store in the paint section. This tape has become more popular to use do its great coverage and easy release tacky glue. To me painters tape had become indispensable to modding. It can be used to mask off parts being prepared to be painted and also used to protect any surface that may get scratches while you are test fitting parts or during the reassembly of the case mod. Painters tape does cost more than you normal masking taking but it can save a lot of unnecessary grief when removing it after applying your paint.
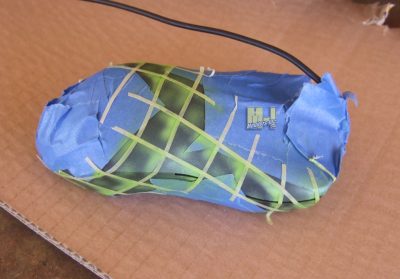
Another usage I have found another use for this tape which is making your own stencils. By laying down a few strips to get the width you want you can draw a graphic onto the tape and with a sharp razor knife and slight pressure you can cut out you design and remove the tape to expose the portions that you want painted.
Transfer tape:
This style of tape is normally used to apply vinyl die cut stickers to different surfaces. The reason this is also another great tape to use is that the glue used on this tape is just tacky enough to hold on to the vinyl when you are removing it from the slick wax paper type backing. A wide variety of sizes can be found and used to help cover and protect work you have already finished. With the tape having a less tacky grip it makes it idea to be used on the surface of dry paint as it will not damage the work you have already completed. There is not anything worse than having your finely laid down graphic being chipped apart when you pull up some tape.
TIP: Never use the tan masking tape to mask off your part for painting. The glue used on thins tape is too tacky and can leave a film behind and if you forget to remove it for a few days it can be stuck to the item pretty well and then you are back to square one.
Powder Coating:
Powder Coating is a quite hard, yet somewhat flexible chip resistant paint that is ideal for a case mod that might be moved often or taken to a lot of LAN’s. At first the colors were very limited but now you can get just about any color or finish. Powder coating is a procedure of applying dry paint to a part. In normal wet painting the solids are in suspension in a liquid carrier, which must evaporate before the solid paint coating is produced. In powder coating, the powdered paint may be applied by either of two techniques. The item can be lowered into a fluidized pool of the powder, which may or may not be electro statically charged, or the powdered paint is electro statically charged and sprayed onto the part – this is the common way most local shops do it. The part is then placed in an oven to bake which cause the powder particles to melt and band together to form a continuous film. For the best results you should really take the parts to a professional but if you are the ultimate DIY modder you can purchase a Powder Coat System from Craftsman, but you are limited to the colors they offer.
TIP: One thing to remember and that is there is a build up of the paint and that you may need to sand down areas to allow pieces to go back together. You can help eliminate having to do this by masking off edges or areas that may have a very close tolerance.
LCD Screens:
LCD, Graphical , VFD,
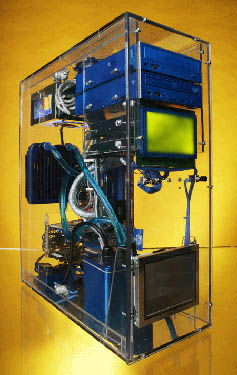
So you’ve seen those shows where they install a few dozen LCD’s into someones ride and watch them freak out. Well you can do the same thing with your PC and it pretty simple. The smaller LCD’s that go into your car run off of DC (Direct Current) voltage which just so happens to be the same voltage your PC runs off of. The tiny LCD’s are the perfect size to install into any available space on your PC.
Yeah they are a bit expensive, but if you willing take your case mods to the next level there is a price to pay. So how easy is to install? If you get the correct one and have all the right accessories you can have it working with 15 minutes or less. The hardest part is having a way to connect it to the graphics card but if you are lucky your video card might have come with an S-Video connector to RCA. Next an RCA connection cable is needed. One that is a couple of feet long will give you enough length to route and hide the cable. If you not have either of these, don’t worry as they can be purchased for a few dollars but it will put your project on hold until the parts come in.
Some of the screens already come with the connectors and length of wires attached. Theses are the one you are looking for as it make things so much easier to work with.
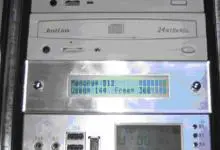
So you are thinking to yourself “Do I really want or need a LCD screen in my PC” for the over the top effect, yes, but you can also go another route and that is with a Serial LCD Modules and USB LCD Modules from companies like Crystalfontz or Matrix Orbital. These are not TV screens but LCD modules that display a single color over another background color. Both of theses companies offer complete kits that will allow you to basically install the hardware into a drive bay, plug in the cables and install the necessary drivers and software. The next step up from the “dot marix” LCD is the graphical LCD. These types of LCD are like the ones you commonly see in the top end in-dash car audio players.
You won’t be able to watch TV, your desktop or other graphical content but you will be able to show information from the likes of winamp, email, zoom player, RSS feeds and more. The software that drives theses LCD used what are called plug-ins. Theses plug-ins are made by the software creator or by members of their respective communities. This means that there is just about an endless supply of plug-ins to add new features to your LCD.
TIP: Look for an LCD with a large viewing angle as you won’t be sitting directly in front of it.
Vinyl:
Sometimes you need to obtain an effect of certain surface but there is not possible way that you can either make it or have it created. This is where printed vinyl comes in to play. Lets say you want your power supply to look it has been made of carbon fiber. A quick internet search and you can find many place that sell what you need and at a decent price.
Take anything on the power supply off that may get in the way when you start to apply the vinyl, such as decals, fan guards and screws. When you are going to do something like this it is always a smart idea to first create a template. Take a large piece of construction paper or tape together a few pieces of notebook paper to get the size you may need. Place the power supply with either of the larger sides down. Trace the outline with a pencil. Next take the power supply and tilt so the end without the cables is flat on the paper, trace around it and return it to the original position. Rotate the entire power supply until the non cable side is 180 degrees from you and repeat what you just did. Roll the PSU on its side trace it now roll the PSU once again, now the opposite side that you started with is now facing upwards. Trace it and you are almost done the only side you have not done is the where the cable are located. You should now have an outline of the PSU. I like to add about a 1/16 to 1/8 of an inch to the outside edges so that I will have a little extra for over lap. Allowing the edges to over lap you can go back and do a double cut. This is trick from doing wall paper and it is were you cut through both layers, remove the excess material and lay the two edges back together for a perfect fit.
Applying a large vinyl section can be a little tricky but with a tick of the trade you can get a perfect install. Make sure that the surface that you are going to put the vinyl on is clean and free of any derbies. Next take a small amount of water with just a drop or two of dish soap in it and spray it on to the surface. What this does is allow you move the sheet around without having it stick to the surface right away. Once you get the vinyl in the correct position you take a plastic squeegee and start pushing the water out from underneath the vinyl towards the edges. Continue to do this until all the bubbles are gone. Now don’t be worried there are a few little bumps are left behind that you can not get out. These will disappear over time as the water evaporates and can be rubbed over to make them disappear. But it you find that you have one or two that just want go away you can do this; take a needle or the point of a razor and pop a tiny hole in to it. This will release any air that was left behind and you can now smooth out the bump.
Lighting:
When you are watching a movie you know that the lighting creates the tone and mood of the scene. If the light is not done correctly or consistent it can change the feel of the whole movie and make in unmemorable to watch. This same principle applies to the effects you are trying to create for your mod. Let us think about it. If you are creating a mod that has flames or a fire theme to it then you would of course use some red, amber, or yellow lighting. Blue or a green color would not give you the correct experience.
You see back in the day when modding was just starting to get into the mainstream of PC users there was a very simple yet effective way to light up the inside of your computer case, it was by using a device called a CCFL (cold cathode fluorescent lamp). Despite the name a cold cathodes fluorescent lamp does not remain cold as they function; they can get quite hot and add unwanted heat to the inside of a case. Cold cathode devices also use a high-voltage/low ampere power supply that emits heat and at times puts off a very high frequency noise plus the added box has to be hidden somehow. So along comes the LED (light-emitting diode). LED’s are nothing new, but it is the way to go when modding your PC. What is making LED the new way to light your modded PC is that you use less power to run them and they create a lot less heat. You can make your own lighting effect by using different colors and the customization possibilities are just about endless.
TIP: Don’t over do on the lighting of your case unless that is the needed effect such as radioactive container that has a nice green glowing haze around it.
Wire management:
The one thing that I am really meticulous about is wire management. Nothing gets to me more than seeing a great looking modded case on the outside and then seeing a rats nest of wire on the inside. I mean why waste all your time and effort trying to create the perfect mod and then stop because you do not think that anyone will see the inside. You do not have to be anal retentive like I am about it but just take a few steps during the build and you will have a complete successful modded case.
Look at how the wire is currently done in the case and note anything that may need to stay that way or that could be done better. Only use what is need. Do you really need that firewire cable hooked up? No, see ya!
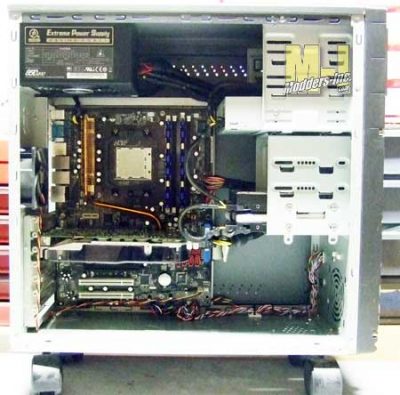
Grouping of wires that go in the same direction is a perfect way of removing the clutter of wires. All those wires like the power, reset, USB and indicator LED’s that come from the front of the case pretty much all go the same place on the motherboard; the lower right front. By using some small plastic tie wraps you can group them up and tuck them out of the way. Taking it to the next level you would capture all them wires into one sleeve cover making it appear as just one cable. While you are at it make sure and use some colored tie wraps that match with the sleeve color. Sure you could use the white one you have but do they really look good against the black?
Buy the correct cable lengths when you can. So far I have not figured this one out. Why do they give you SATA cables that are a foot and a half long when you only need to go maybe 8 inches. OK so you have a SATA DVD and you may need one that long but the in most case the hard drives are typically on the lower side of the rack. So get the right size it only a few bucks more and it does make a difference in the appearance.
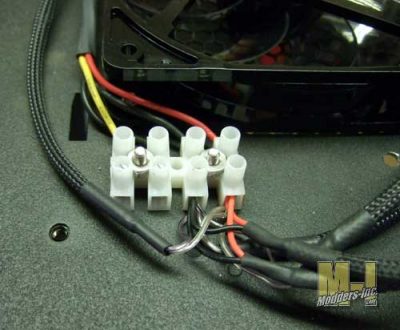
When you add that effects lighting, LED fans and other items they then mostly come with a molex connector attached to them. That’s nice for one or two devices but when they star adding up you should really make a power bar. At the nearby Radio Shack or electronics store you need to pick a few things one is a Dual-row Barrier Strip and Jumper Strip. The Barrier strip allows you terminate one or more wire together with actually bonding them to as one. The Jumper Strip can turn a couple of terminals in to a single connection point. This allows you the flexibility to connect multiple devices up to single power source.
Power supplies are the biggest headache for the modders with all those cables and connectors. Where do you hide the one that you don’t need. You could go to the extreme and remove any unwanted wires, but that means you just gave up the ability to expand later on. That’s why modders made the first modular power supplies.
Don’t be afraid to cut wires, sometimes you just have to do it. Why have a wire that is 12 inches long when it only needs to 4 inches or vise versa. If you are worried about how to reconnect them don’t be. A quick and easy way is by using solder less terminals and a whole kit, including the crimper, can be had for less than 20 dollars. The down side to this is that you have a colored plastic coated piece that stands out; wire sleeving to the rescue. Slip it over and all it forgotten about. Now a second way to do this is to solder the wires back together and use heat shrink to cover the bare wire. Both of these methods do not require you to remove the ends off the wire; such as a molex connector. If you need to it can be done with a special tool that will unseat them, but you will have to cut off the pins and install news ones which can be found at your favorite electronic store.
You can check out this older, but informative article on cable management
TIP: When ever possible us a modular power supply as this gives you the maximum choice on how many wires you really need to use need.
Keyboard and mouse, going all the way.
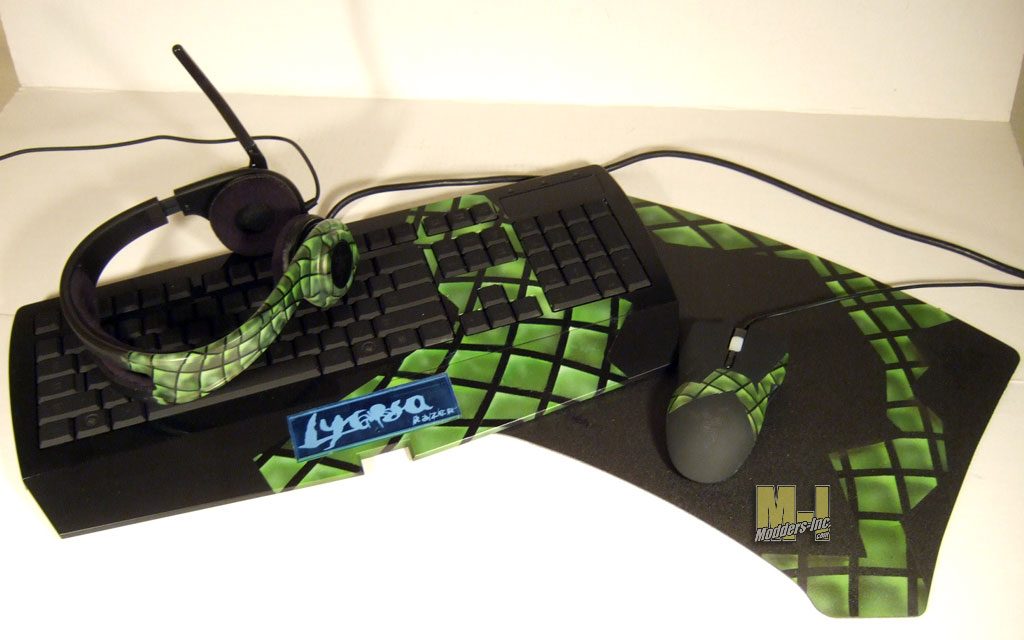
The mod is looking as sweet as every, but the keyboard and mouse are still bone stock and this just wont do. You have to complete the whole effect by continuing the theme to these peripherals. Even though theses are mostly made from plastic and can be a pain to paint, you can still get a good result with the automotive paint. The trick is all in the prep work. Once you get the mouse and keyboard torn apart you need to give the plastic a good sanding with some sandpaper. I like to rough it up a bit at the beginning with some 220 grit. Just a light sanding as the 220 with put some unwanted grooves into the surface if used to hard. Next start working your way down through the finer grits of sandpaper like 400, 600, 800. This will give the plastic its smooth surface back but it has opened the material up to accept the primer and it will bond better with it. After going through the proper steps of sanding the primer and applying the paint make sure that you lay down a clear protective coat. Without doing this your paint job will be exposed to a lot of wear and tear and will not last very long.
TIP: When painting make sure that you apply a few clear coats on the mouse to help reduce any chance of the paint wearing off quickly.
And finally this will be the most important tip that I can give you and if you follow it you will end with a successful build. Patience…Do not rush yourself because if you do you are more likely to error and will get discourage and may give up. There you have it some of my tips (What do you think I am going to give up all my little secrets? Maybe in some more articles) on helping you create an unforgettable modded PC.
