Keyboard Mods
Tired of your old bland looking beige keyboard? If you answered yes, and don't have the money to rush out and buy a keyboard that matches your mod color scheme, then our latest guide is right up your alley. Showing everything from custom painting to LED lighting and custom badge making, this guide covers just about every aspect of keyboard modding.
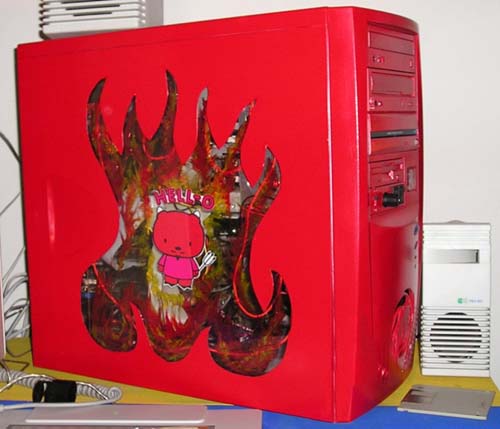
You know it, I know it, everyone who owns a computer knows it. Keyboards are the most abused, overlooked and dis-liked computer peripheral. They are so basic. They come in colors, ergonomic, extra keys -yet still most are hidden in trays under the desktop. Just recently I completed some mods to a computer case. Magically transforming it from a basic beige box into a butt kickin' classic, the infamous "Hell-O Kitty Case". It looked so good compared to the old one. Then I placed it on the computer table, in it's new home, where all could see it and admire it. Suddenly I was at a loss for words. This cool case became lost in a jungle of beige… beige monitor, beige speakers, beige cables, and last but not least a beige keyboard. I discovered that there was not a whole lot of info, or how-to's available on keyboard mods online. Finally, I came across a forum post where I found a site that modded mice and painted keyboards. I read all I could, and plotted my next course of action.
Hell-O Kitty case = Evil modded goodness
Figuring that I had one chance to do this right (because I didn't have a spare keyboard at the time) I borrowed one from a lesser used system. I began disassembling it, making sure to get good pictures for when I put the keys back on the board since not all boards are the same. (A nightmare of not knowing where the keys went). I looked over the plain plastic case and cleaned it first. I noticed the design, and imagined how it would look: dimly backlit with LEDs. Next I looked at the keys and decided to move the status lights to their respective keys. I painted it to match the system it was hooked to and the keys too as well as adding new lettering. This is a group of mods that I am breaking down to a couple of mods per page.
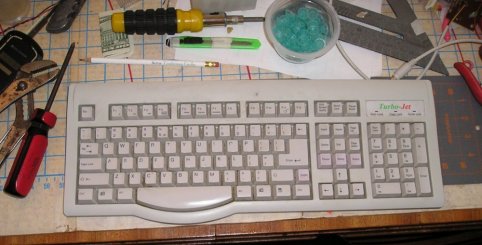
The keyboard in question before
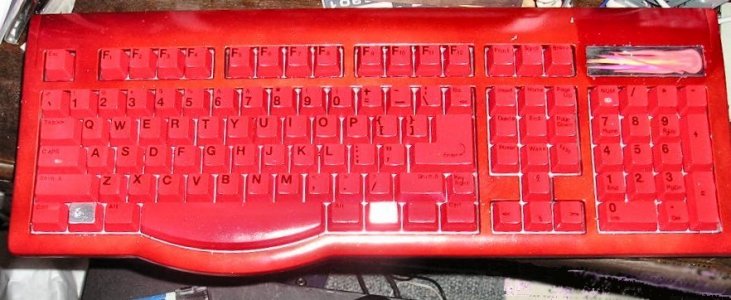
The finished product
The usual old run of the system Keyboard. It is starting to look a little worn. You can see the letters are beginning to wear off, as well as those green lights we all love so much. This is the standard PS2 model that comes with most computers. I could just buy one, or even spring for a cool one. But where is the fun in that? Besides I wanted a one-of-a-kind keyboard clearly showing the blood, sweat and love poured into it. Anyone can buy a piece of mod life but only the bona fide modder creates it for fun!
Next I photographed as well as wrote down and memorized the keys. Carefully inspecting it, searching for a way to get it apart without destroying it. Notes were needed so I could remember the key order and location. I have had many boards and have discovered that no two are alike. Also find a clear space, that will not be disturbed, to work in. It is also helpful as well to get a container to put all the parts (especially the small ones) in, and the tools needed.
| List of Tools / Parts | ||
|
Screwdrivers – Phillips#1,#2 Soldiering iron & such Wire cutter/ strippers Heatgun or lighter Glue gun Hacksaw Razor knife Drill and bits Plastic wrap |
Thermal laminate Bright white paper Rub-on Letters Glue for plastic 1/4" plexi-glass Shrink tube, wire & LEDs Masking tape Paint & clearcoat to your liking |
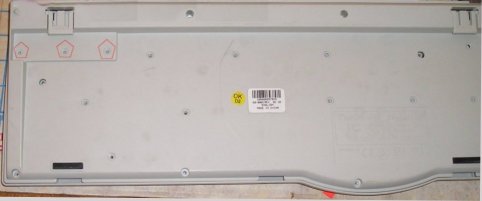
Here was a little thing that needed special attention, three small screws hold the plastic tap mat in the keyboard to the PCboard. The Pentagons are marks thou out the photos that highlight things I noticed just in time or got stuck on. For all the screws in this thing you would have thought that it was holding the CPU!
Red pentagons show screw location
Important to remember the key layout
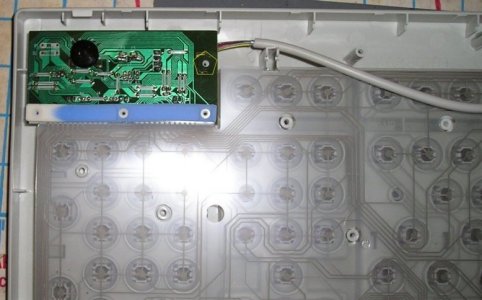
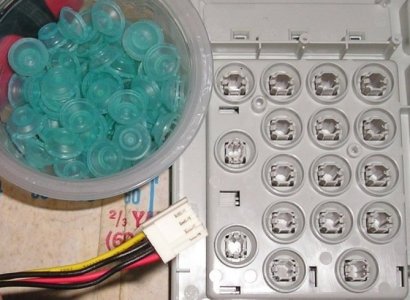
After all the screws are removed get a container! See in the photo, the plastic contact sheet. Under the sheet are a bunch of rubber cups, one for every key, and all free now that you have removed the bottom. The photo below it has a shot of the rubber cups, I am holding a floppy drive power cable for size comparison.
LED PCB and the plastic contact sheet
Rubber cups in the parts container
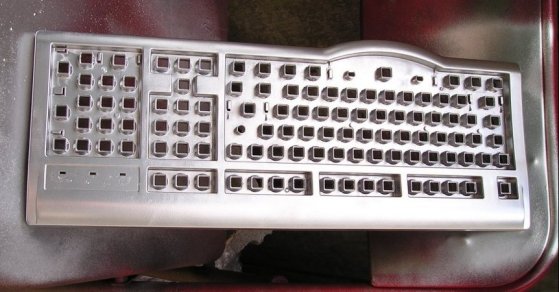
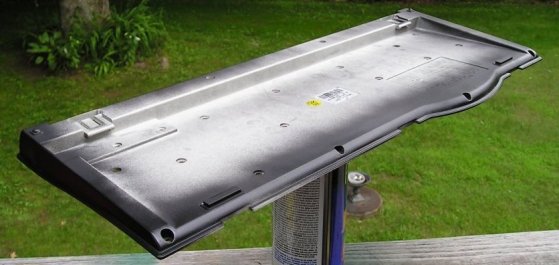
One last screw in the PCboard, and then everything is removable. Careful with the keyboard PCB as with the rest of a PC: a static charge from you will kill the rest of its usefulness. I then popped out all the keys and put them in storage until I was ready to work with them again. Brush out the top and bottom, then to the sink for cleaning. A little time in the sun to dry and it was ready to mask as needed. I needed to paint an under color; I chose silver. Then I masked off the key area, so it will stay silver and I can get the next color on. The bottom, don't forget the bottom, mine only shows on the side, but with the right paint will look like it isn't even there. To paint this it is prepped as with any project.
The inside of the base painted a shiny silver
Top masked off and painted red, yummy waffles
The bottom is prepped and the edges painted black
